Off-Hours
Carpentry
Software is just building at scale. The workshop is where it stays physical.
Current Builds
On the bench right now.
Completed
Shipped and in use.
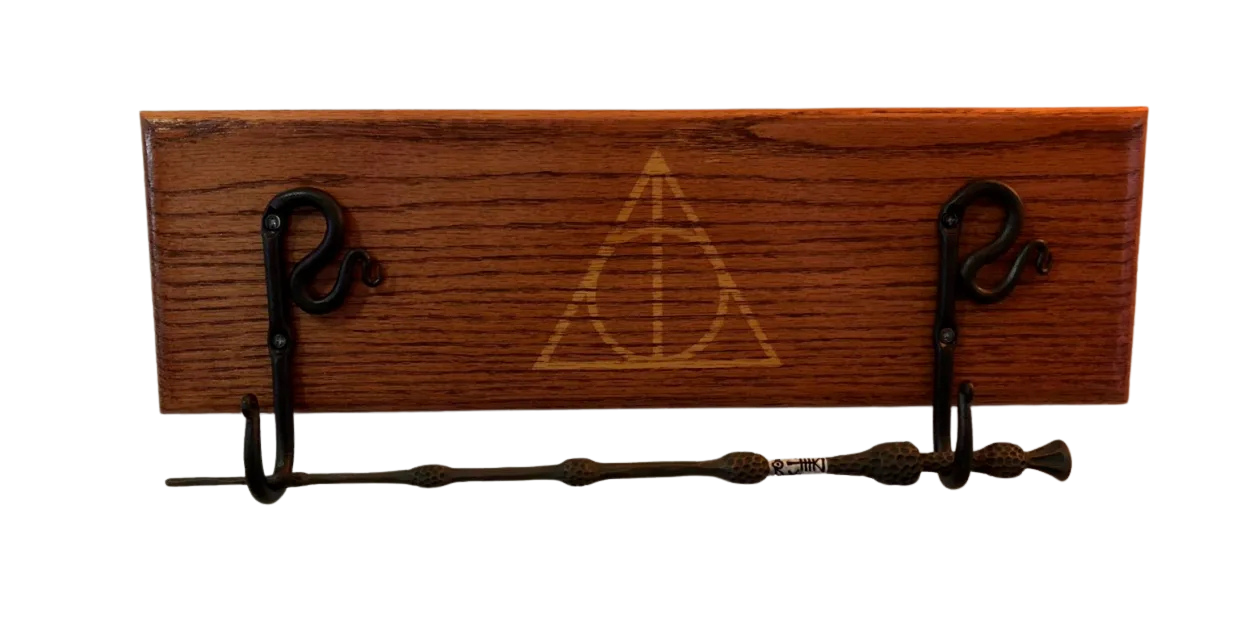
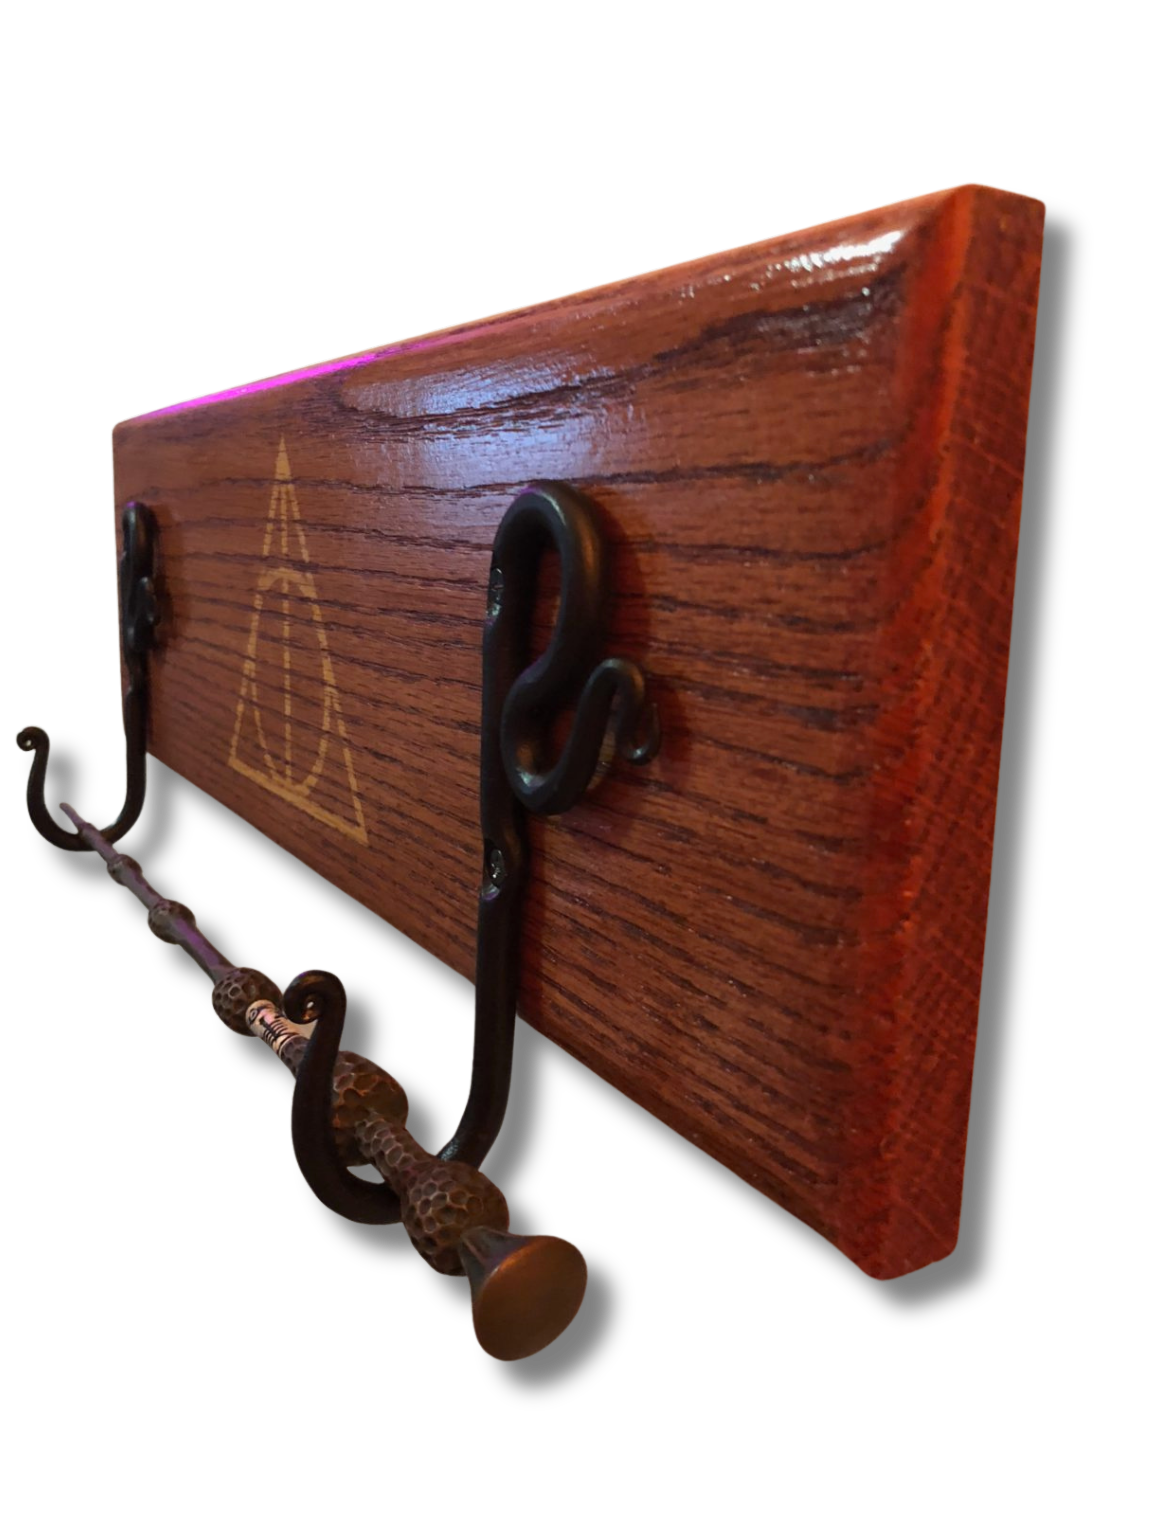
Several years ago, I traveled to Universal Studios in Orlando to check out the ‘new’ (at the time) Harry Potter stuff. It was fantastic! Among the things I brought back was one of the Deathly Hallows — the Elder Wand. For years, I’ve been wanting to come up with a way to display it. I finally set out to make something myself and at the same time, learn some new woodworking techniques.
Here It Is
How I Got There…
Step 1
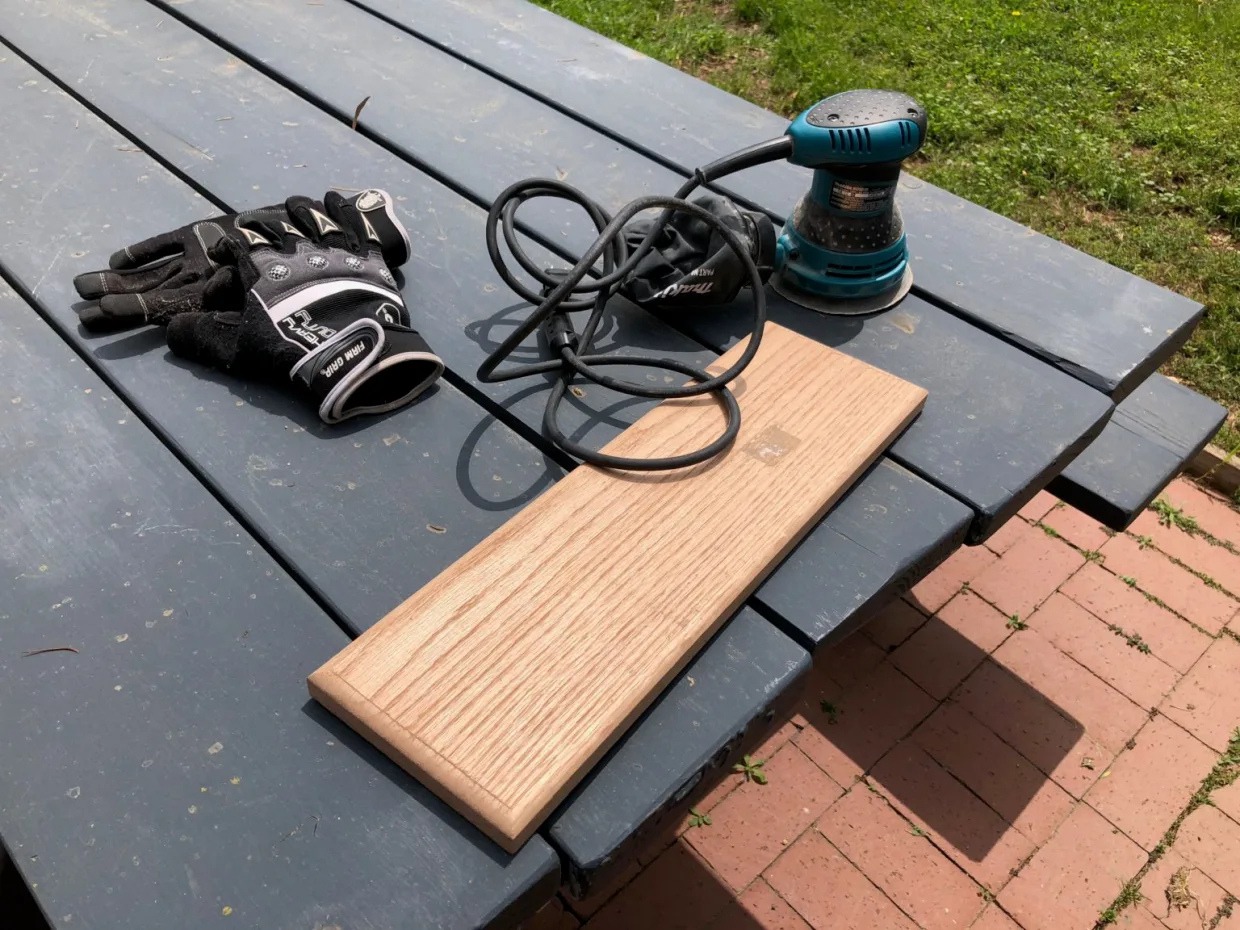
I started with an Oak board (from the local hardware store) at 6″ width (really 5.5″) and cut a piece that was slightly longer than the wand itself — 18″. I wanted to make sure the wand didn’t stick out beyond the edges of the plaque.
Step 2
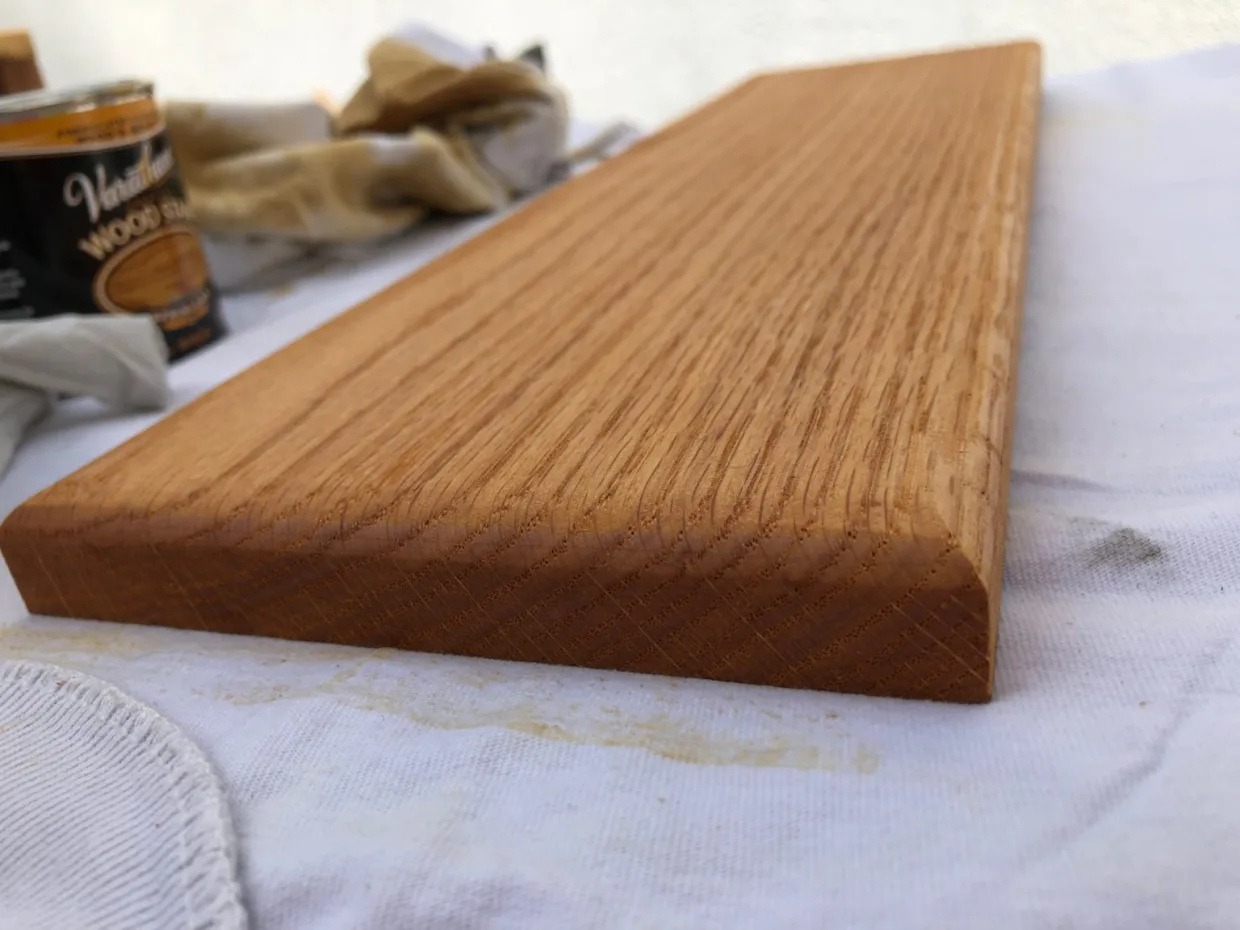
Once I had the wood cut to the length I wanted, I ran it through my router on all four edges of the front face. I really wanted to give it that professional ‘rounded edge’ furniture look, but if you don’t have a router, I think it will still come out looking quite nice. My router is mounted on a router bench, which makes it pretty quick and easy to route a small board like this.
Step 3
You’ll notice a bit of a lip or edge all along the front face from the router. I used my orbital sander to quickly get rid of this lip and ensure the front is smooth. I also wanted to make sure all the residue from the SKU/Price sticker was completely gone.
Step 4
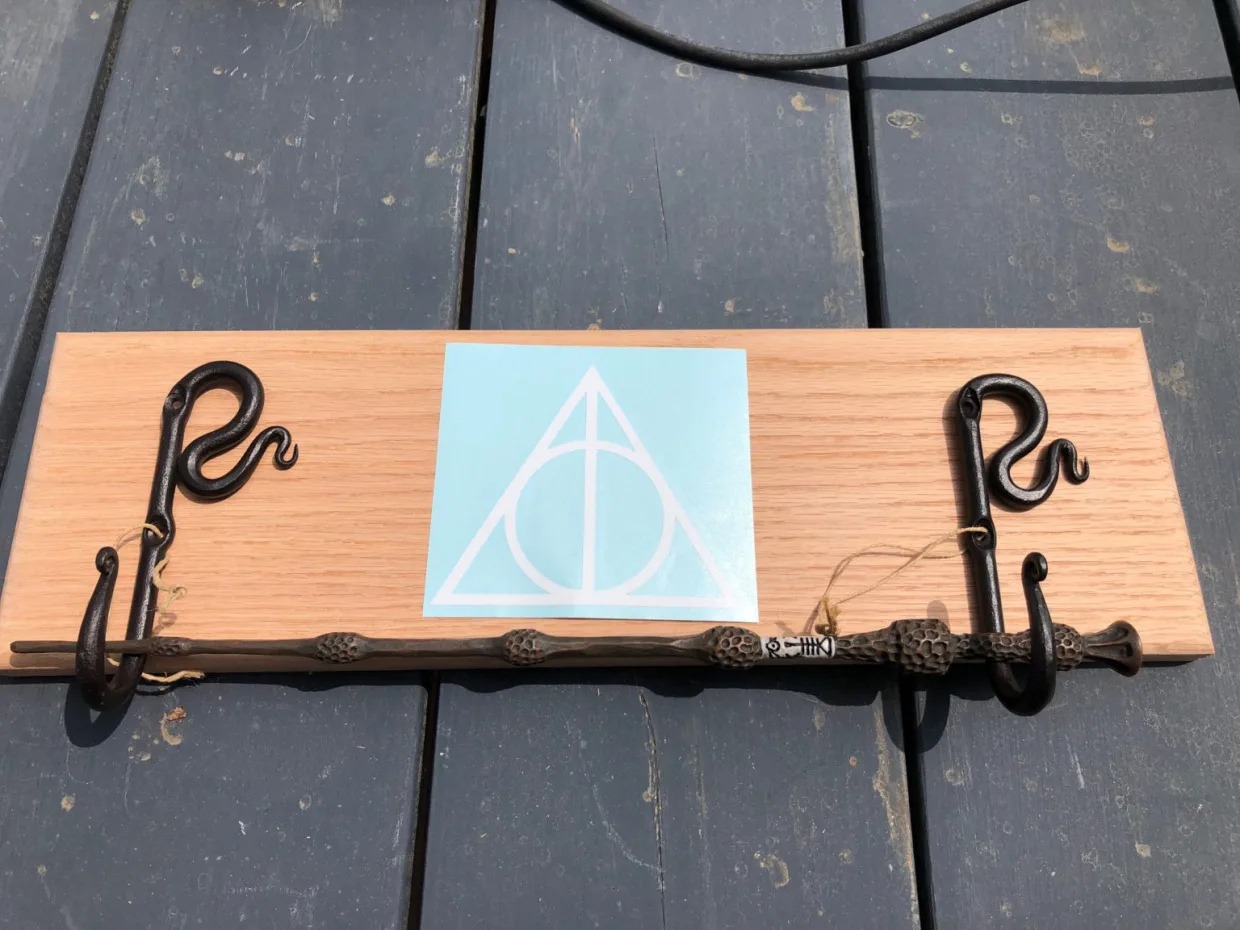
Before going any further, I laid everything out to see how it would fit. I am a fan of the measure twice, measure again, and then cut crowd — I tend to check and recheck multiple times at each step. Here’s what it looked like:
Step 5
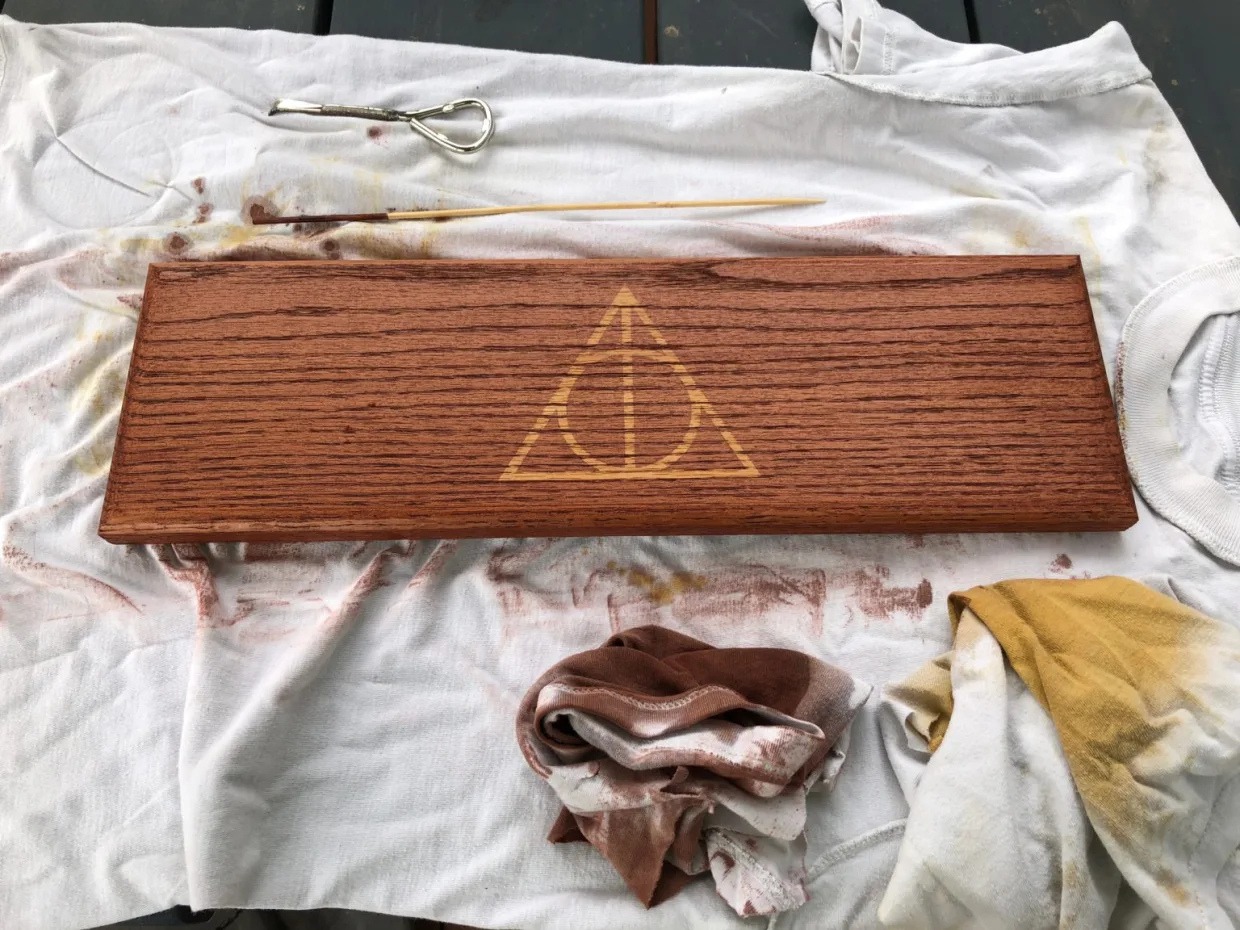
Now it was finally time to apply the spring oak stain. Since I wanted the logo to be lighter on the wood, I stained the entire board with two coats of this stain. I allowed a couple hours for the stain to dry between steps. Be sure that when you work with stain, you are in a well ventilated area and that you protect your skin and respiratory system.
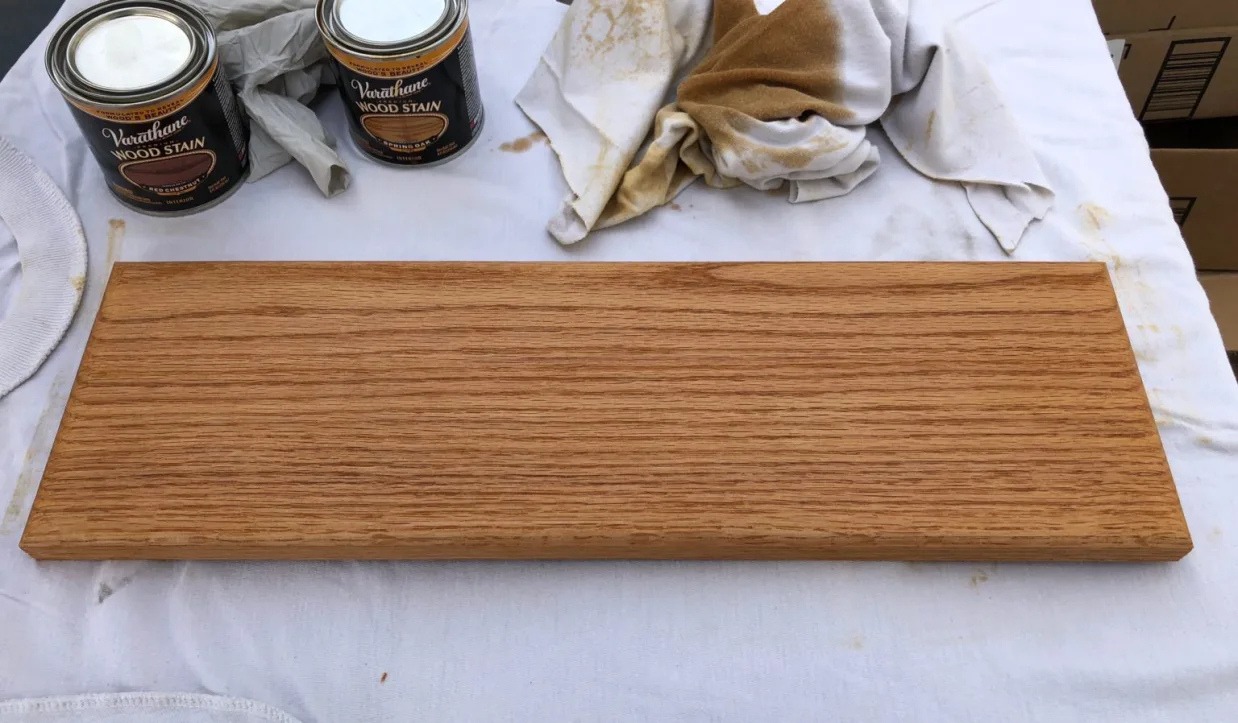
I used old undershirts to keep the work area protected and also as the rags for applying the stain. I have a bag of old t-shirts that I keep in the garage so that I can get double use out of them rather than just throwing them out once they look ratty or start to wear thin — it’s one small way to reduce extra waste. You can also buy a bag of “rags” which are essentially the same thing.
This was a good stopping point for the day to ensure the stain would be completely dry before going on to the next steps.
Step 6
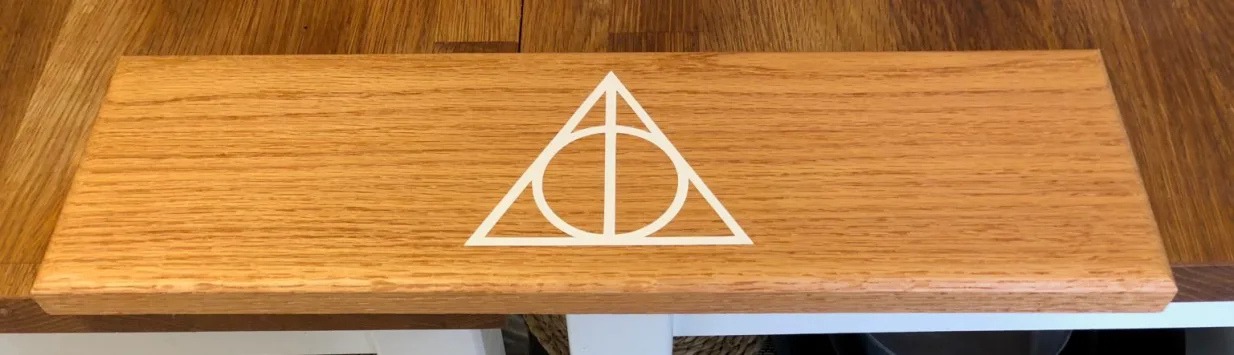
Now that the second coat of stain was completely dry, I brought it inside to apply the decal. My idea was that if I could firmly attach the decal to the wood, it would prevent the darker stain from being applied to that area of the wood. I measured multiple times to find the exact center and middle of the board to position the decal. I applied firm pressure and traced over the entire decal backing multiple times. Then after removing the backing, I traced over the decal once more with my fingers to ensure it was applied tightly.
In positioning it vertically, you may also want to inspect the wood grain so that the grain flows in a way that you like. I chose to orient it so that the grain was closer along the bottom than the top, to give it a sense of weight at the bottom.
Step 7
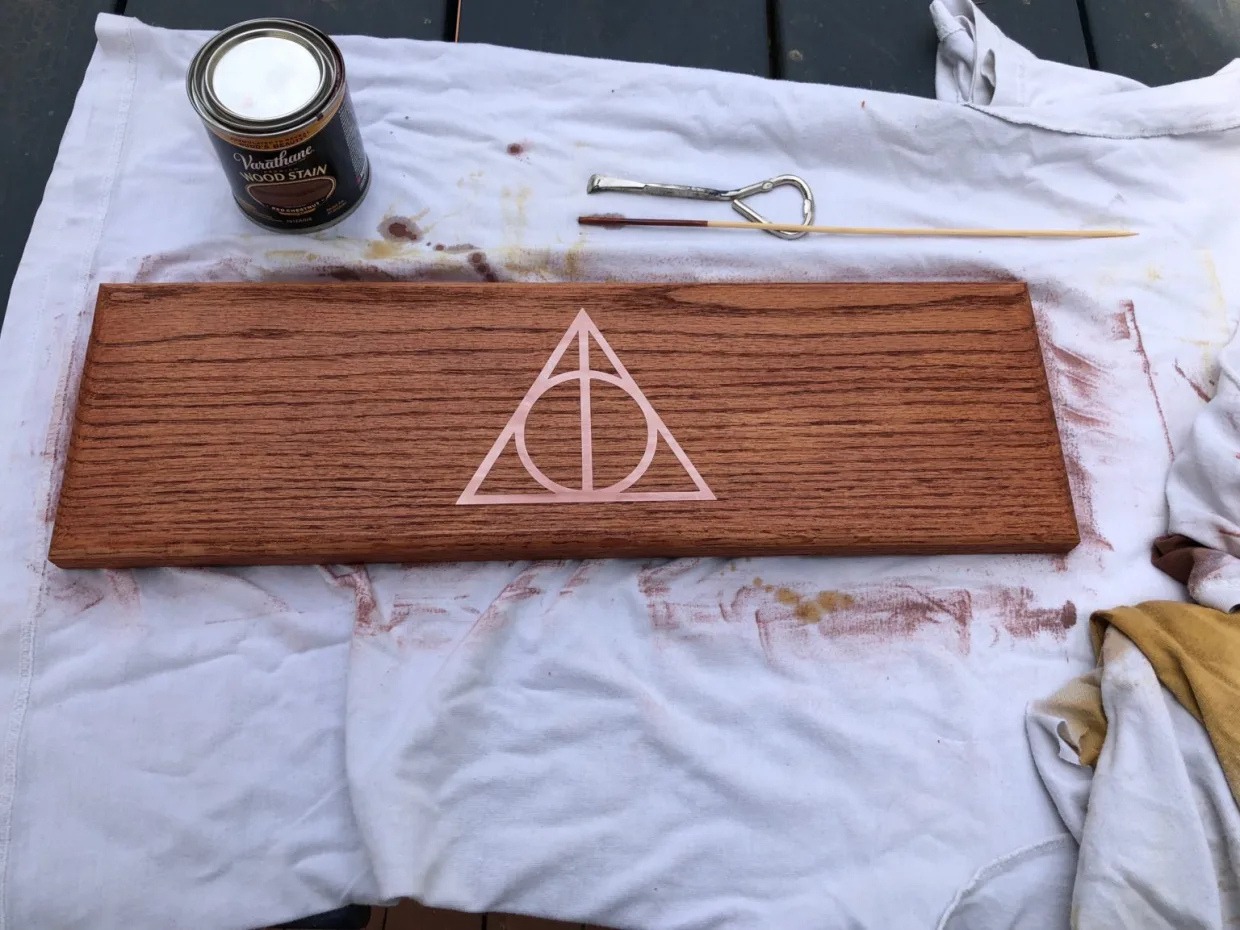
Now it was finally time to apply two coats of the darker stain to the wood. I applied two coats, once again leaving a couple of hours for it to fully dry.
Step 8
Now that the top stain was completely dry, it was time for the moment of truth. I carefully removed the decal, hoping it had clung tightly enough to prevent the darker stain from spreading underneath.
When I removed the decal, I could not have been happier with the result.

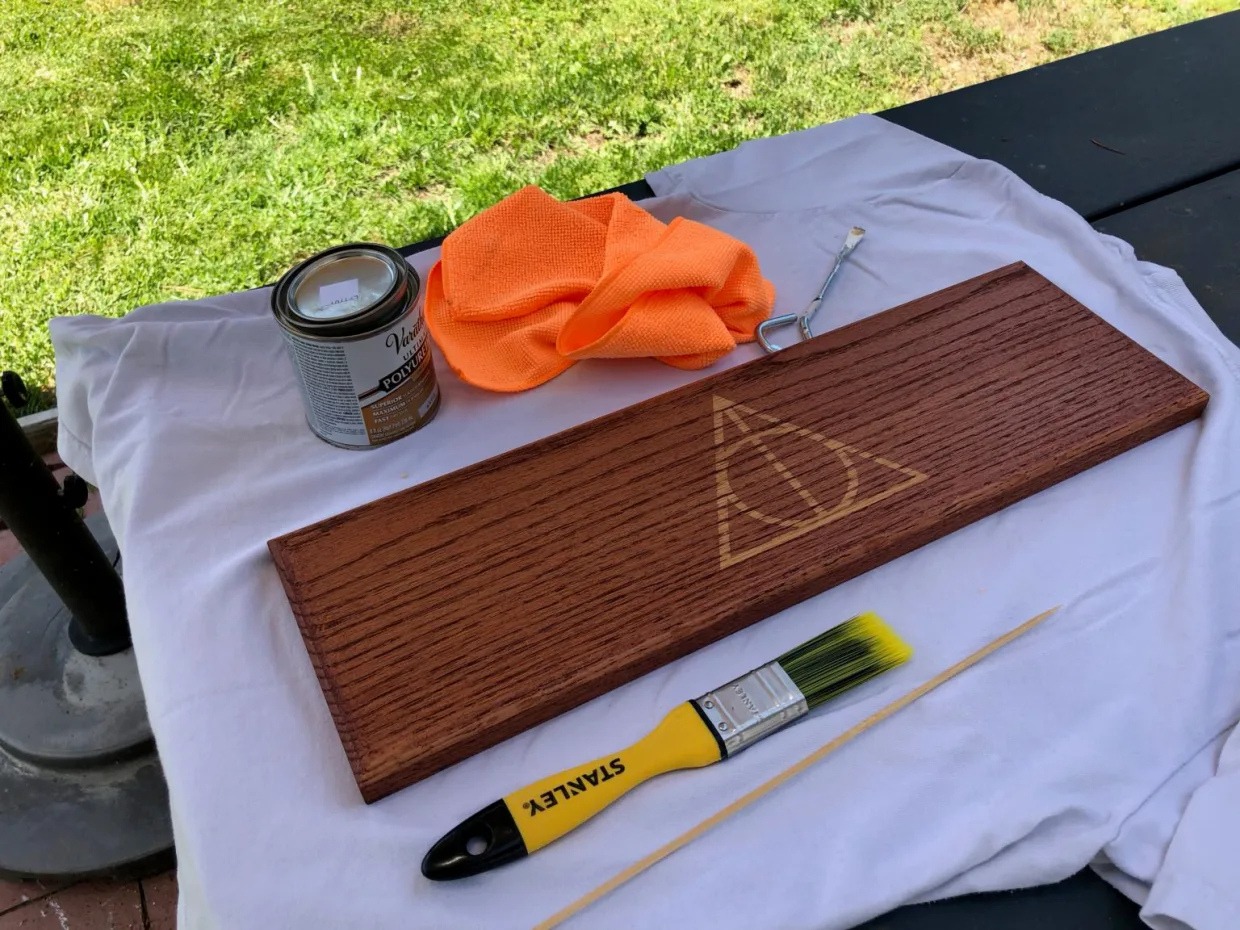
Step 9
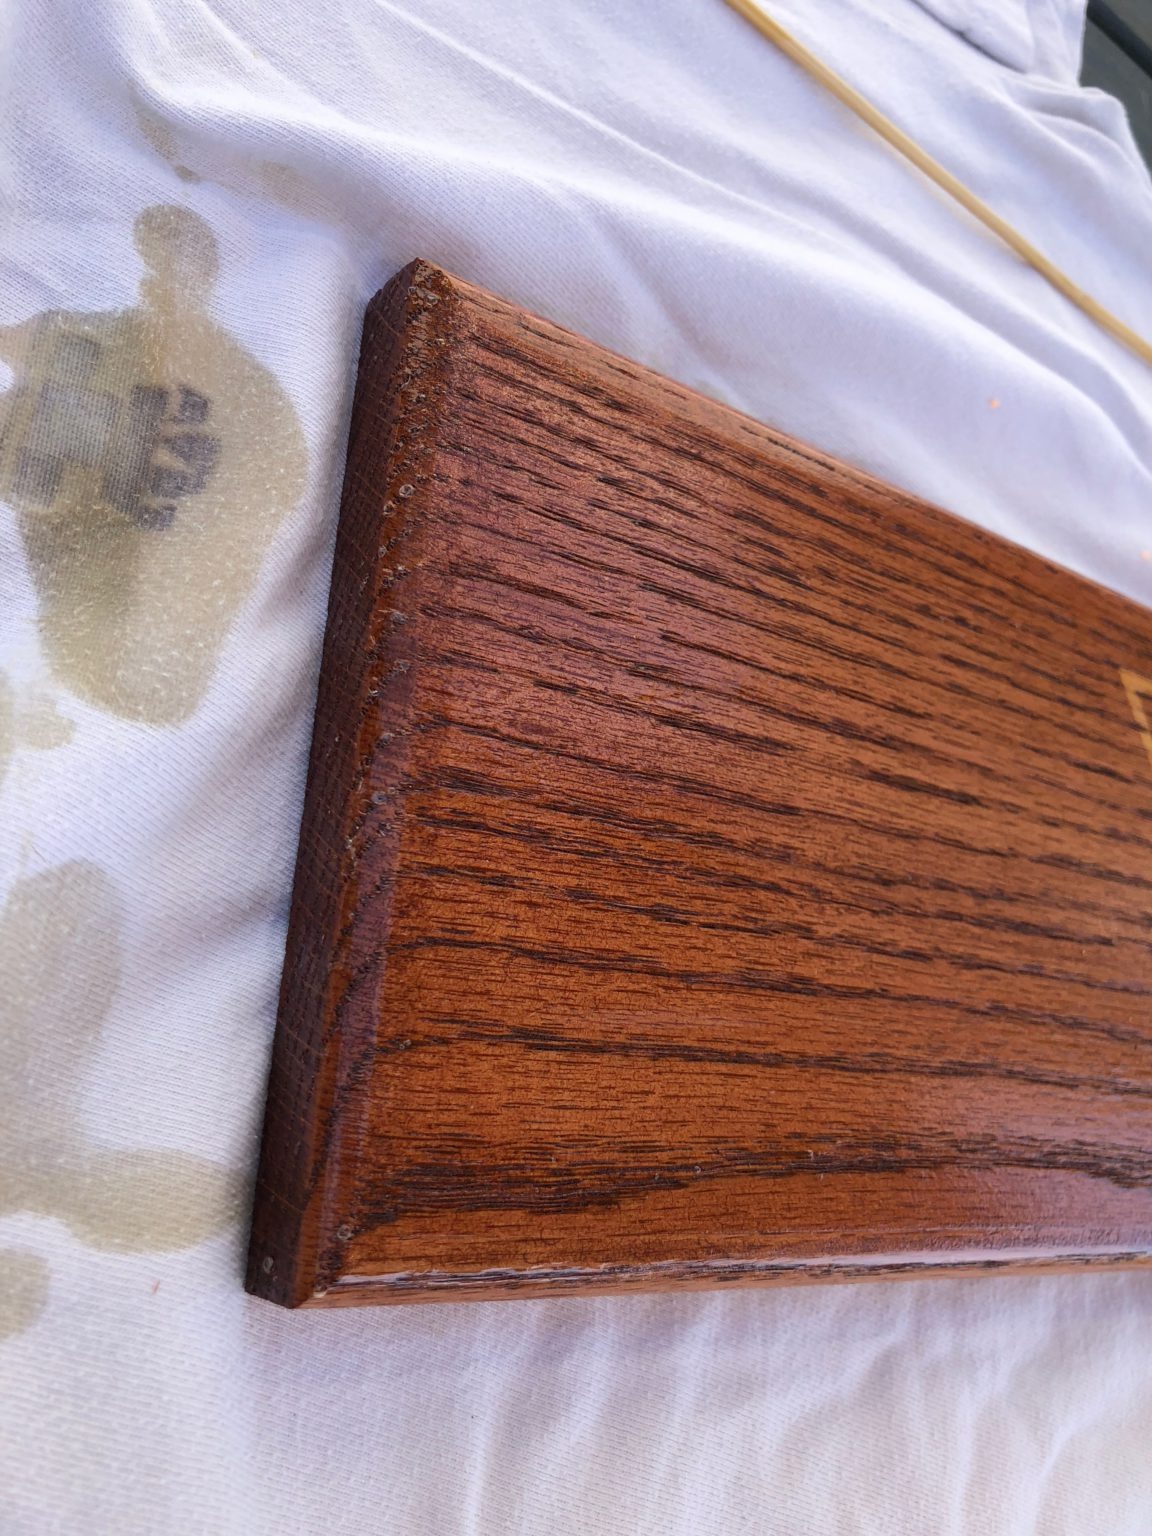
Another few days passed before I was brave enough to try the polyurethane coat. I only applied one coat because I wasn’t very happy with how the polyurethane layer worked. The important part is that you always stir and never shake — this prevents bubbles. Even so, I noticed bubbles forming at the edge of the board. I was able to sand them down with 220 grit sandpaper. This layer makes the grain stand out more. I wasn’t super happy with this part, so I’m not linking the exact product I chose, but it was an oil-based satin (clear) coat.
Step 10
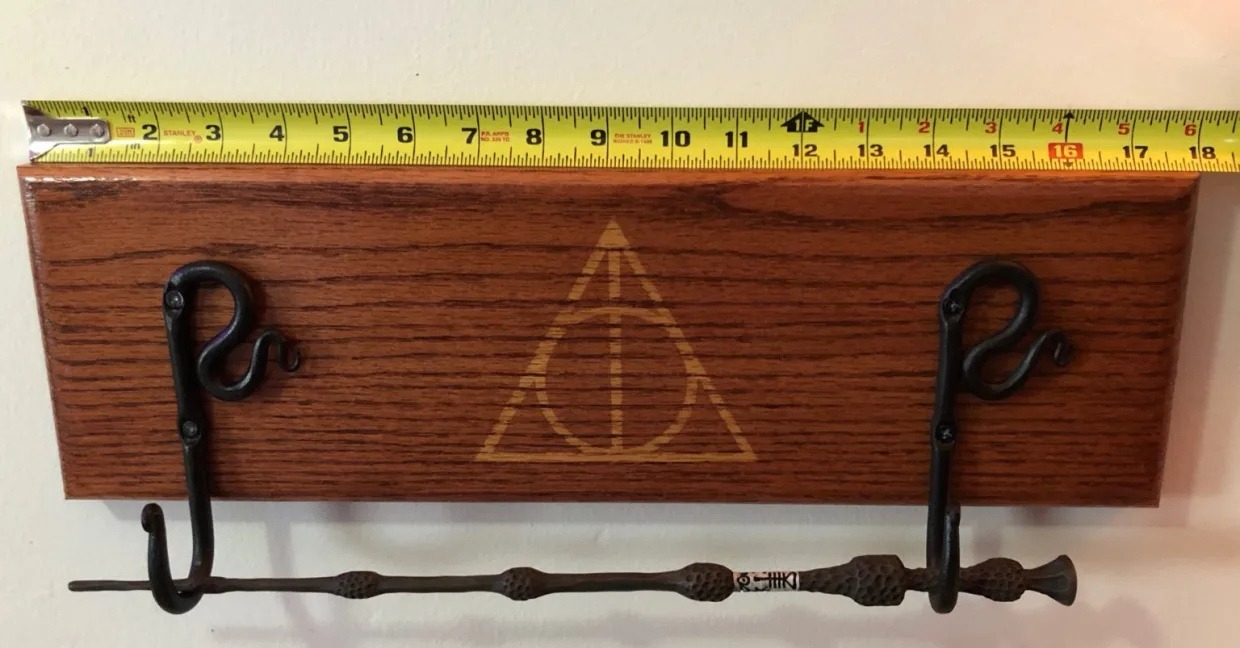
Finally, the board itself was done! I measured out how much space there should be between the hooks so that the wand would fit in such a way that it could not easily slip out in either direction. Fortunately, the Elder Wand has ridges to help with this. Make sure the screws you use are not so long as to extend through the board itself — the screws that came with the fixtures were too long, so I grabbed a couple that went a little more than halfway through the board.
Now you just need to figure out how you want to display it. In my case, I installed a couple of sawtooth hangers onto the back after attaching the metal hook fixtures to the front. Since the rear hooks I bought had to be hammered in, I was able to flip the plaque onto its front face and have the metal work be in contact with a stable surface underneath it. I also pre-drilled the holes slightly so that it would be easier to hammer the hooks in, and laid the front face on top of a soft towel to make sure there was no damage to or from the metal fixtures on the front.
I also applied a couple of rubber cabinet bumpers along the lower half of the back side so that it would hang parallel to the wall instead of tipping forward.
Voilà!
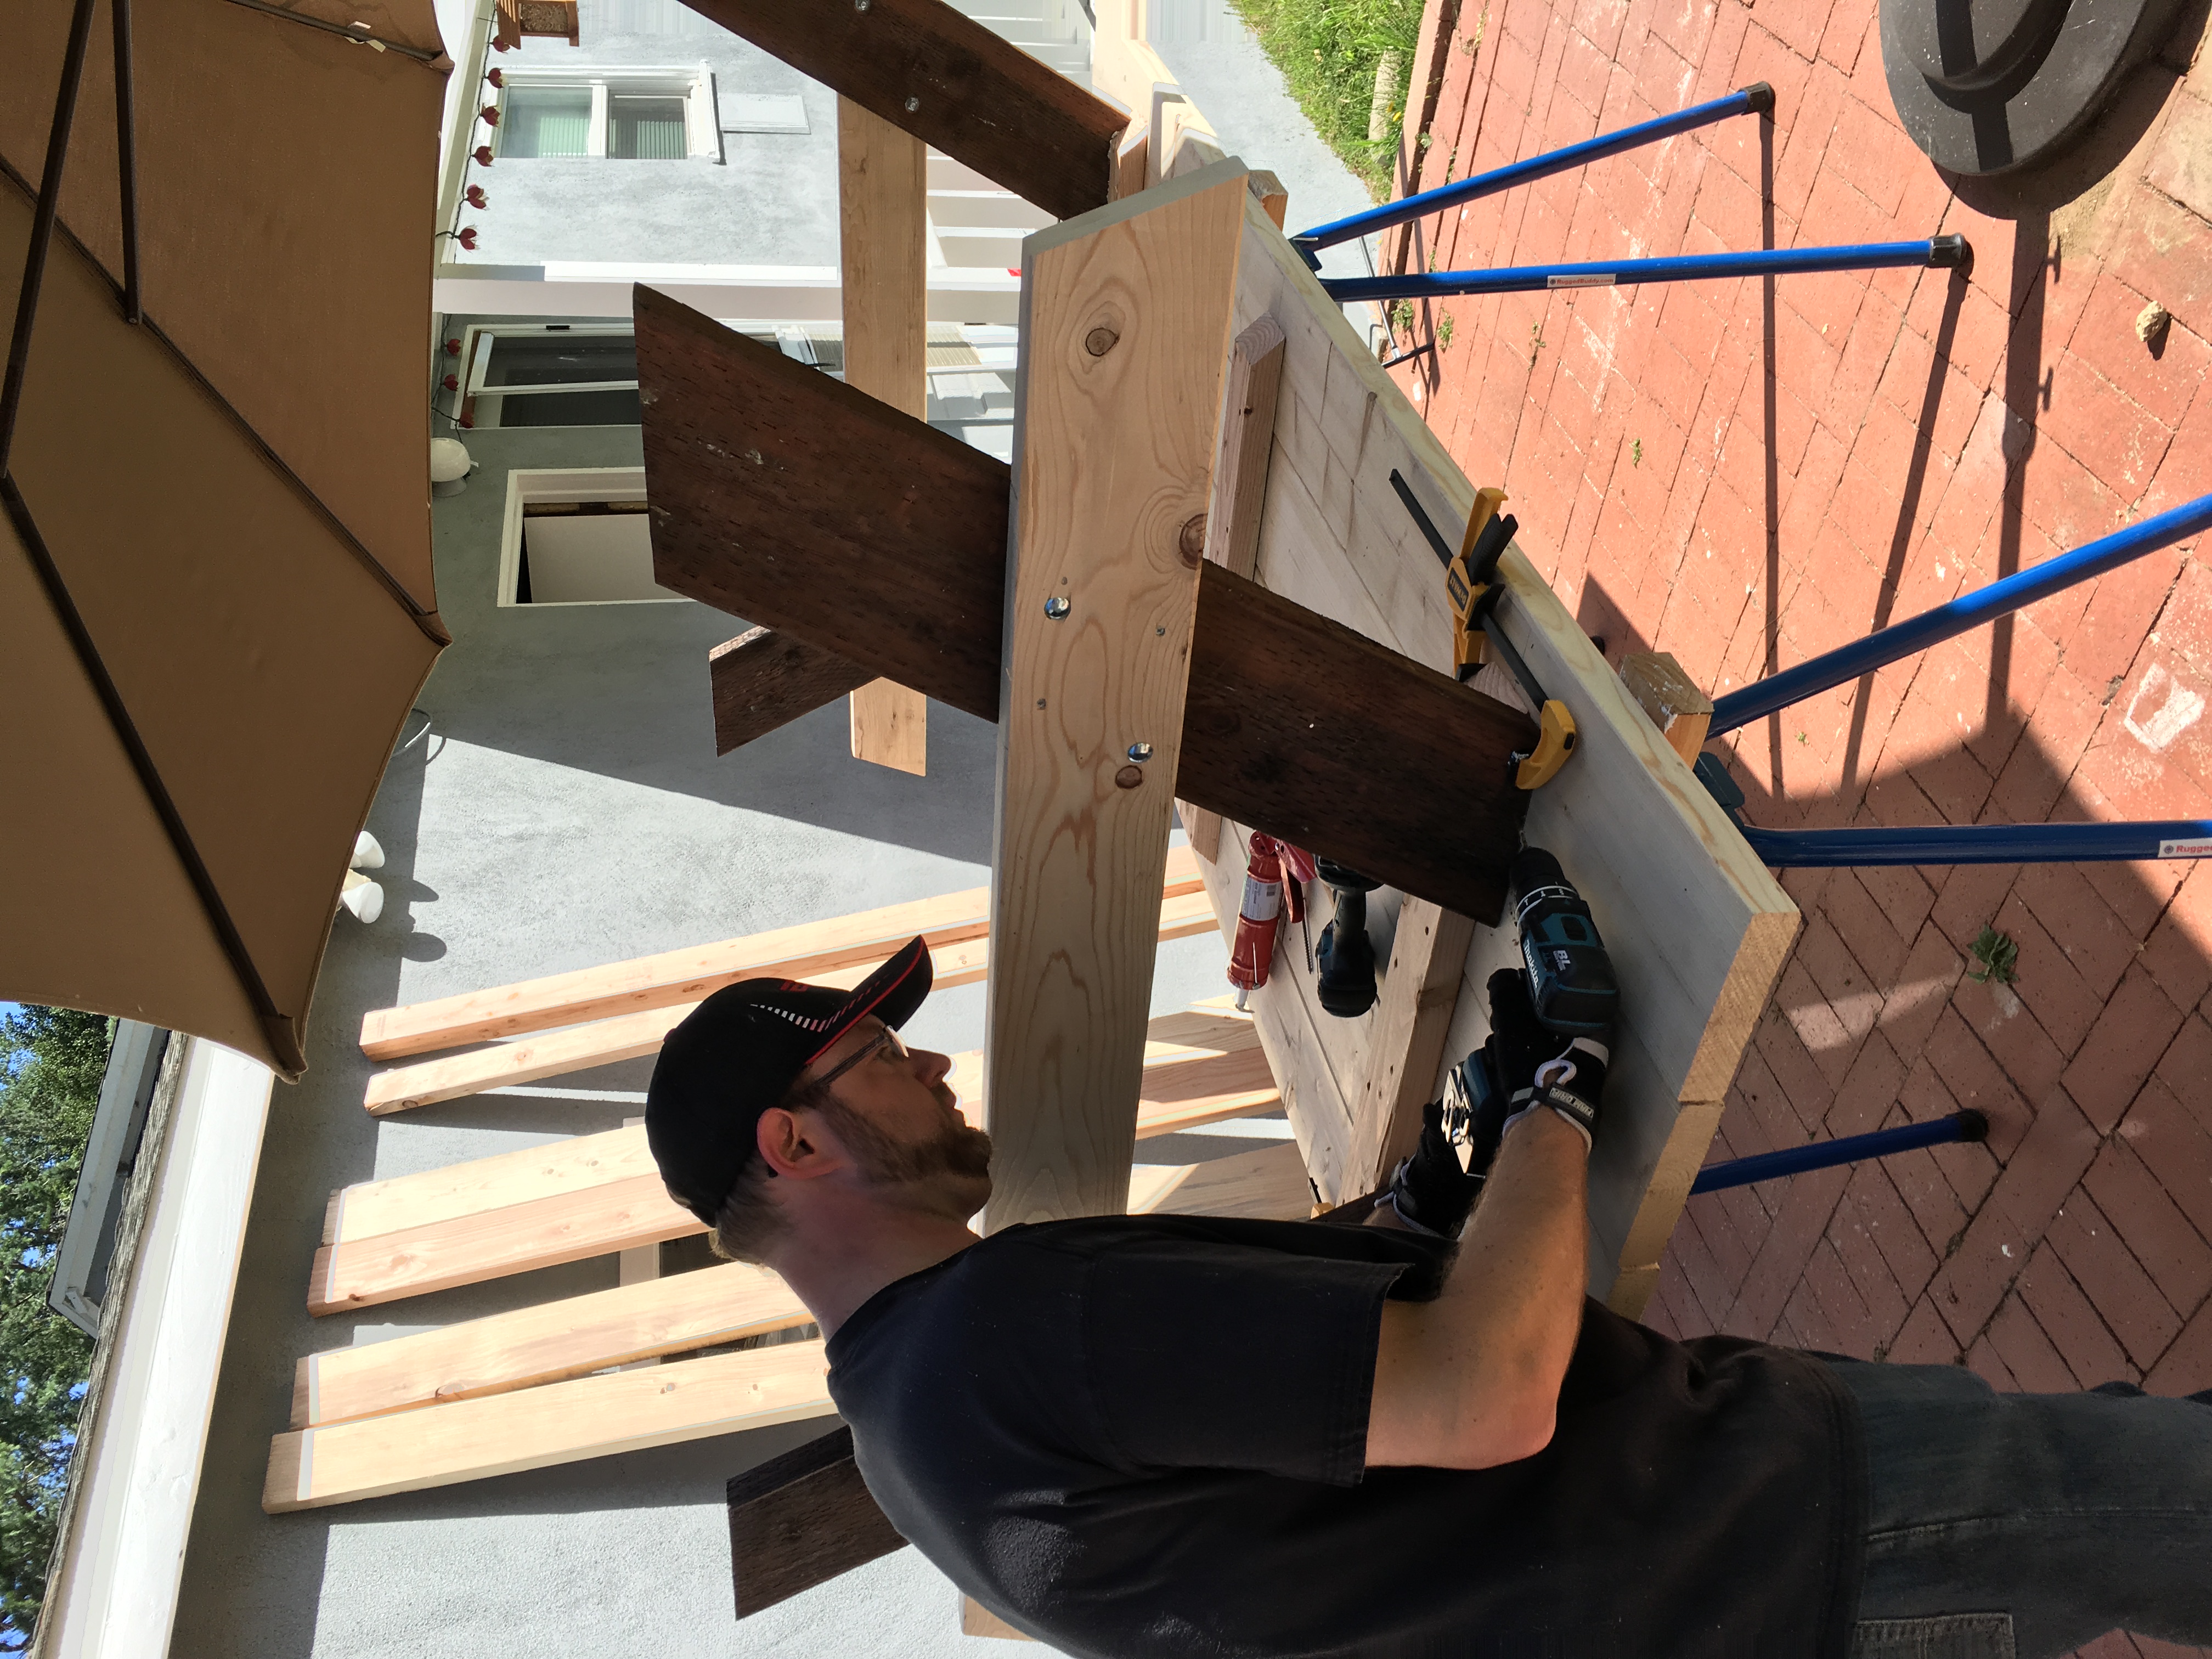
Building a picnic table is a rite of passage in carpentry. It’s a project that demands both brute strength for moving 8 foot 2x10 lumber and precision for the angled A-frame legs. This build taught me a valuable lesson: the order of operations matters as much as the quality of the wood.
The Finished Product

Step 0: Material Selection
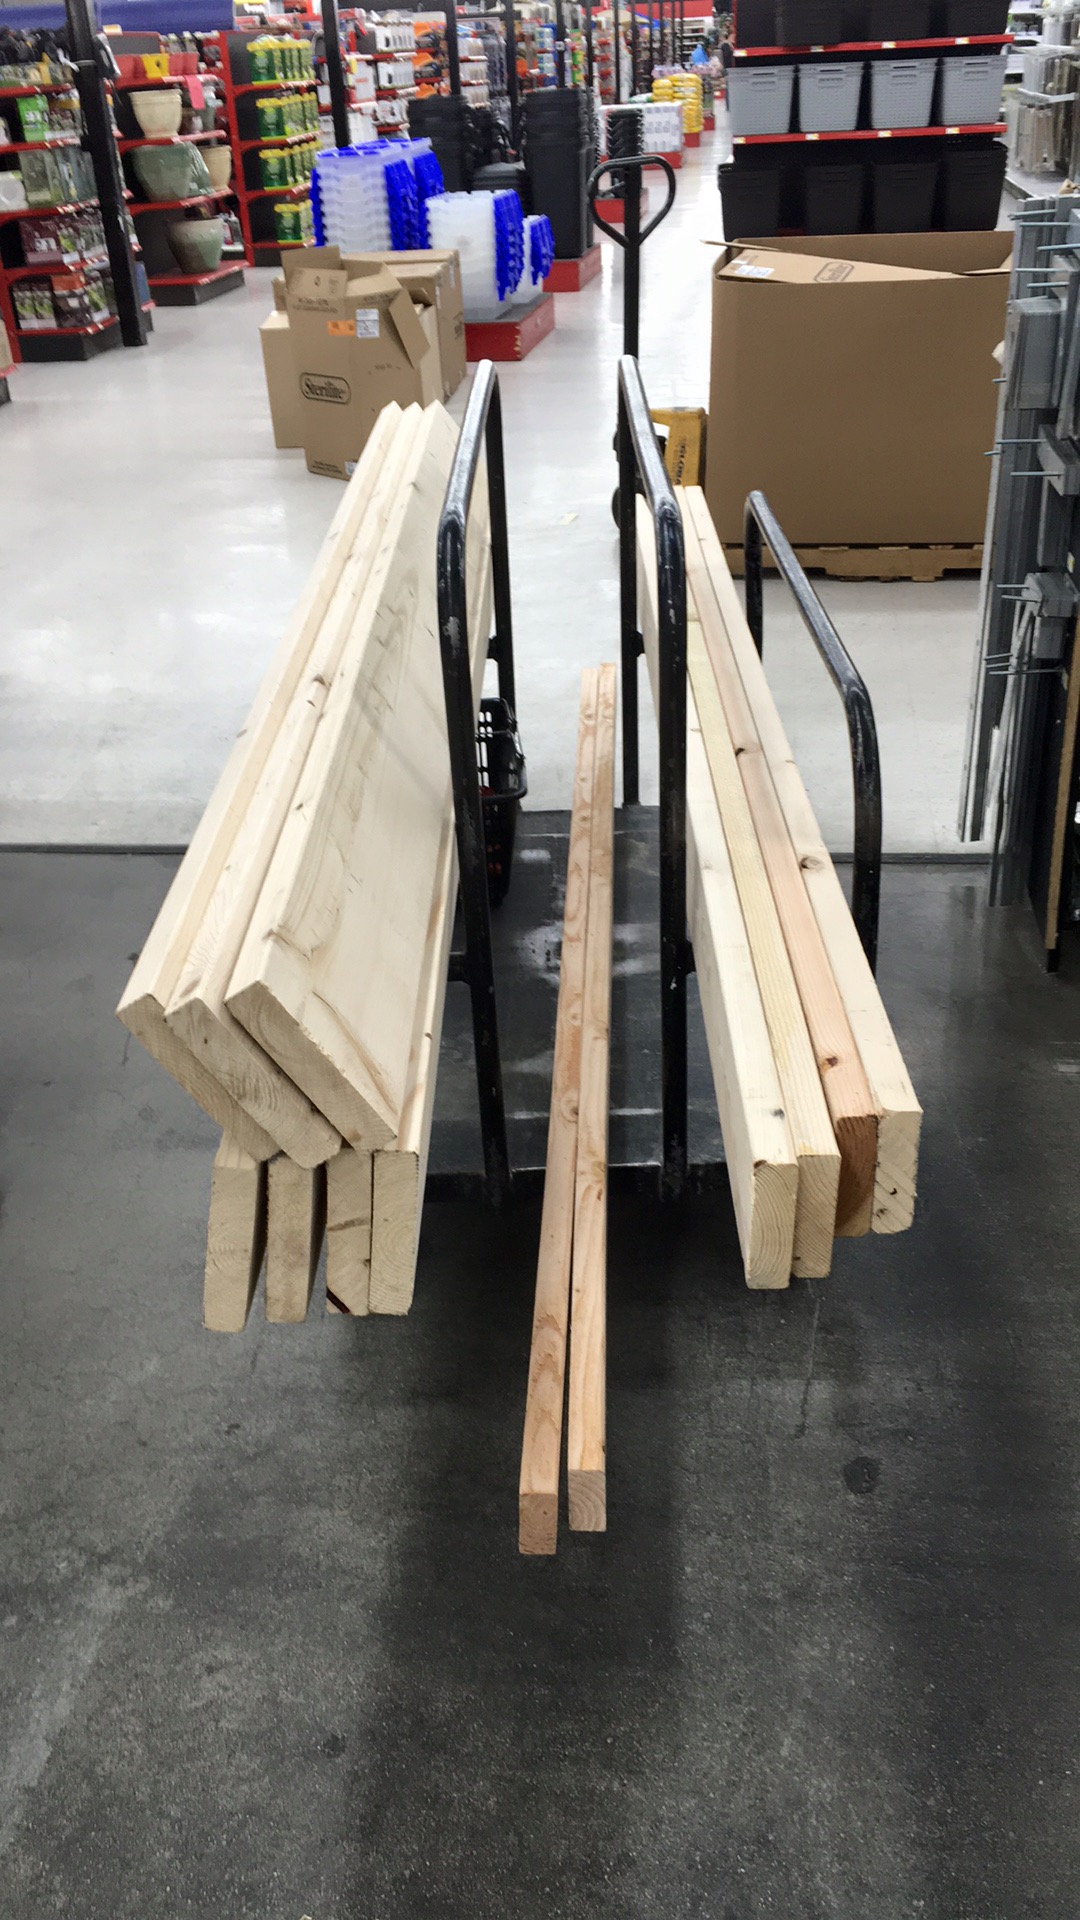
I headed to the lumber yard to pick out the straightest 2x10 and 2x4 boards I could find. For a table of this size, weight is a factor, so I ensured I had a solid cart and a plan for transport.
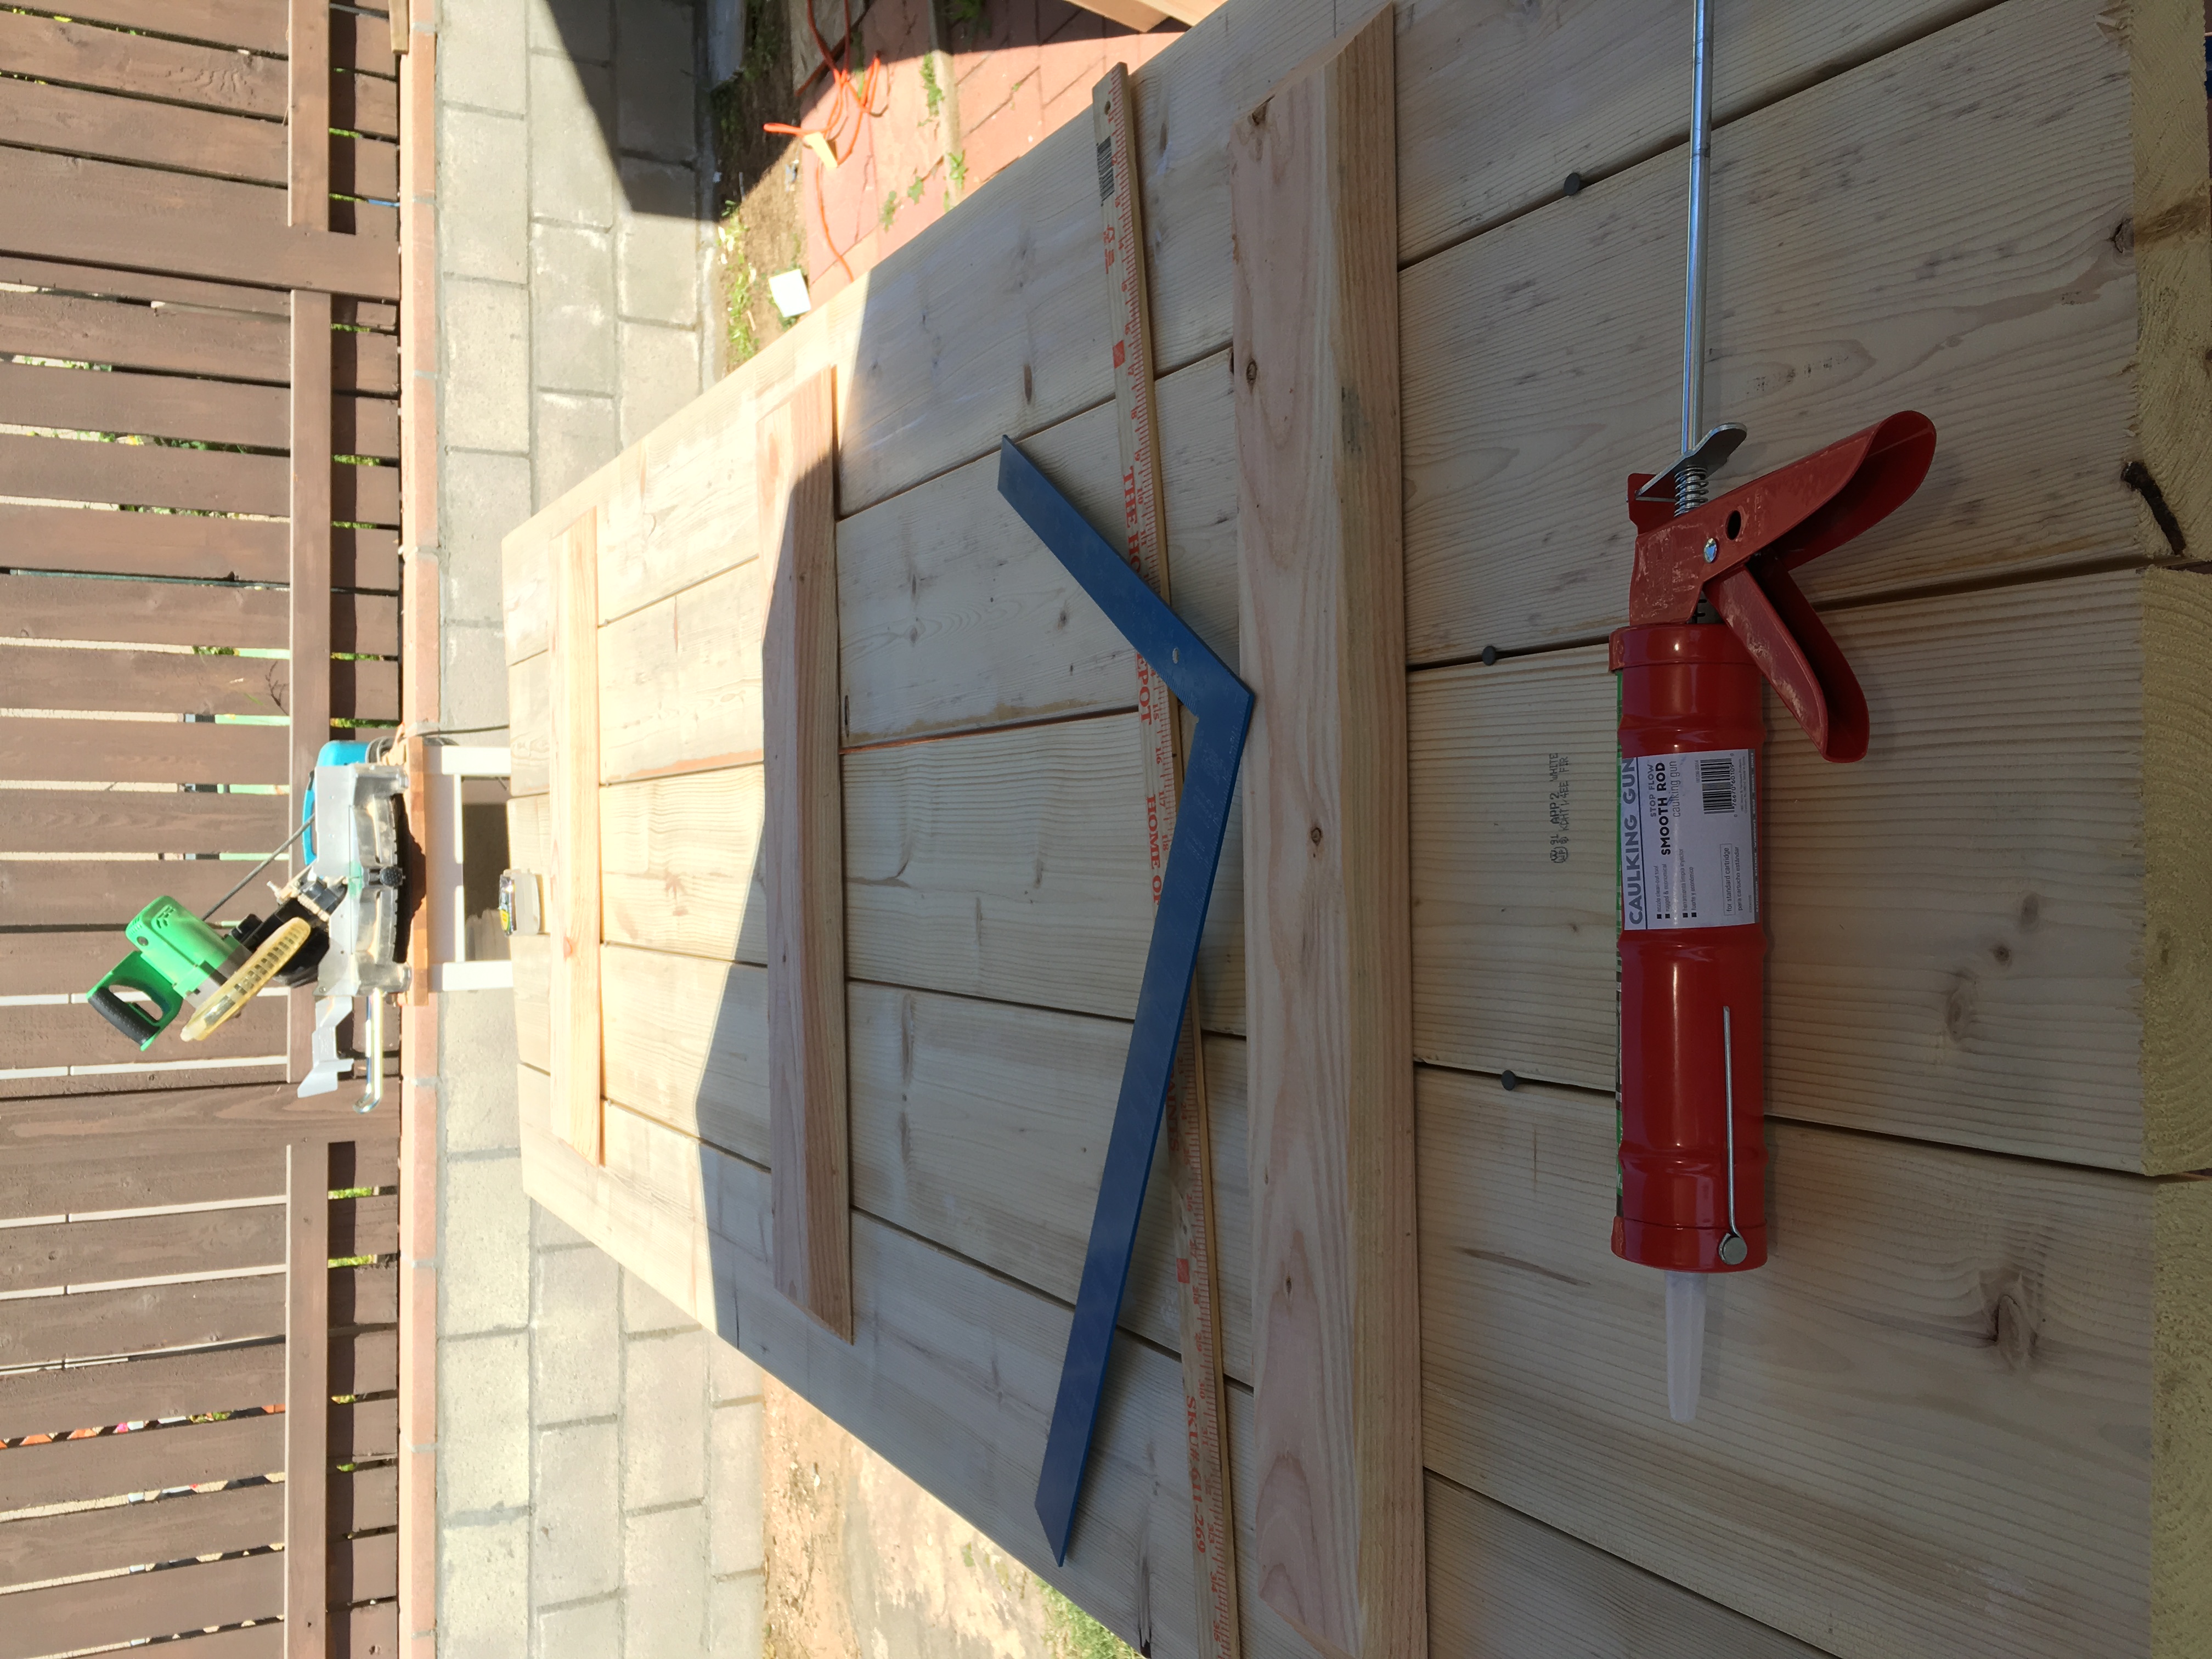
Step 1: Table Top Layout
The top is composed of five 2x10 boards. Each are 8 feet long to make for a good sized table. I used a framing square to ensure the ends were perfectly aligned before attaching the structural supports.
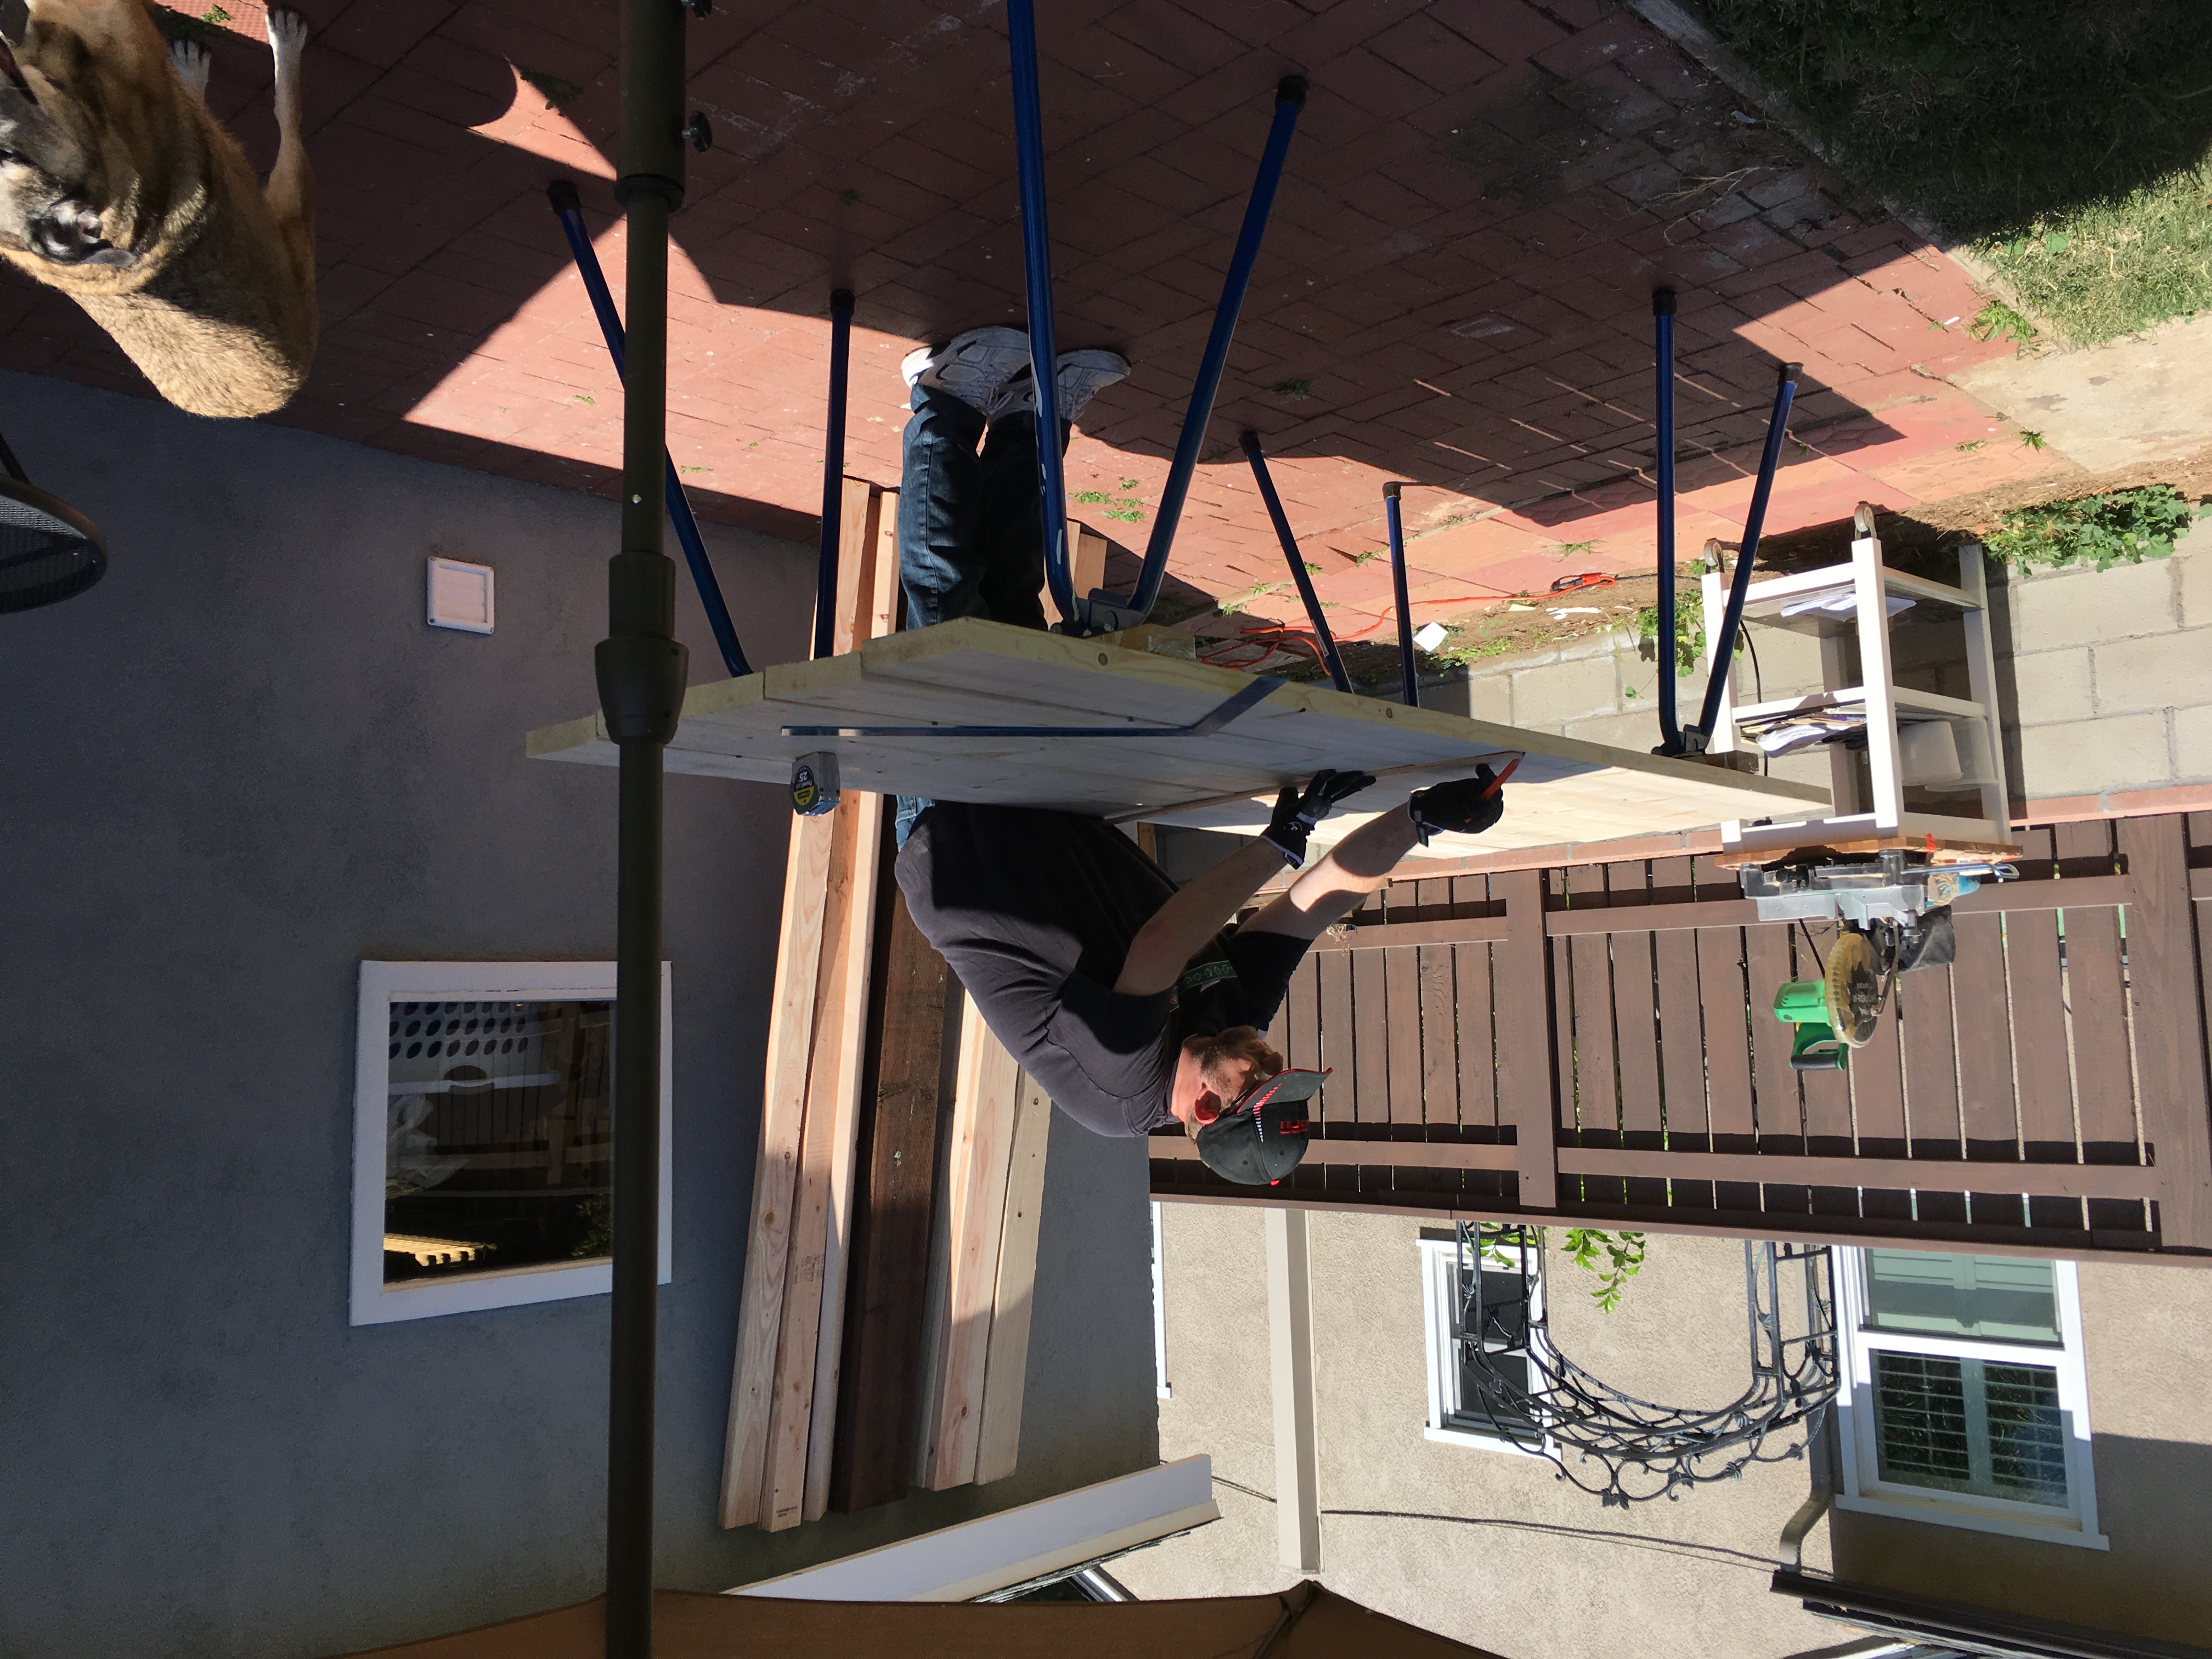
Step 2: Securing the Top Bracing
I used construction adhesive and screws to attach the 2x4 structural supports underneath. This creates a rigid "slab" that prevents the boards from shifting independently.
Step 3: Table Top Dry Fit
Once flipped, the scale of the 8-foot top became clear. I leaned it against the workshop wall to inspect the grain and ensure the surface was flat before moving on to the base.

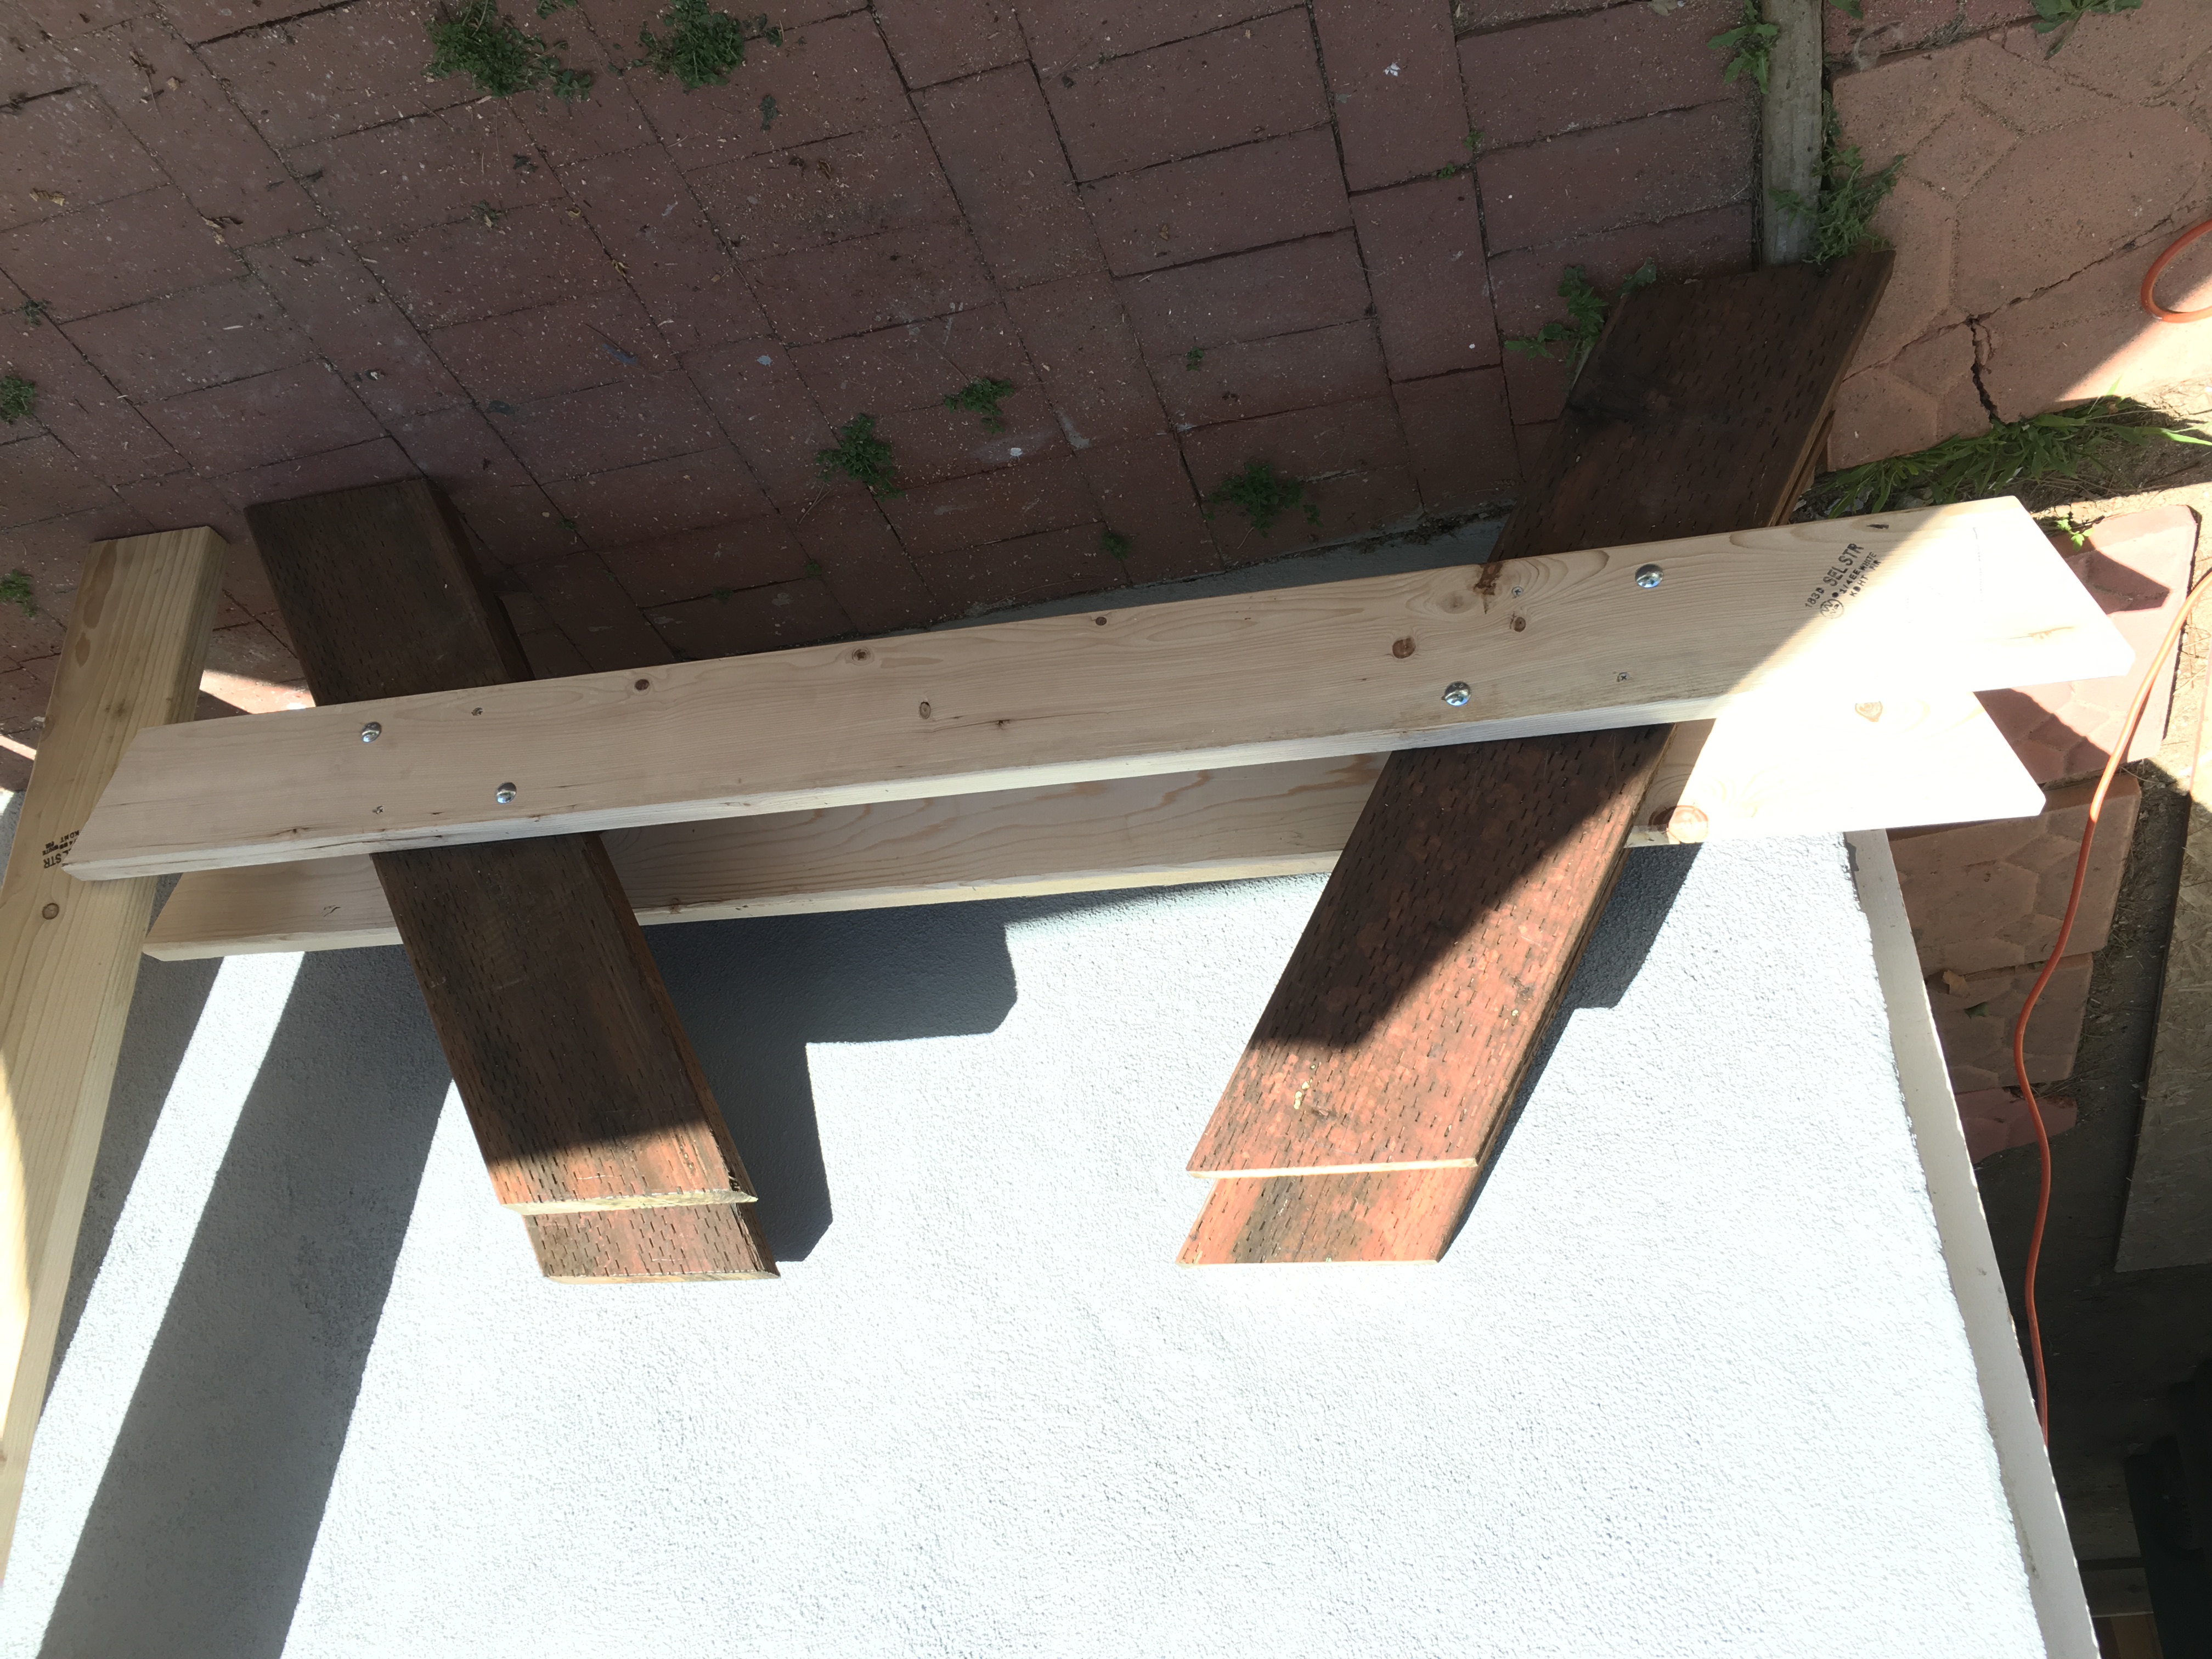
Step 4: Engineering the A-Frame
The legs were cut from pressure-treated lumber. Getting the angles right is critical for the table's stability and overall look.

Step 5: Counter-sinking Hardware
To handle lateral stress, I used carriage bolts. I counter-sunk the nuts so they sit flush within the wood, ensuring a clean look and preventing snags.

Step 6: Base Prep
With the legs assembled and hardware tightened, the A-frame units were ready for the "marriage" to the table top.
Step 7: Attaching the Legs
I flipped the top back over and clamped the leg units in place. I drove structural screws through the top supports and into the legs for a rock-solid connection.
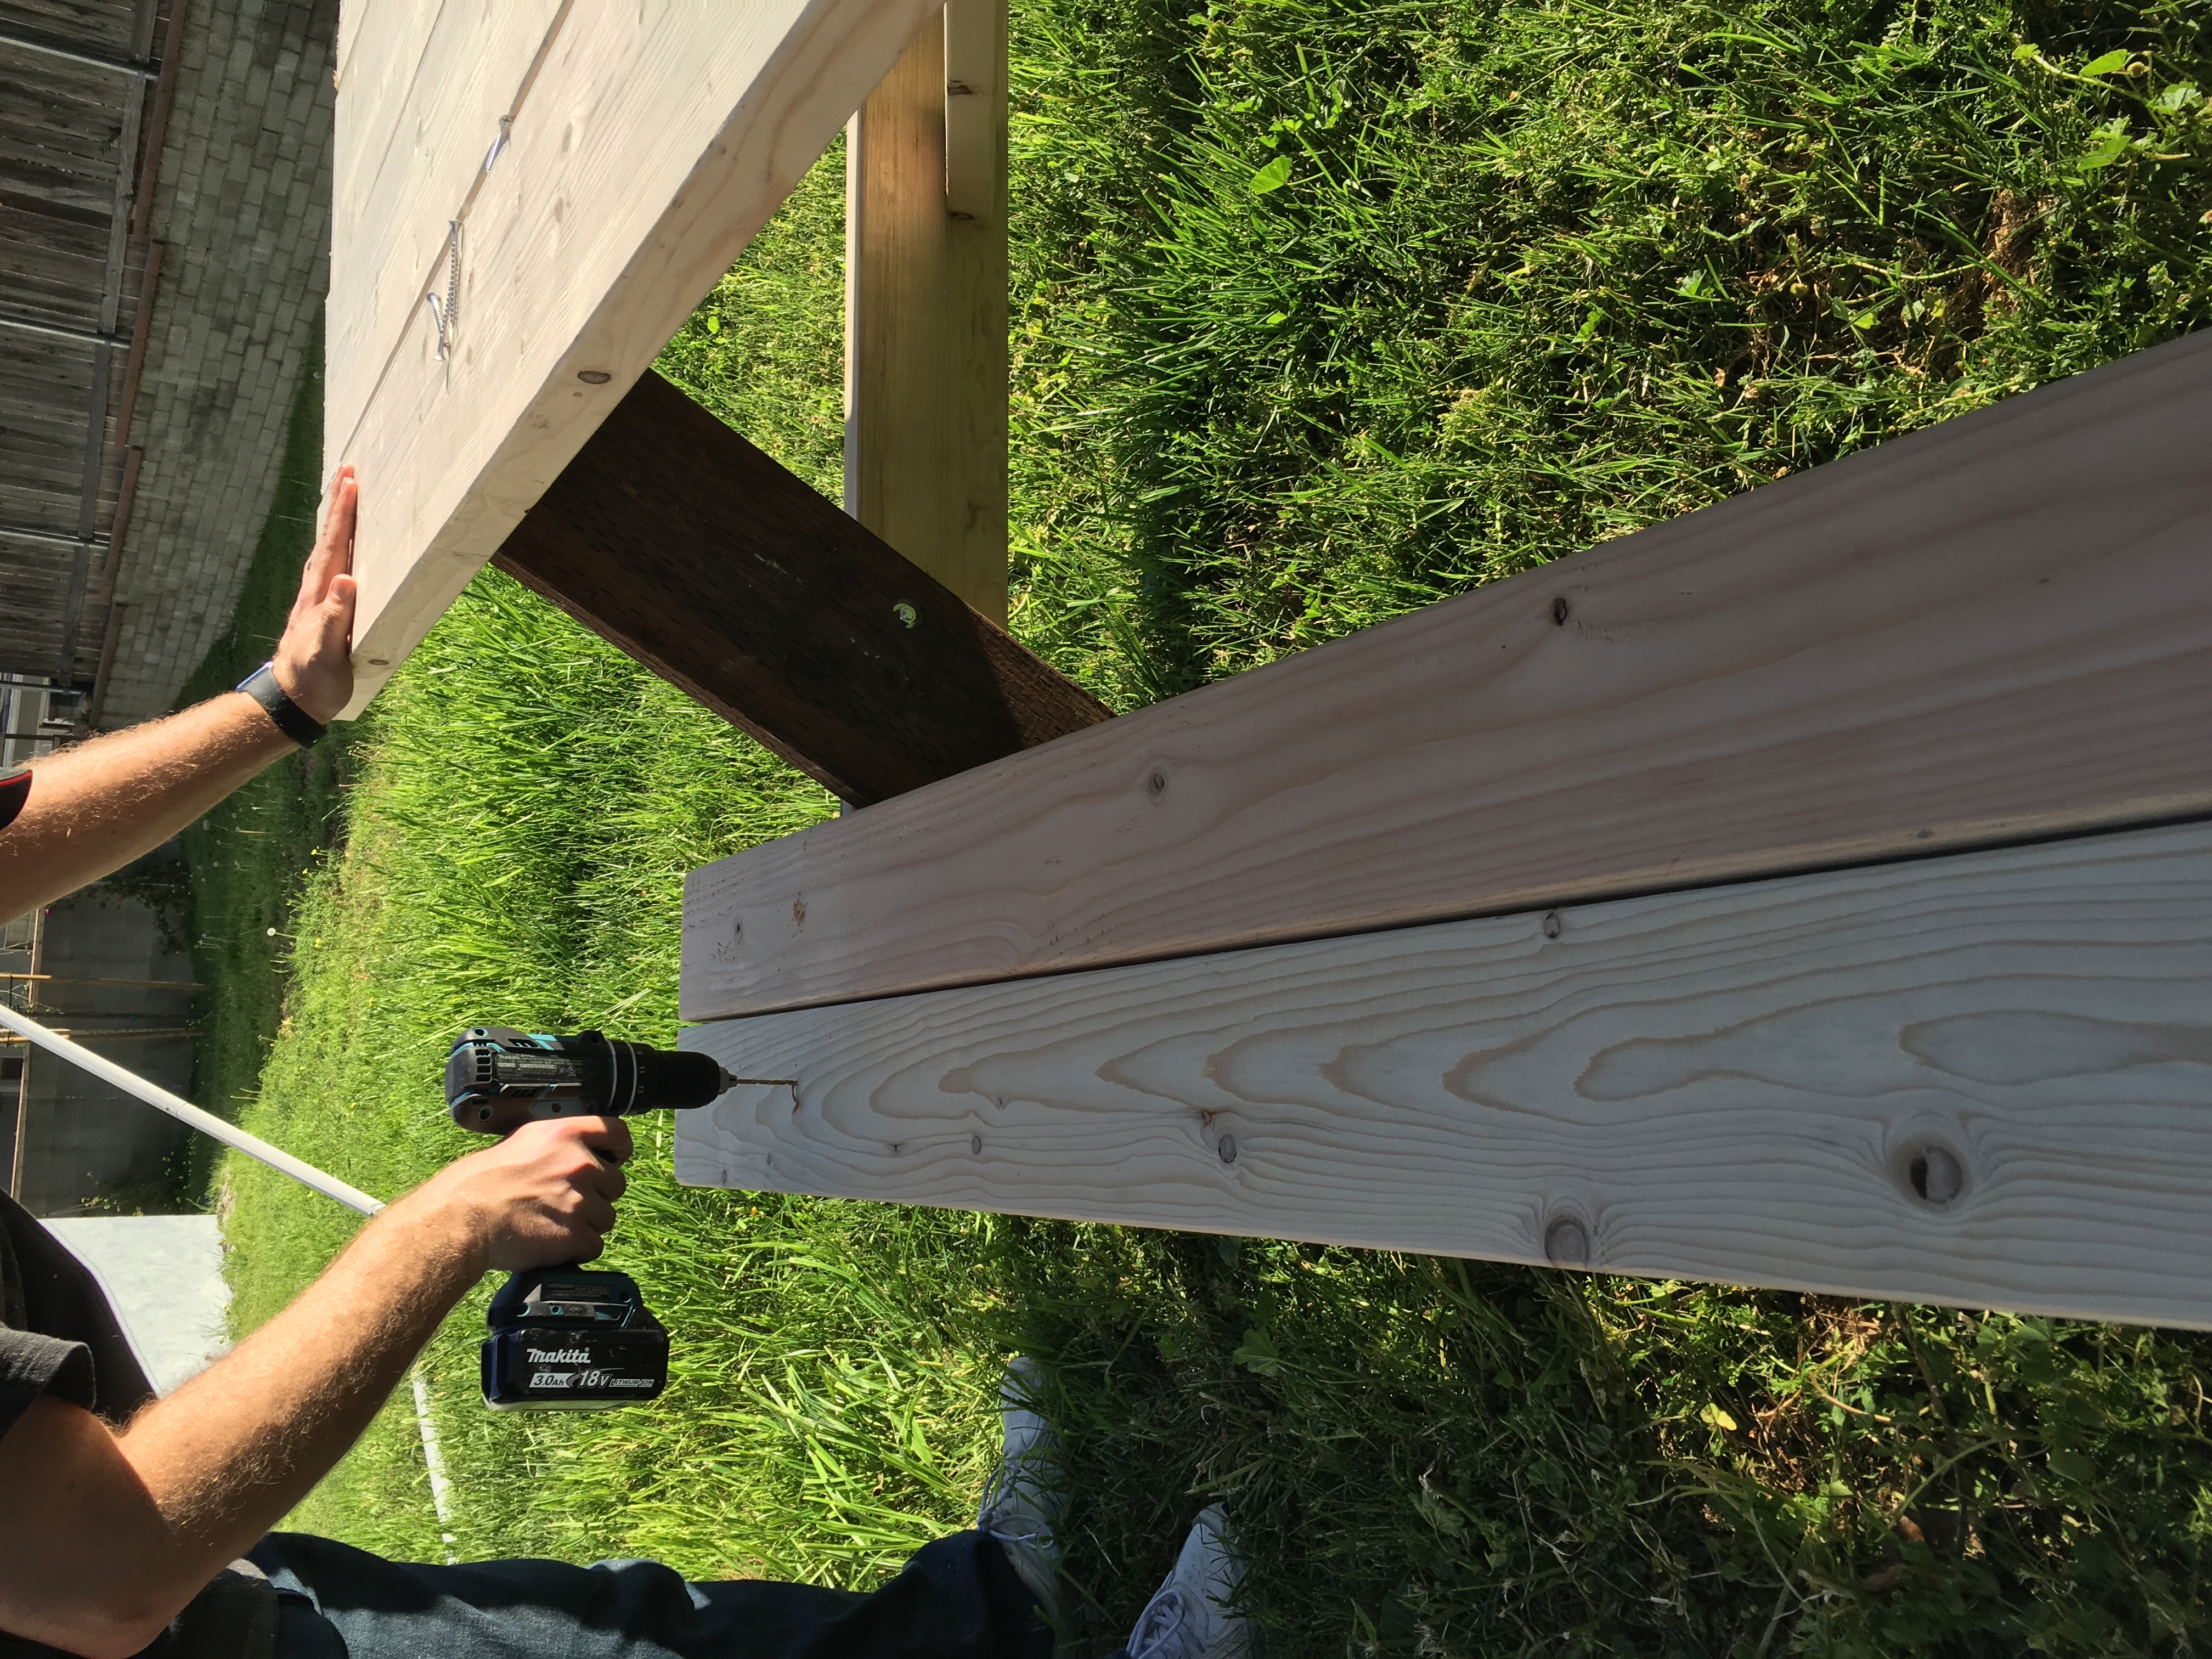
Step 8: Seat Installation
The final structural pieces were the seat boards. I pre-drilled all holes to prevent the lumber from splitting at the ends.
Step 9: Structural Completion
This photo marks the moment the table was structurally finished. All boards are in place, and the piece is fully assembled.
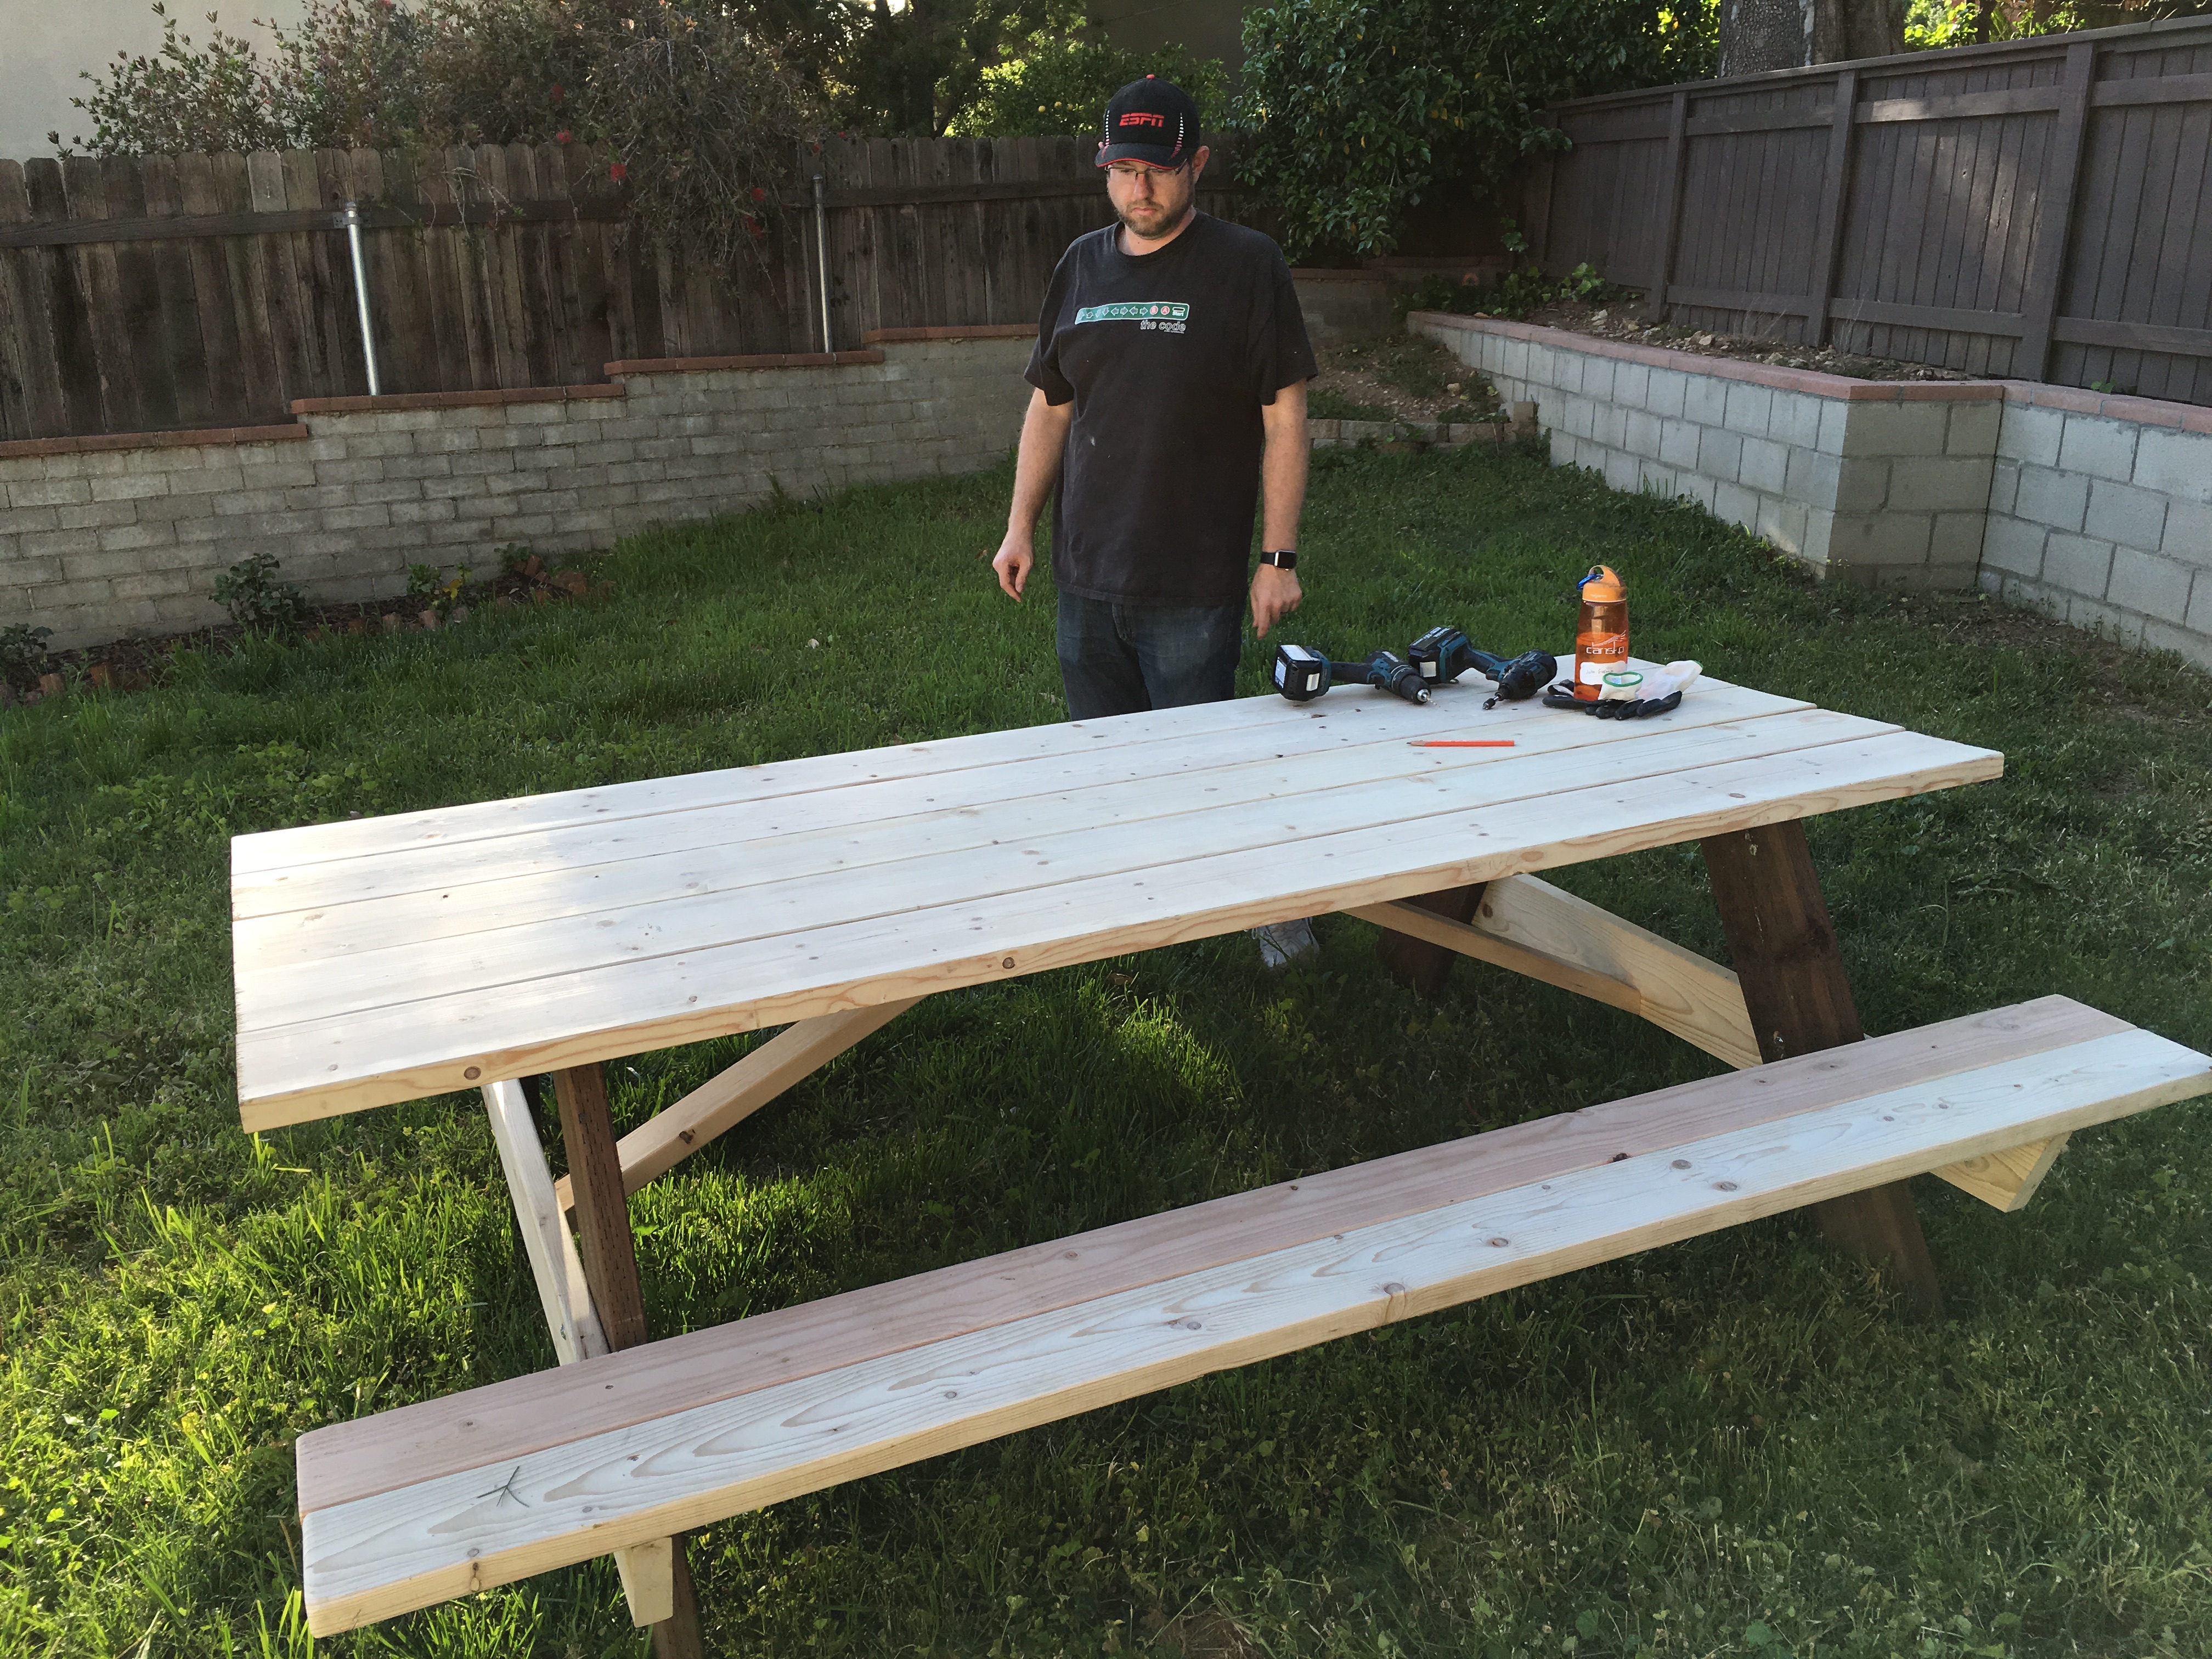
Step 10: Finishing and Lessons Learned
The final phase was the finish. It was during this stage that the "painting after assembly" mistake occurred. While it looked great initially, the lack of coverage in the joints led to the moisture-driven warping. For every build build since then, the primer goes on before the screws go in.
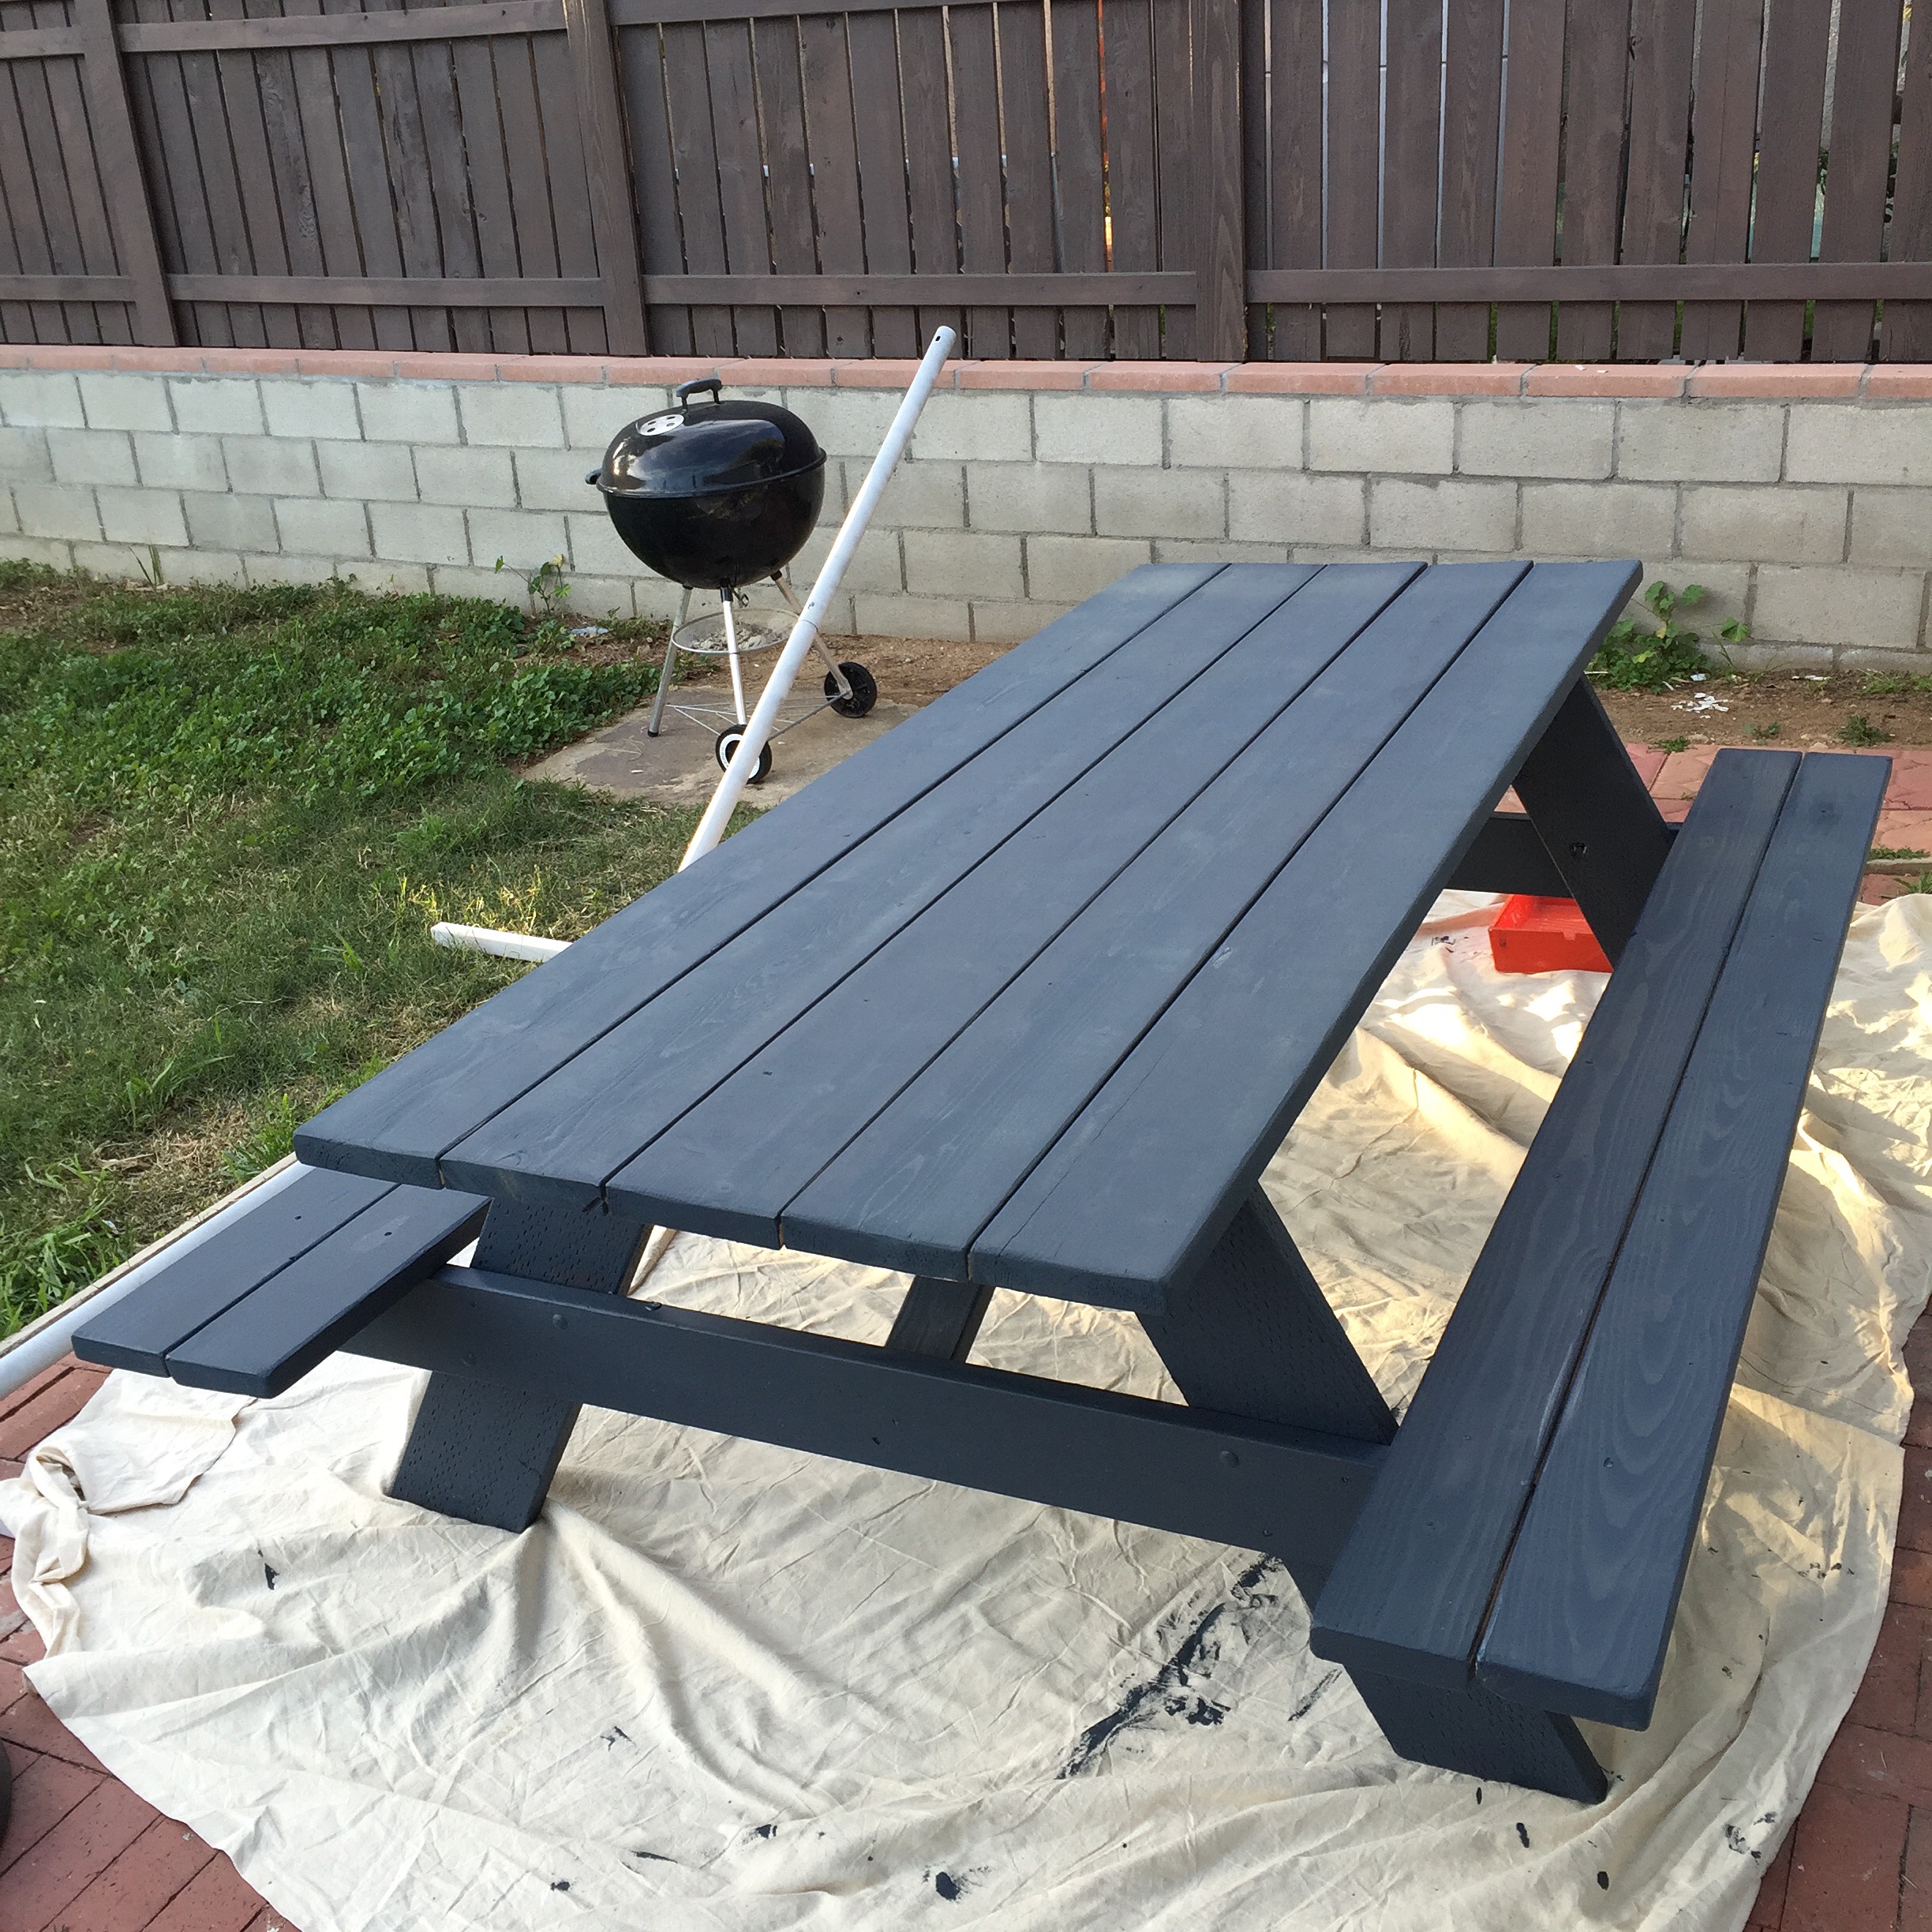
Project Conclusion
This build was a great lesson in planning. While the final worksurface is exactly what I wanted, next time I'll anchor my optimism in better preparation—getting the paint on before the pieces come together.
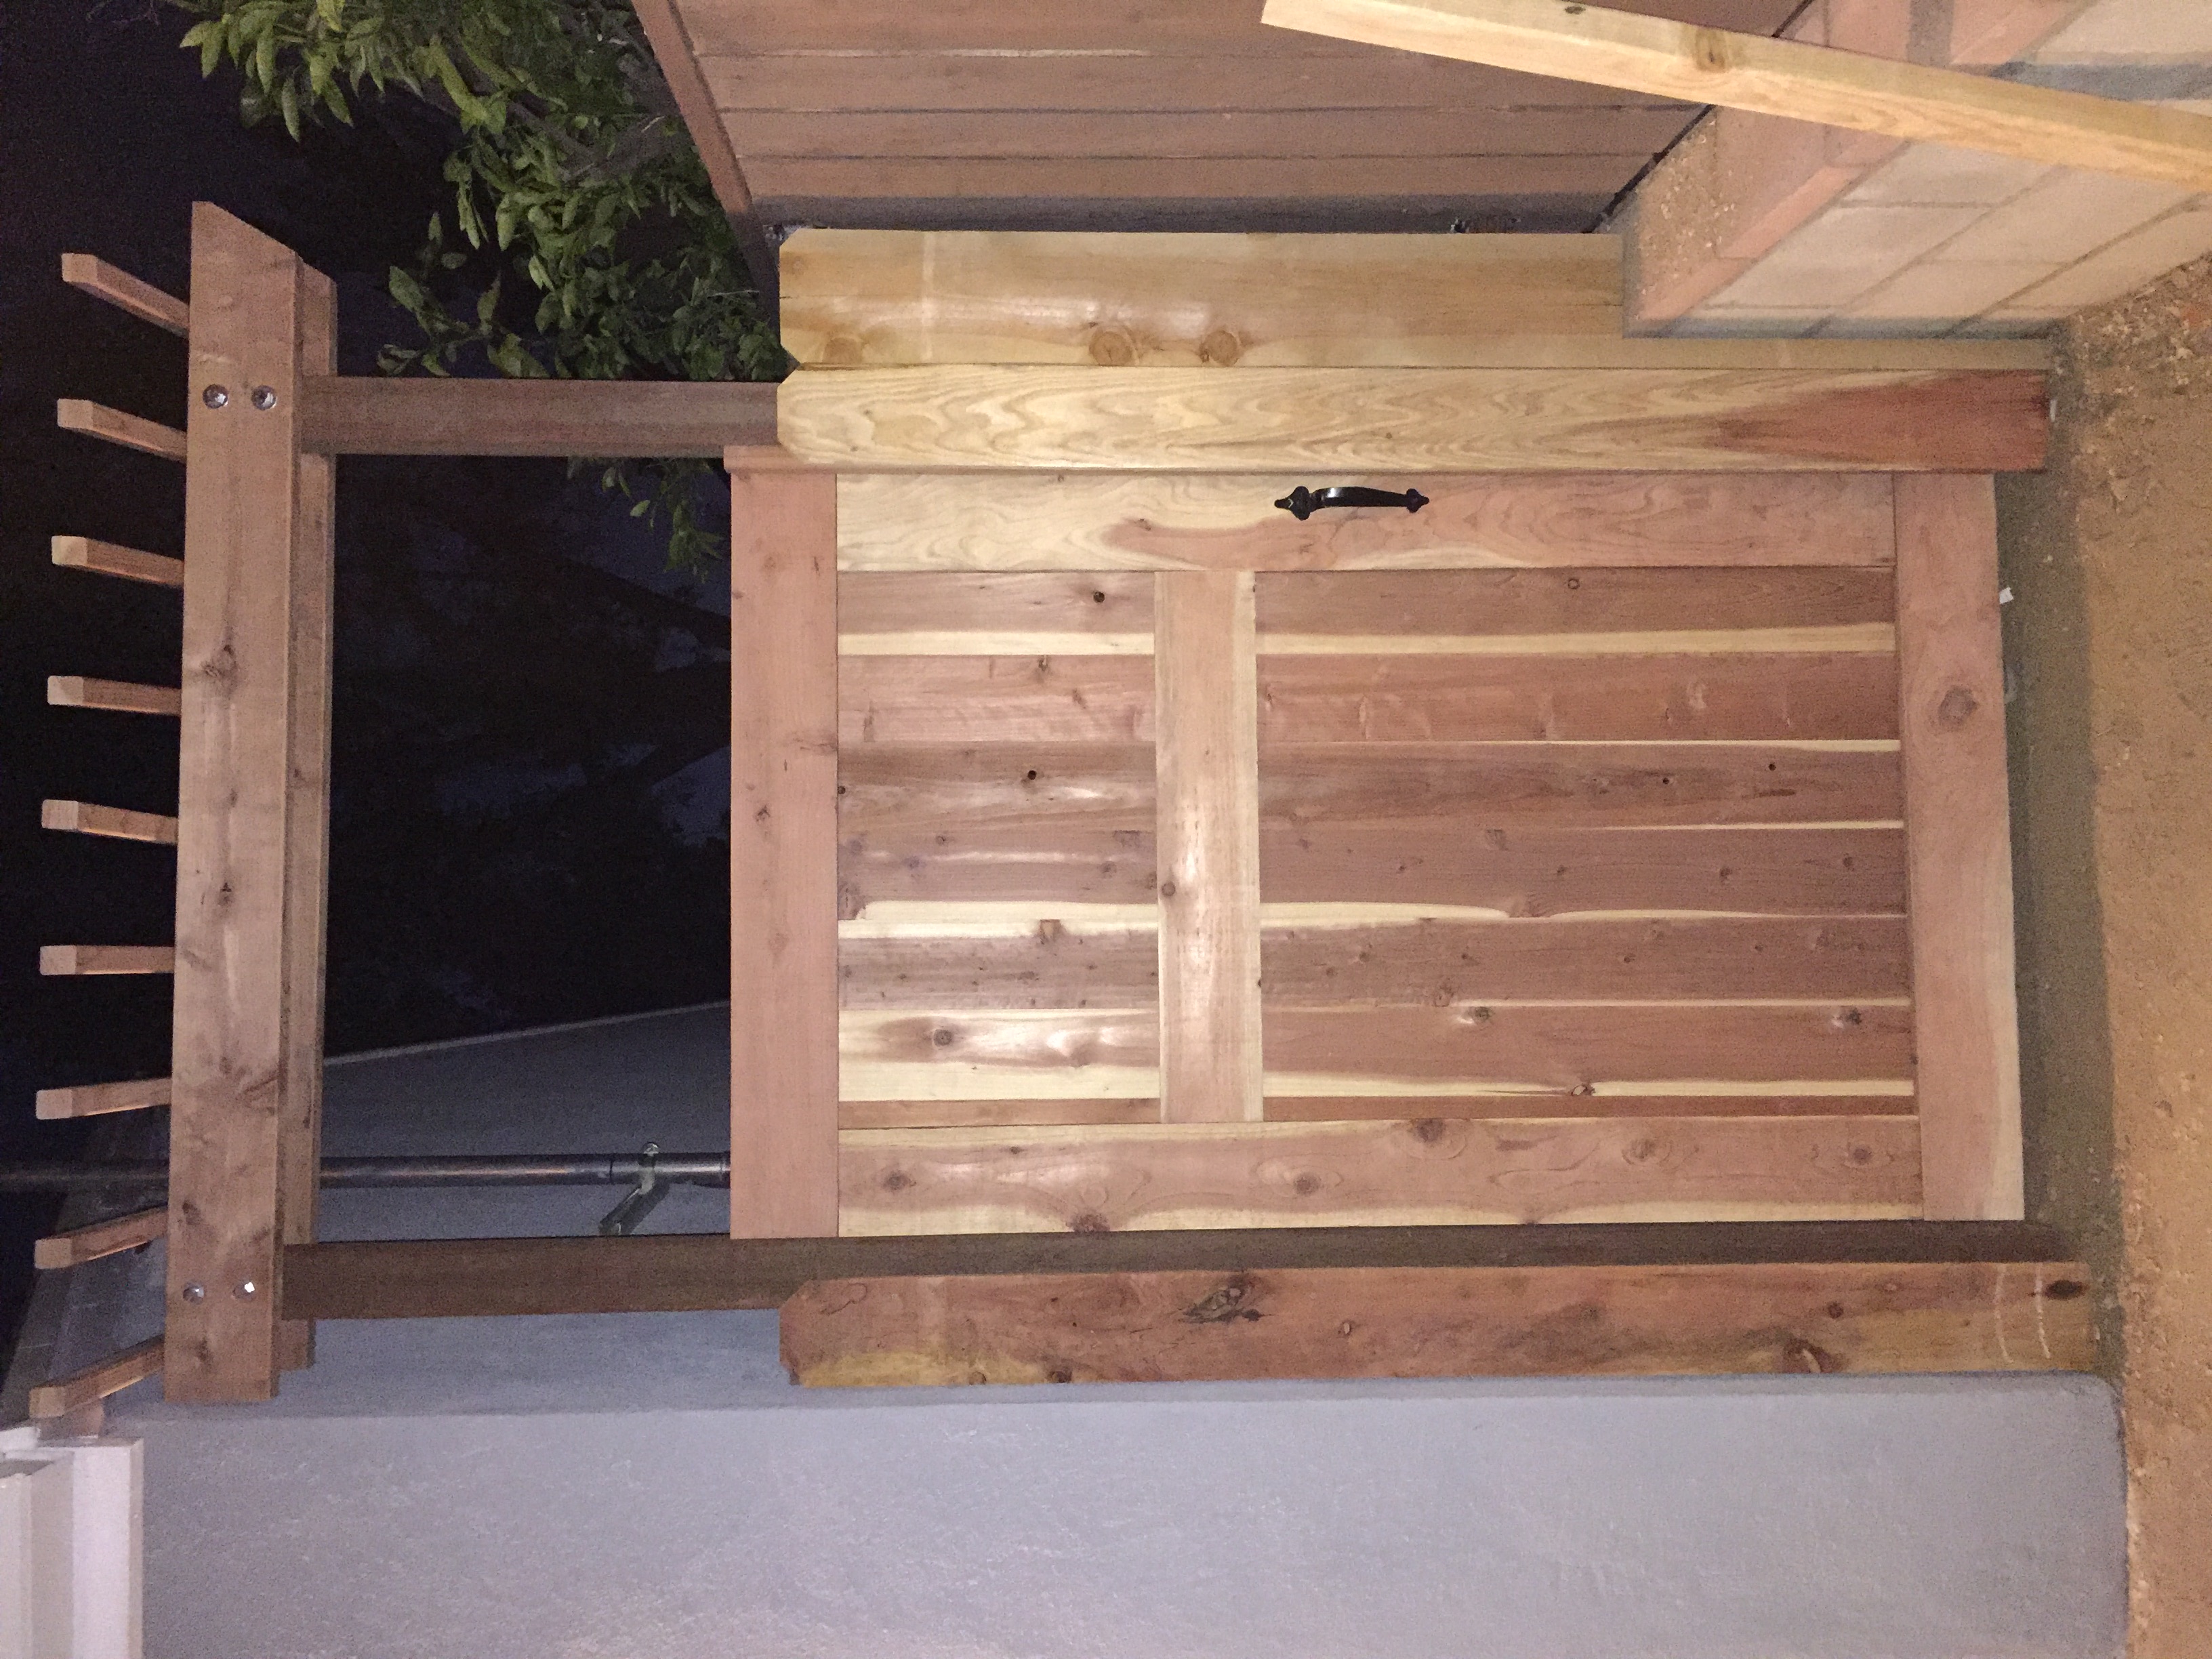
Inspired by classic Craftsman architecture, I wanted to build a gate that felt substantial and architectural. This project was a lesson in scale, ensuring that a heavy cedar assembly remains square and level over time. Much like software, a solid foundation—or in this case, a perfectly set post—is everything.
The Finished Product
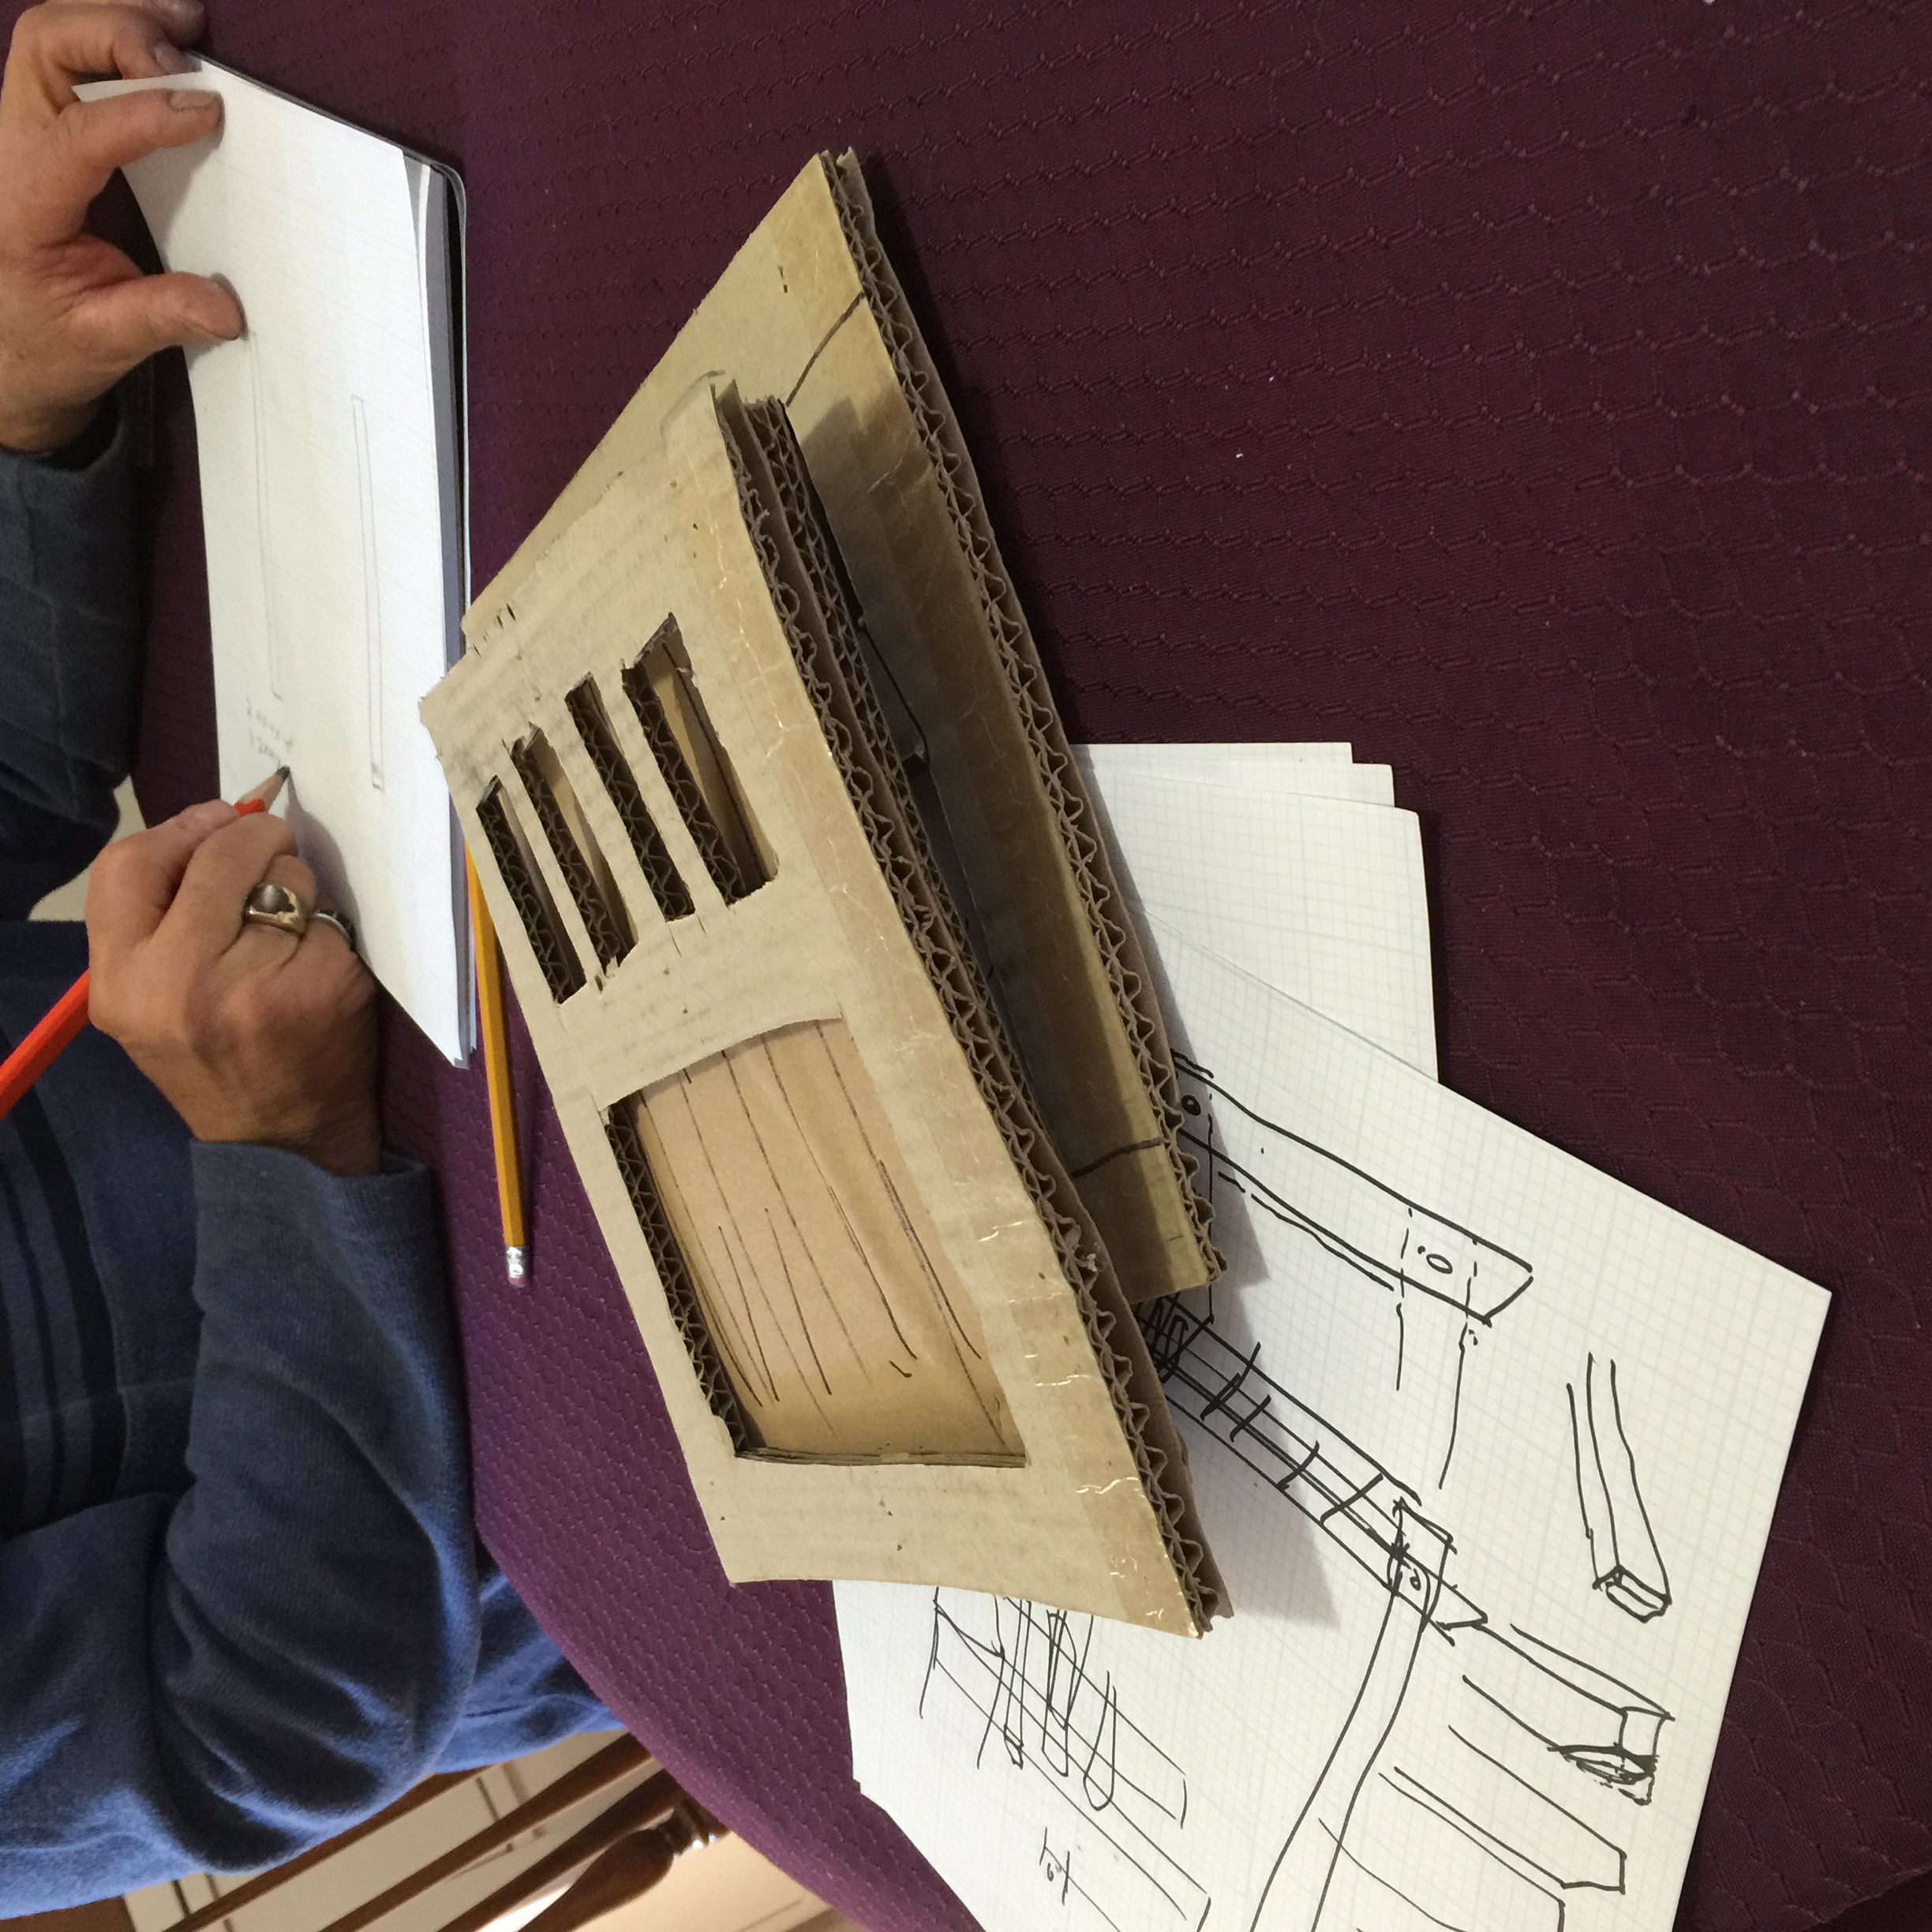
Step 1: Prototyping
I started with a cardboard mockup and detailed sketches. Seeing the proportions in 3D—even in cardboard—helped me finalize the window dimensions and the spacing for the upper slats before committing to the cedar.
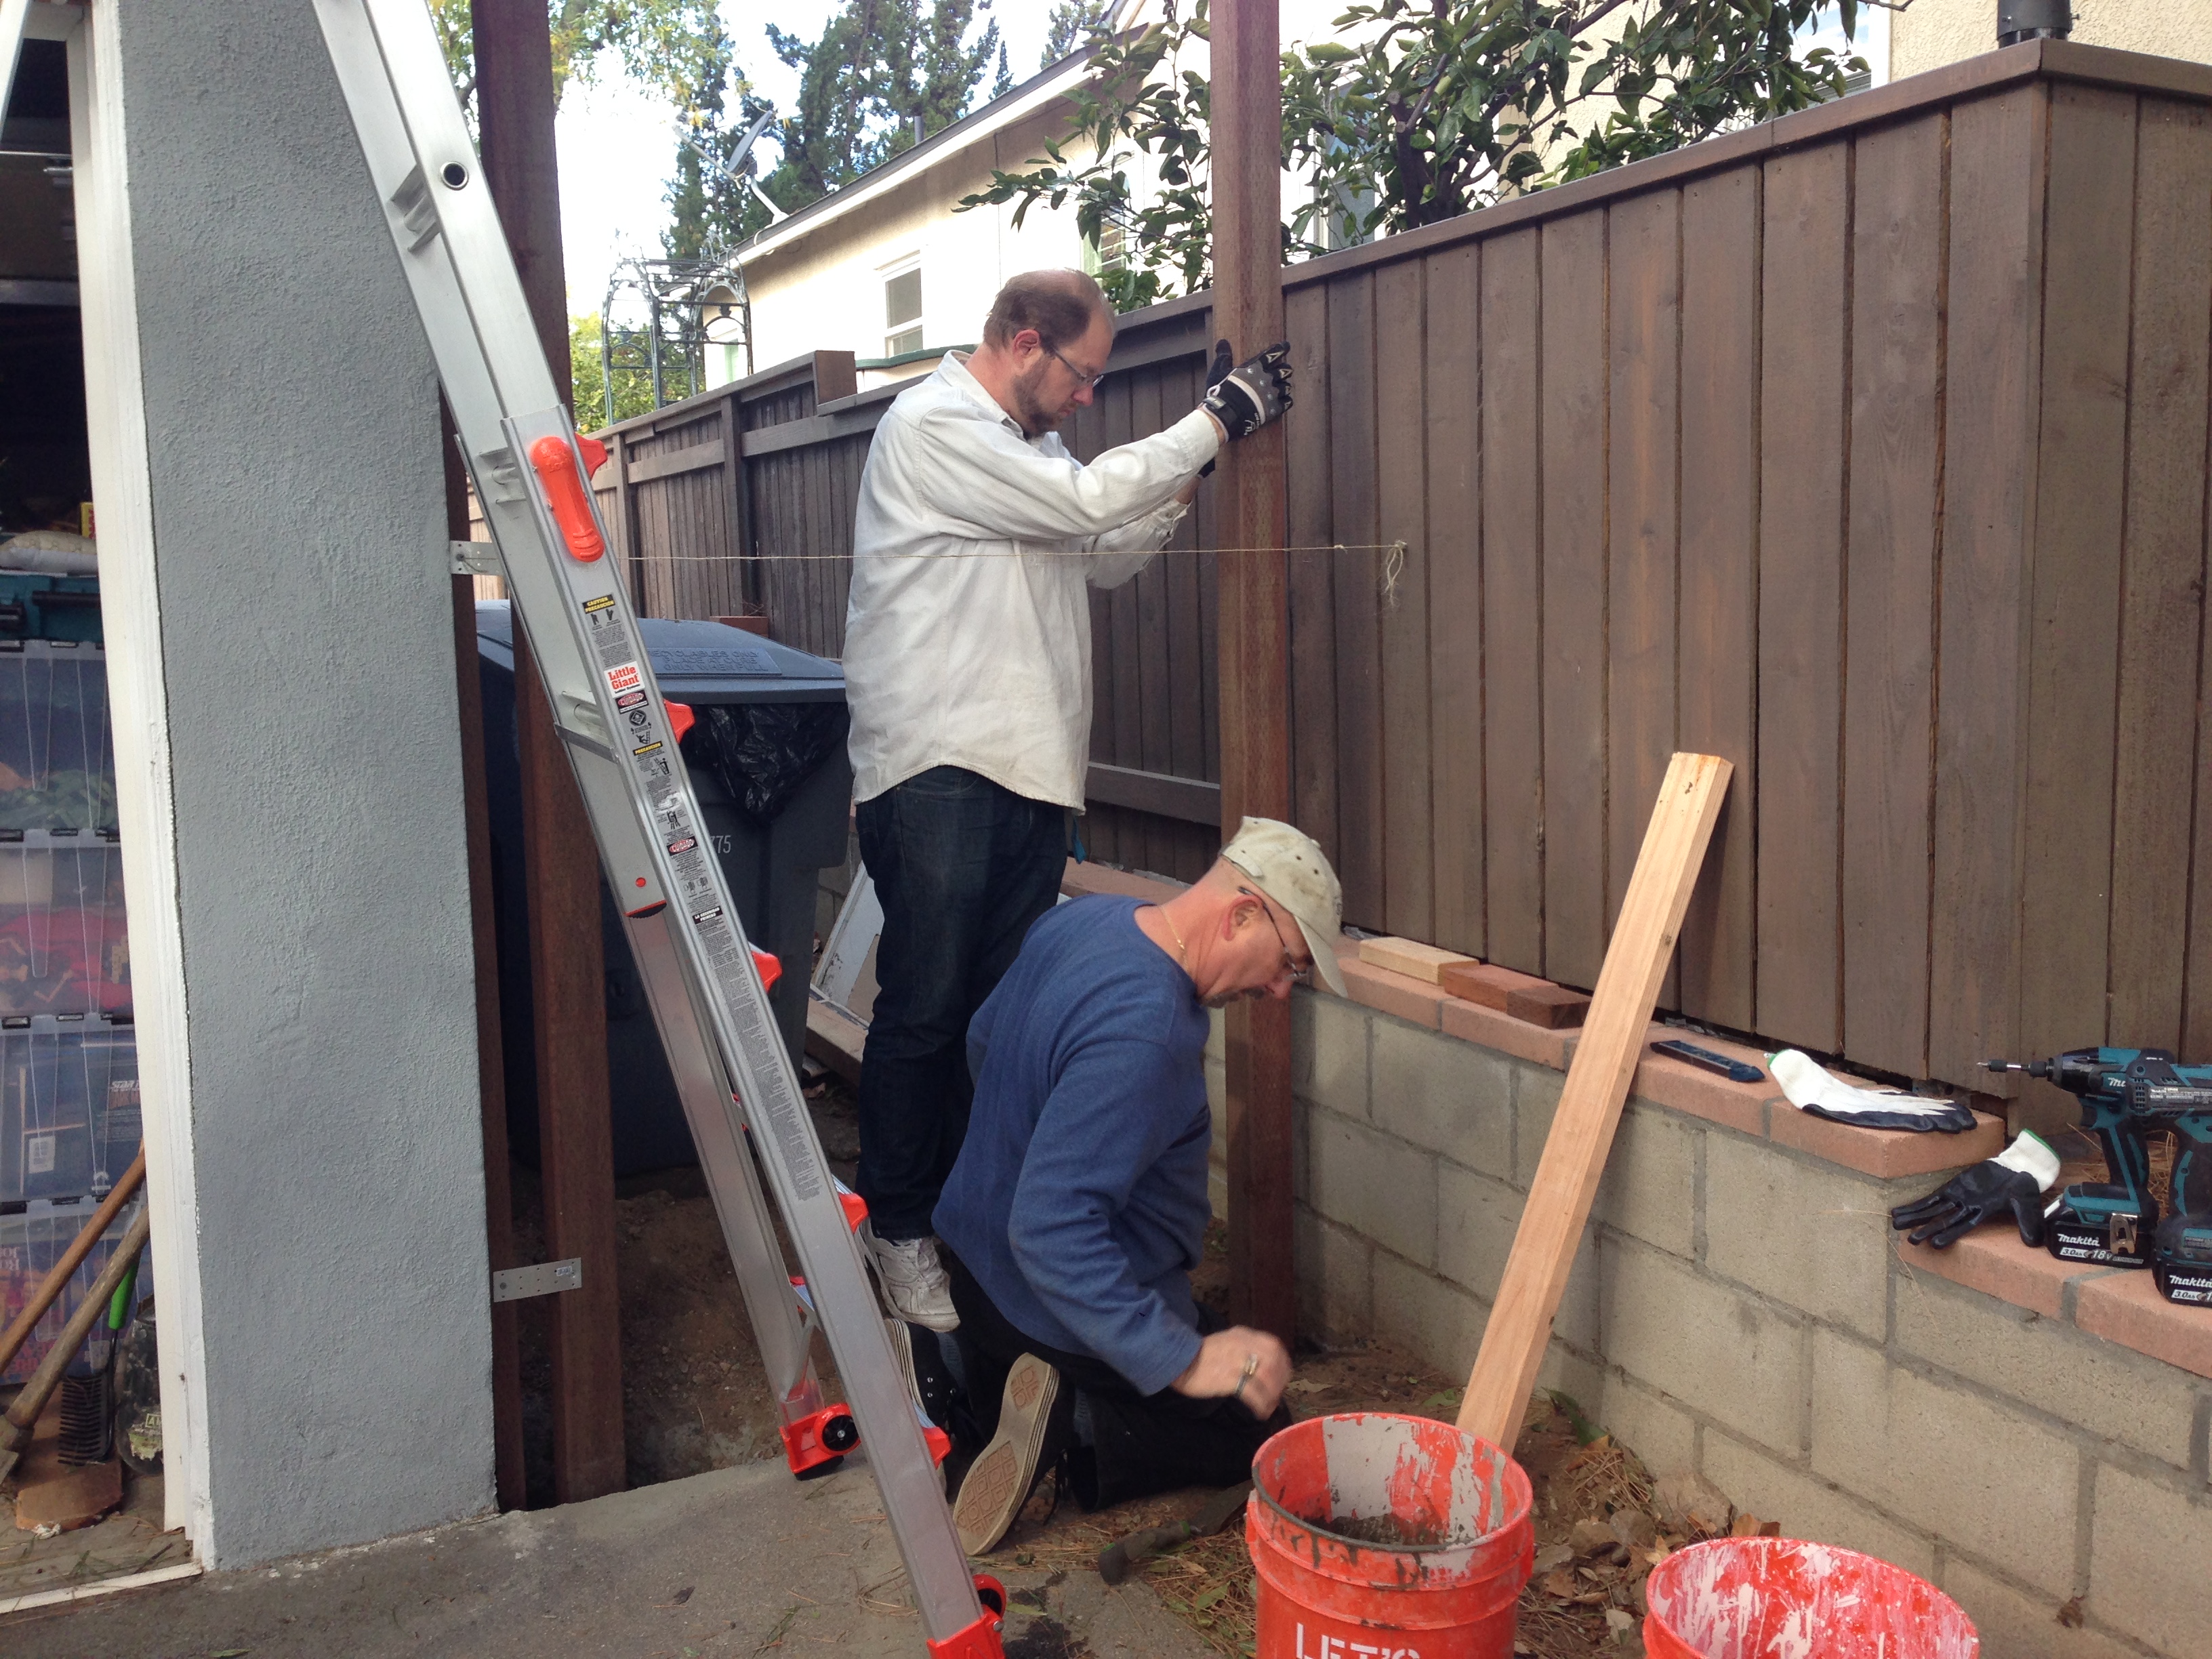
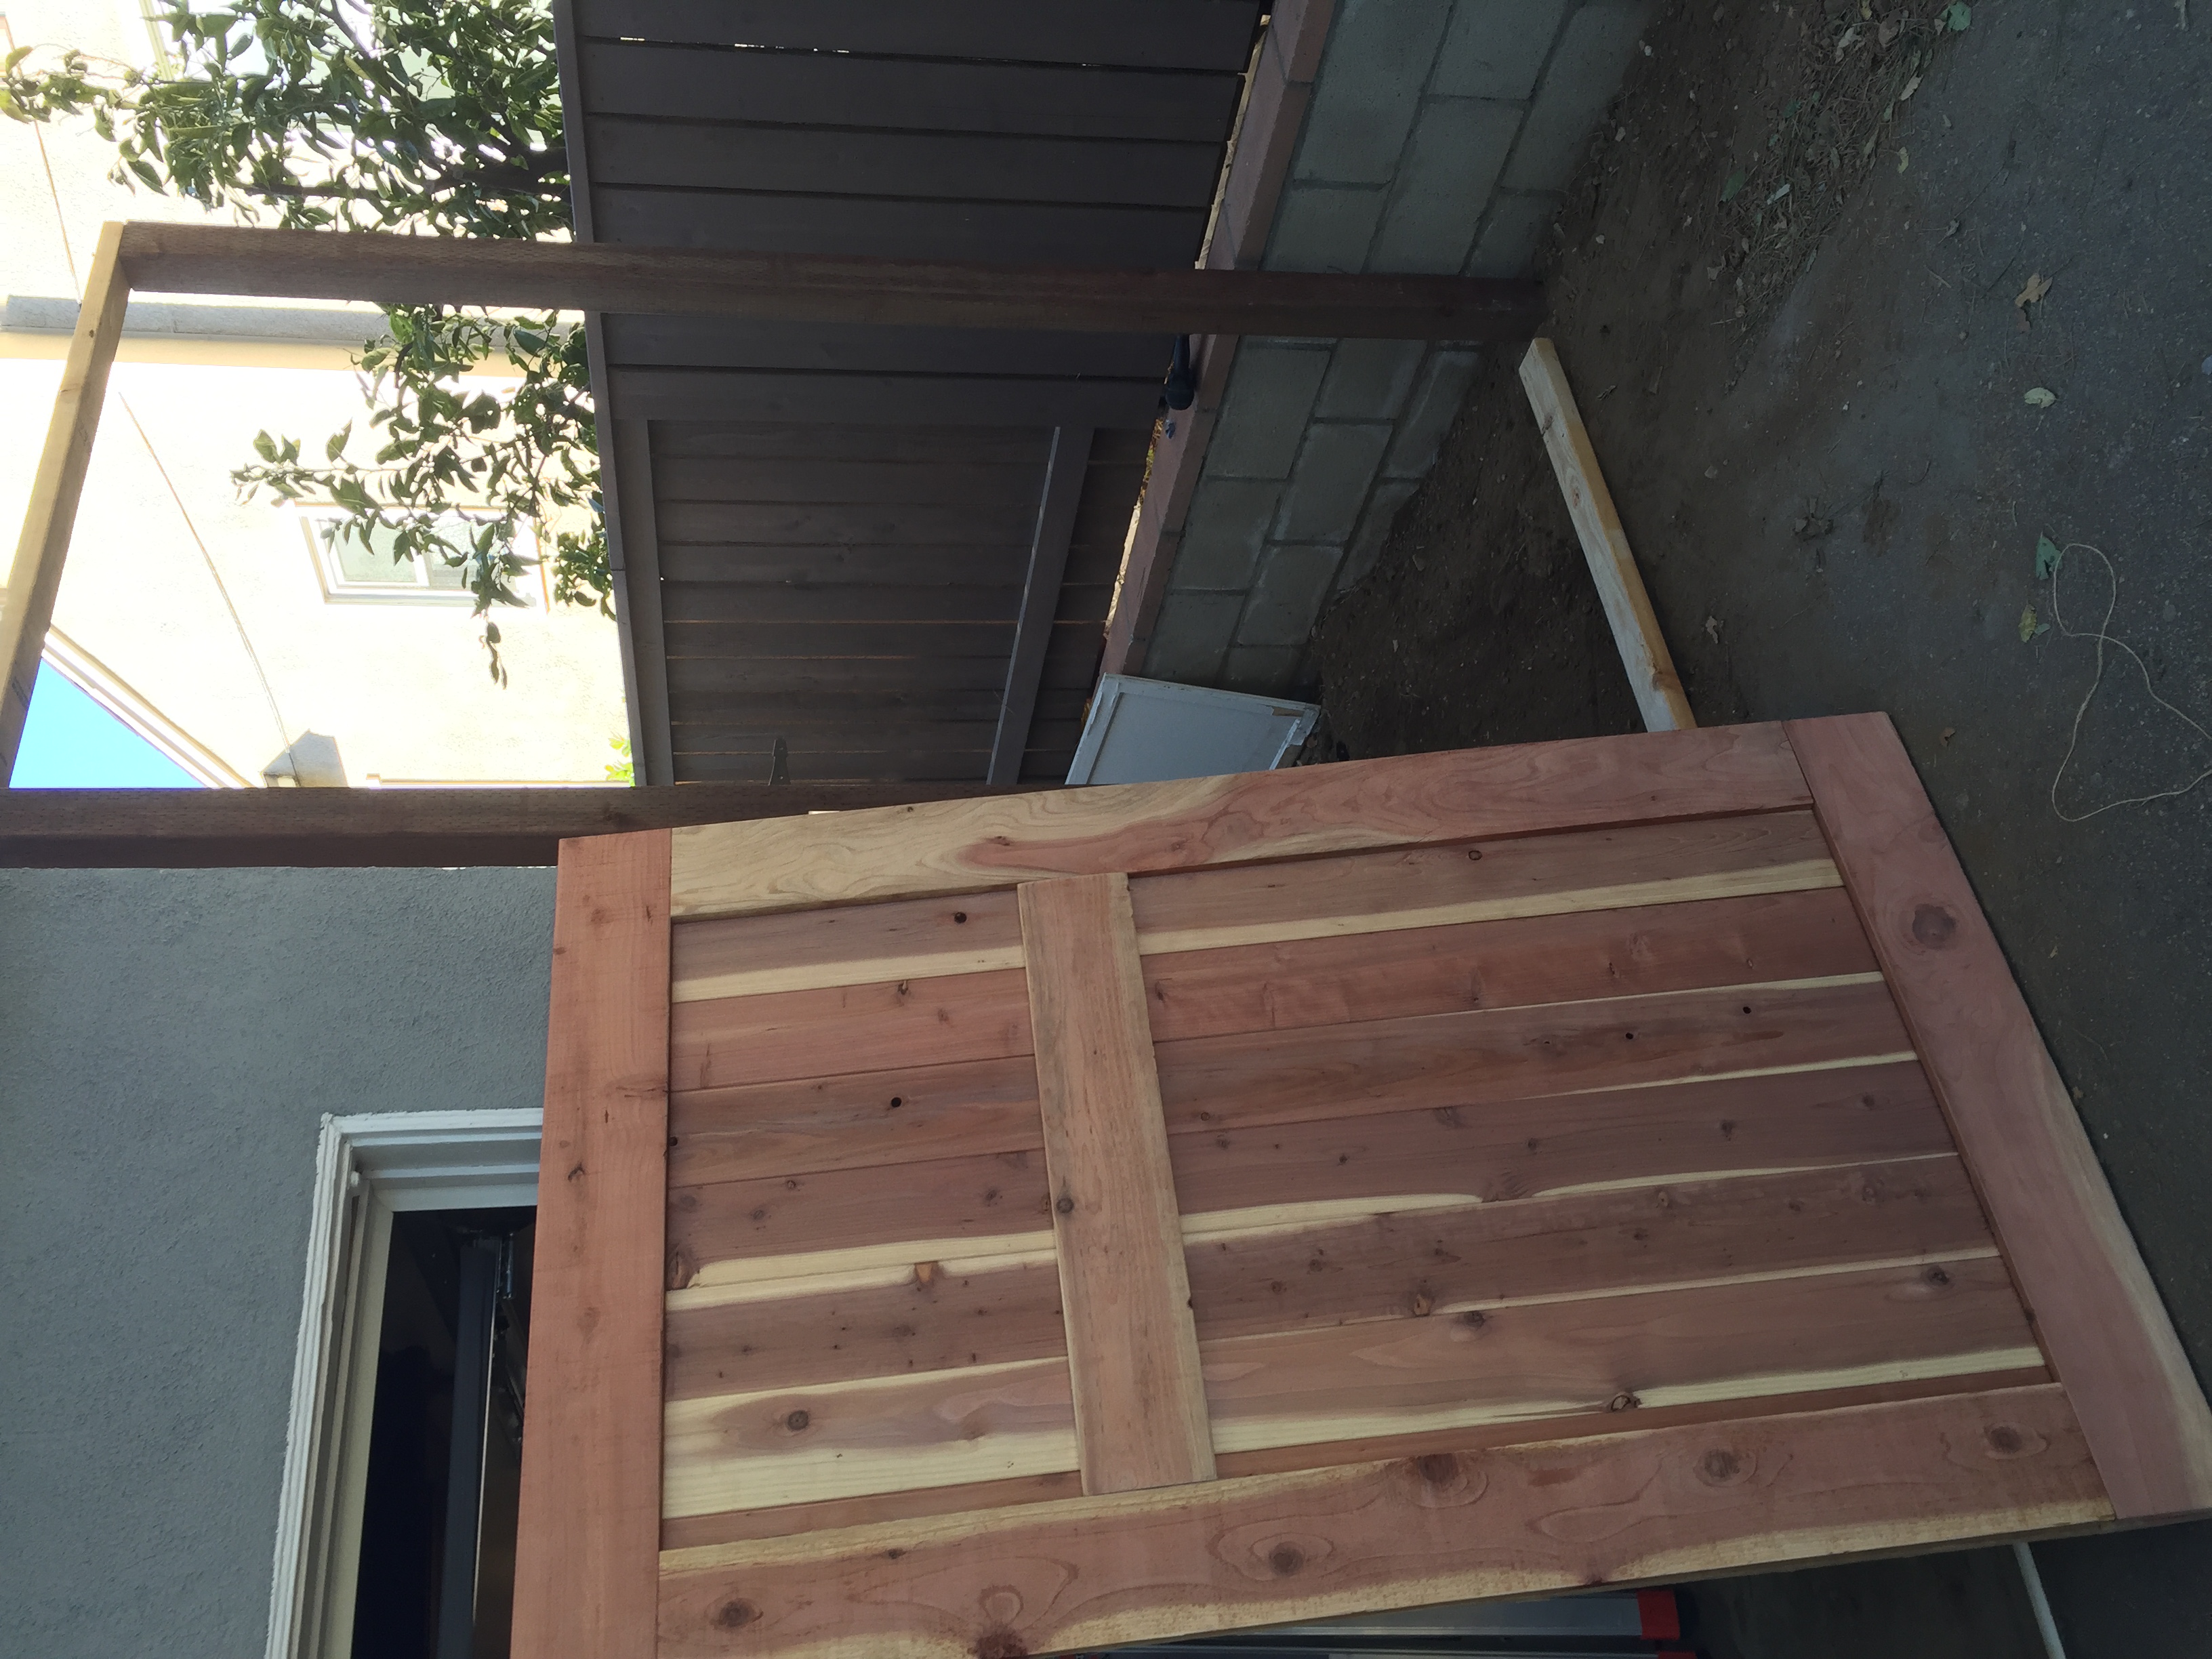
Step 2: Setting the Post
A gate is only as good as the post it hangs on. We used a string line to ensure alignment with the existing fence and set the main 4x4 post in concrete, checking for plumb constantly as the mix cured.
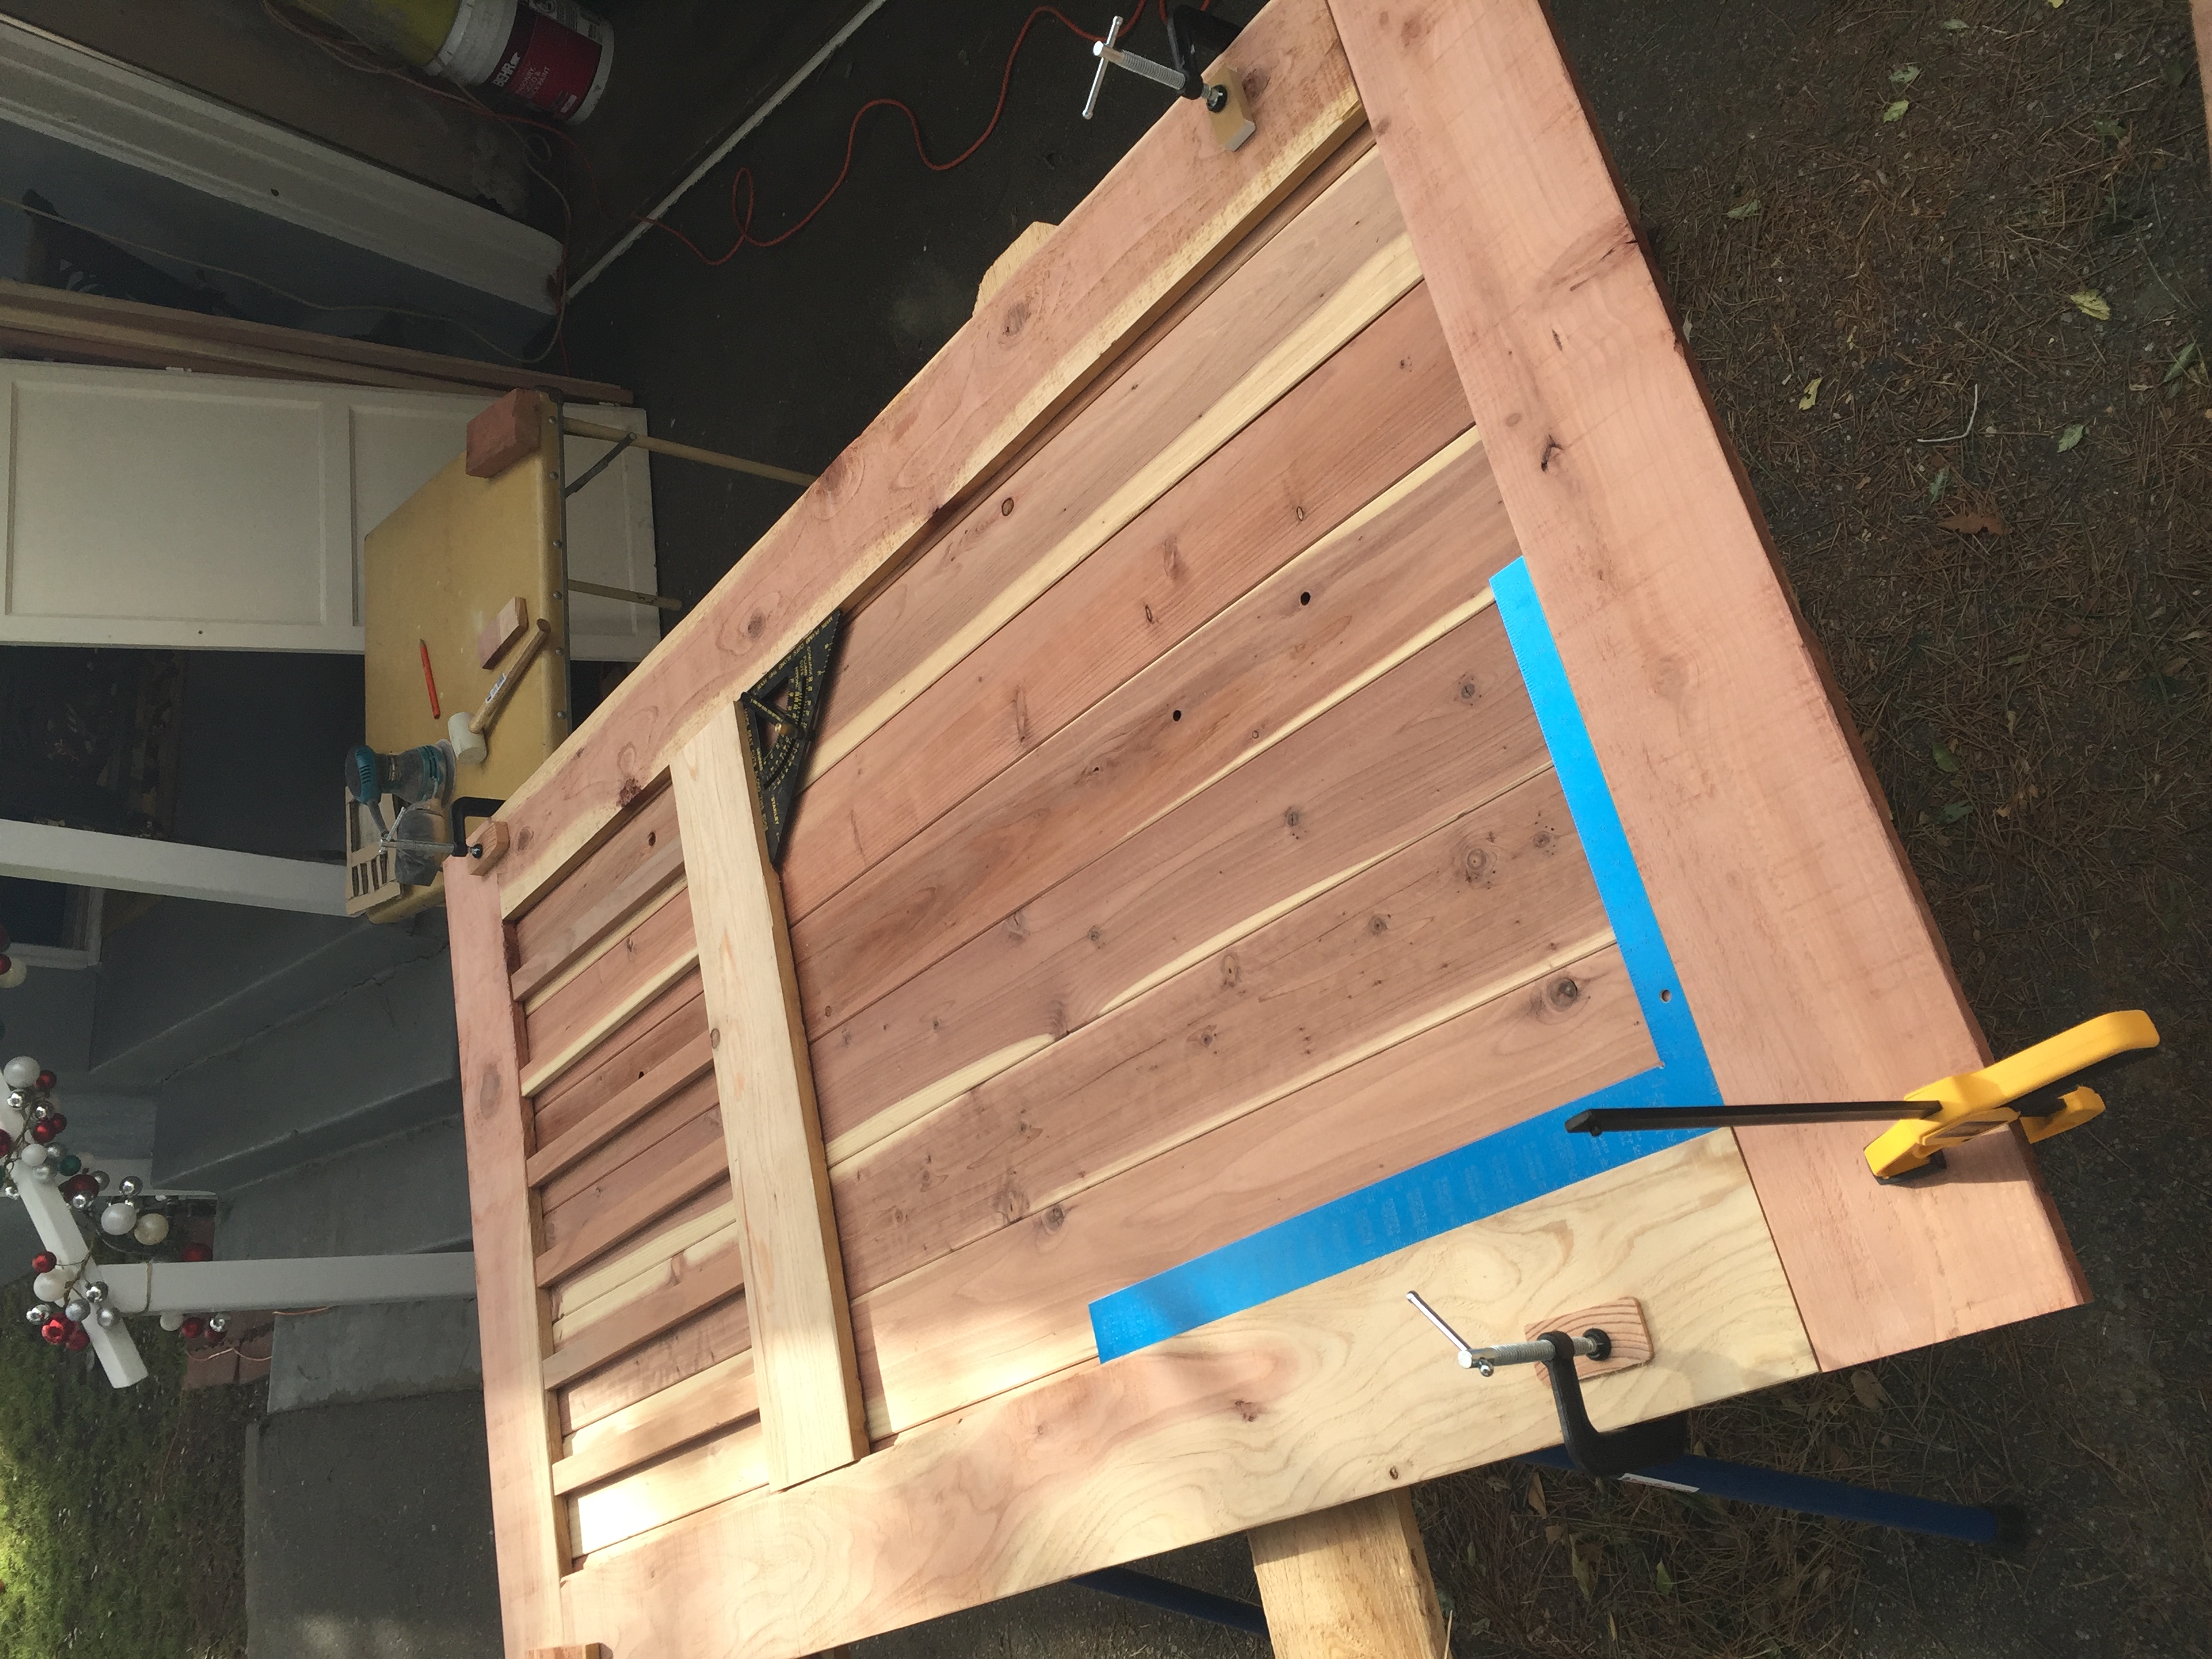
Step 3: Squaring the Frame
With the cedar boards cut, I laid everything out on sawhorses. I used a large framing square and clamps to ensure the outer frame was perfectly 90 degrees. Any slight error here would be amplified once the gate was hung.
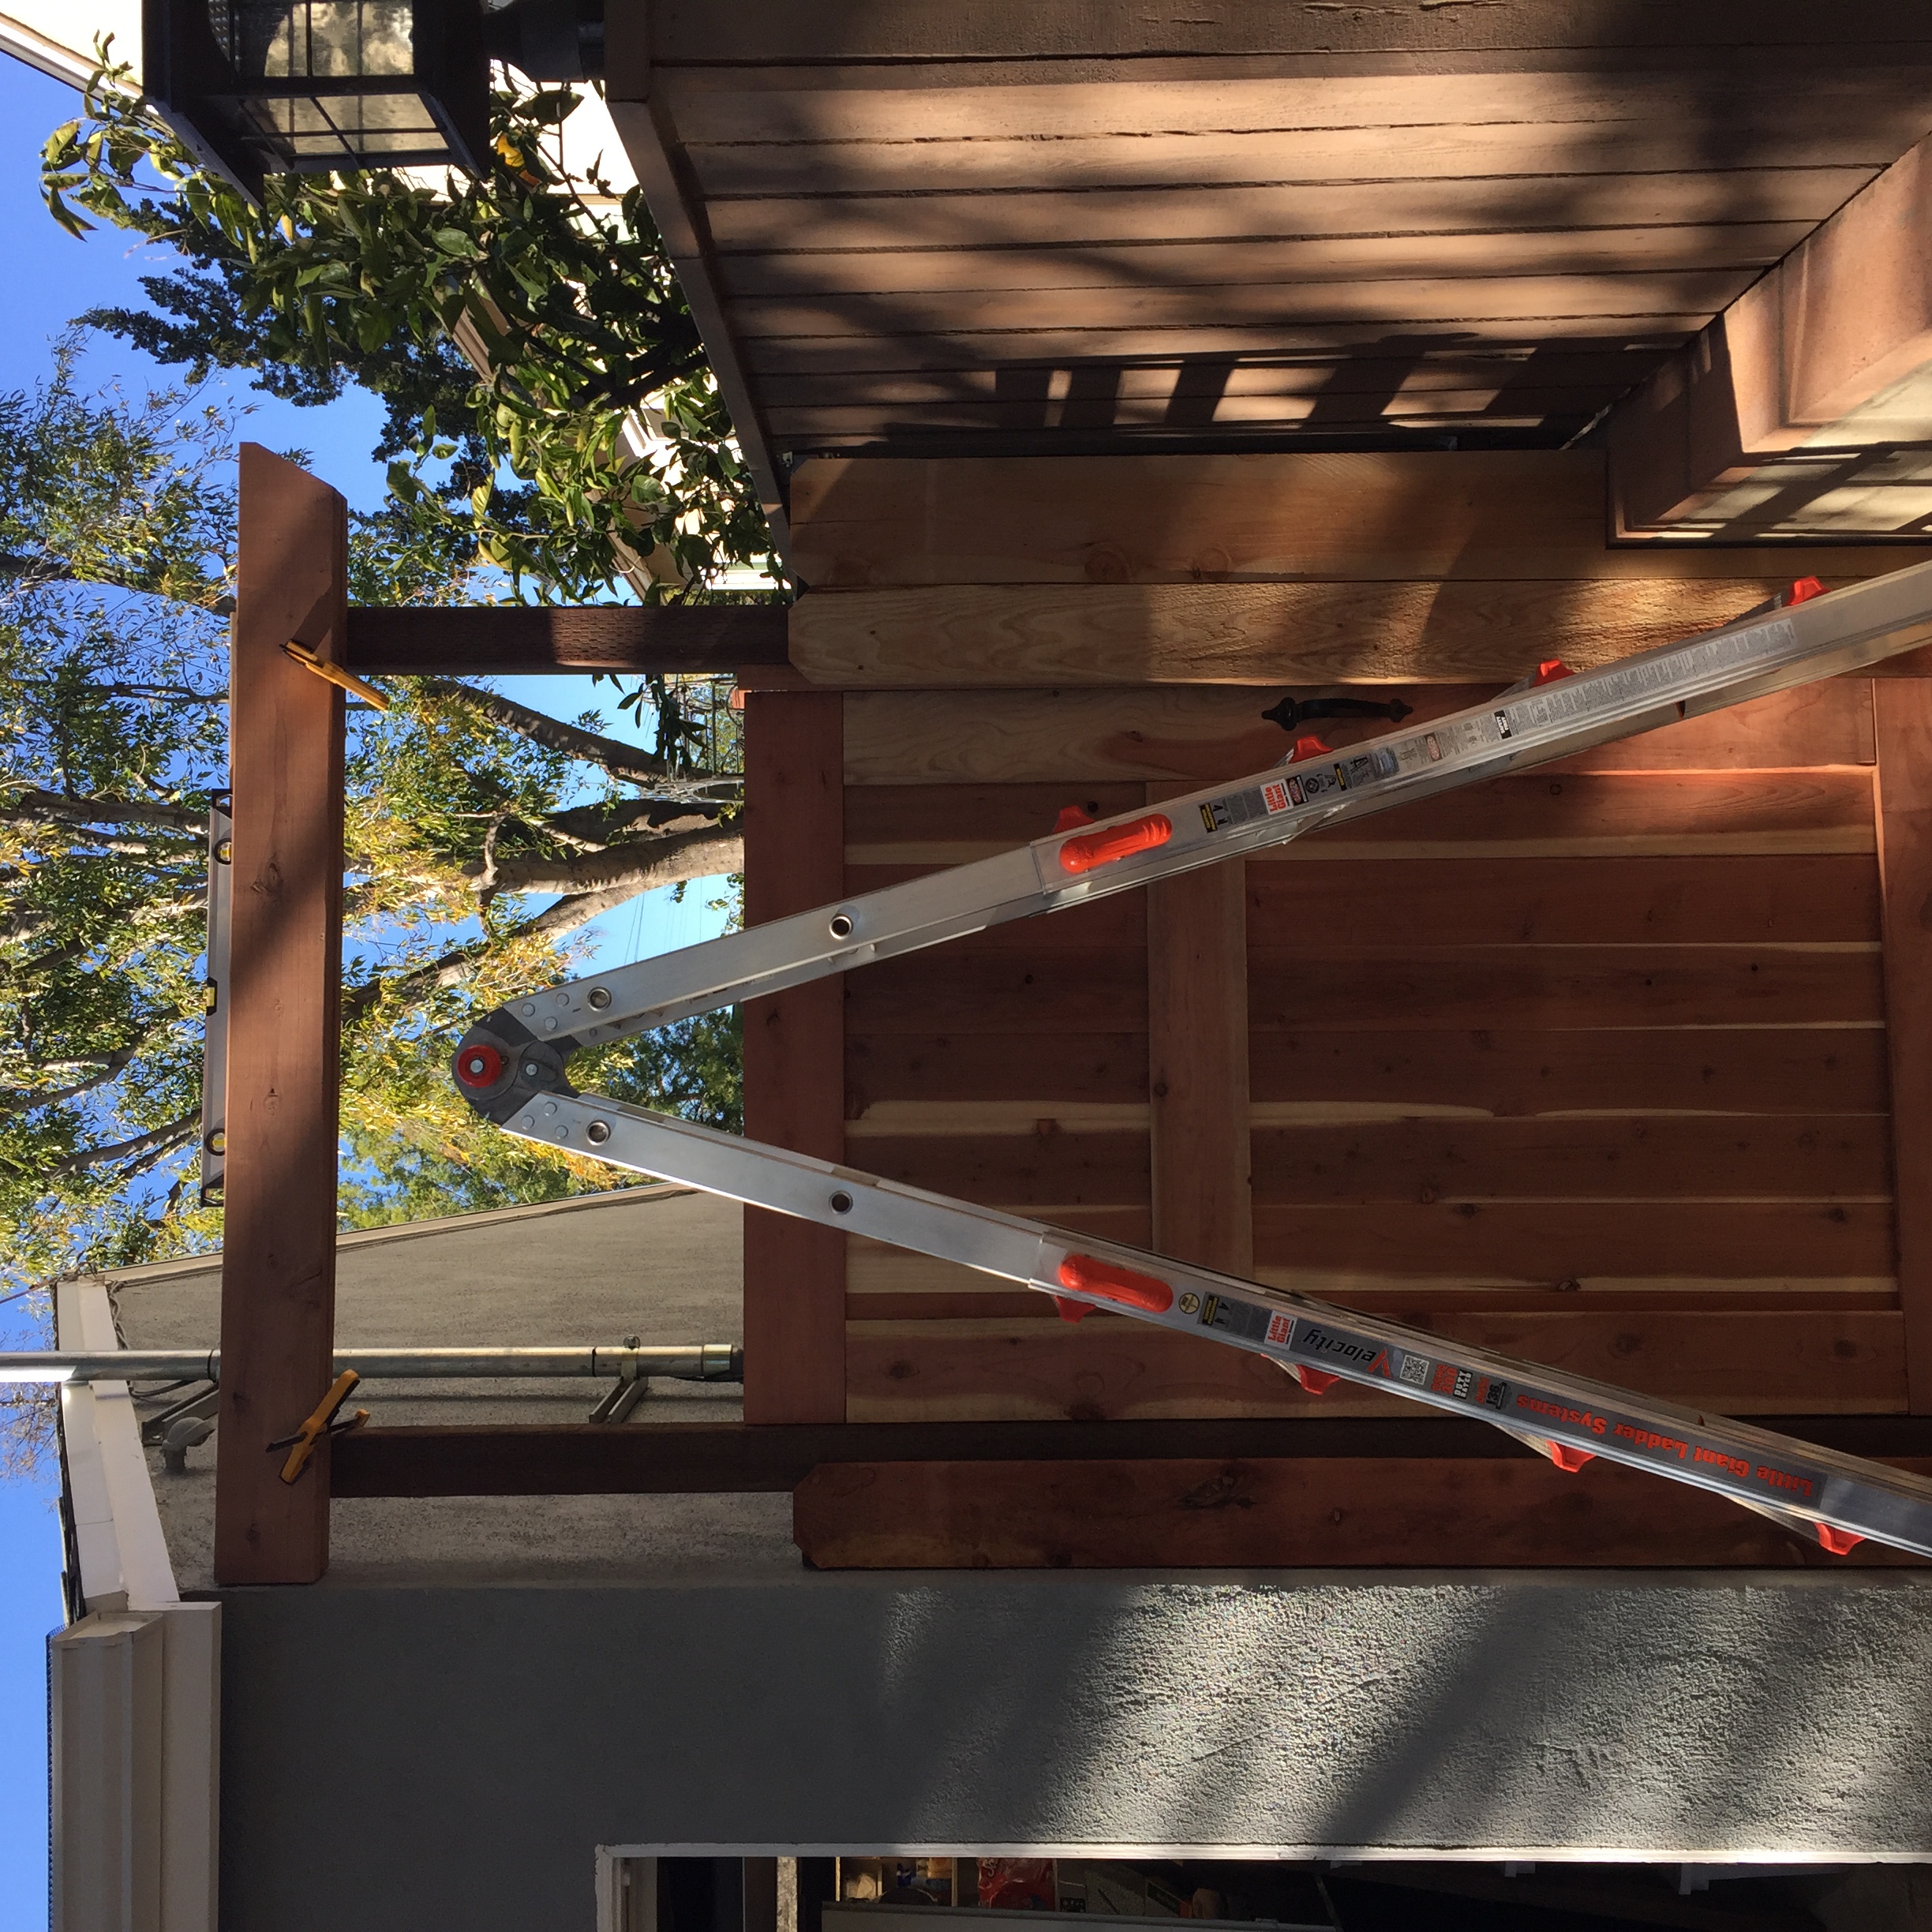
Step 4: Hanging & Leveling
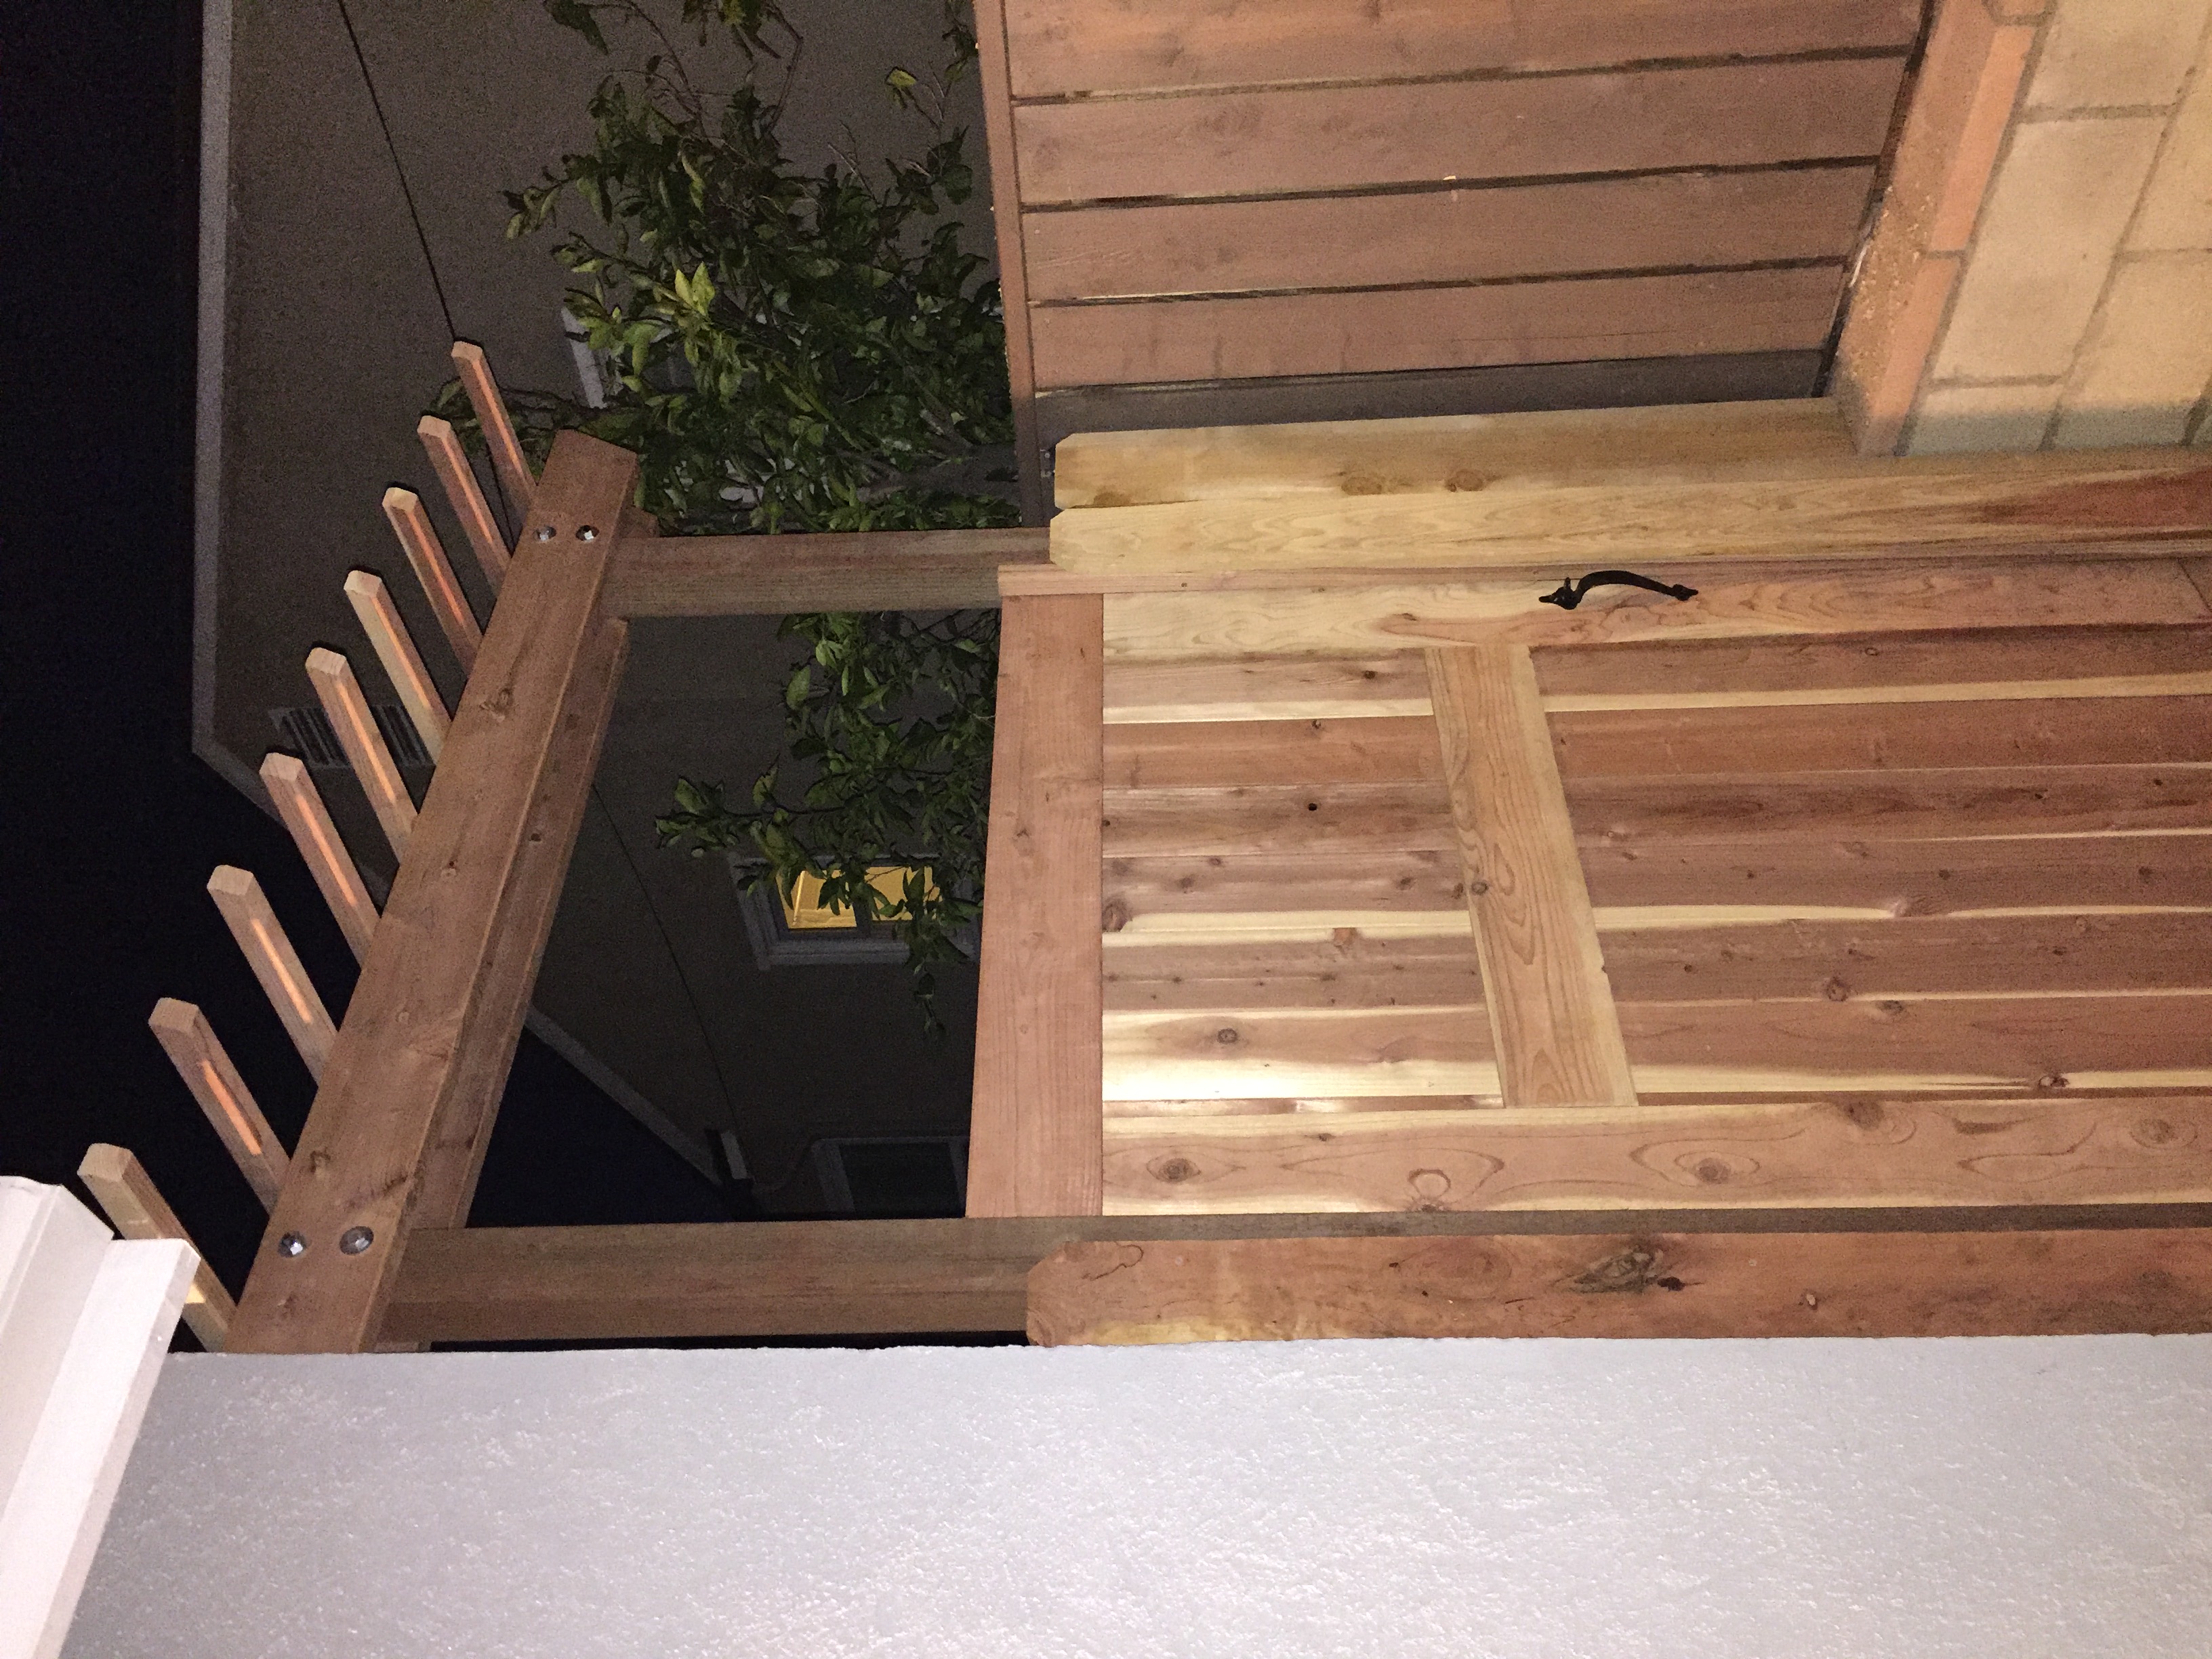
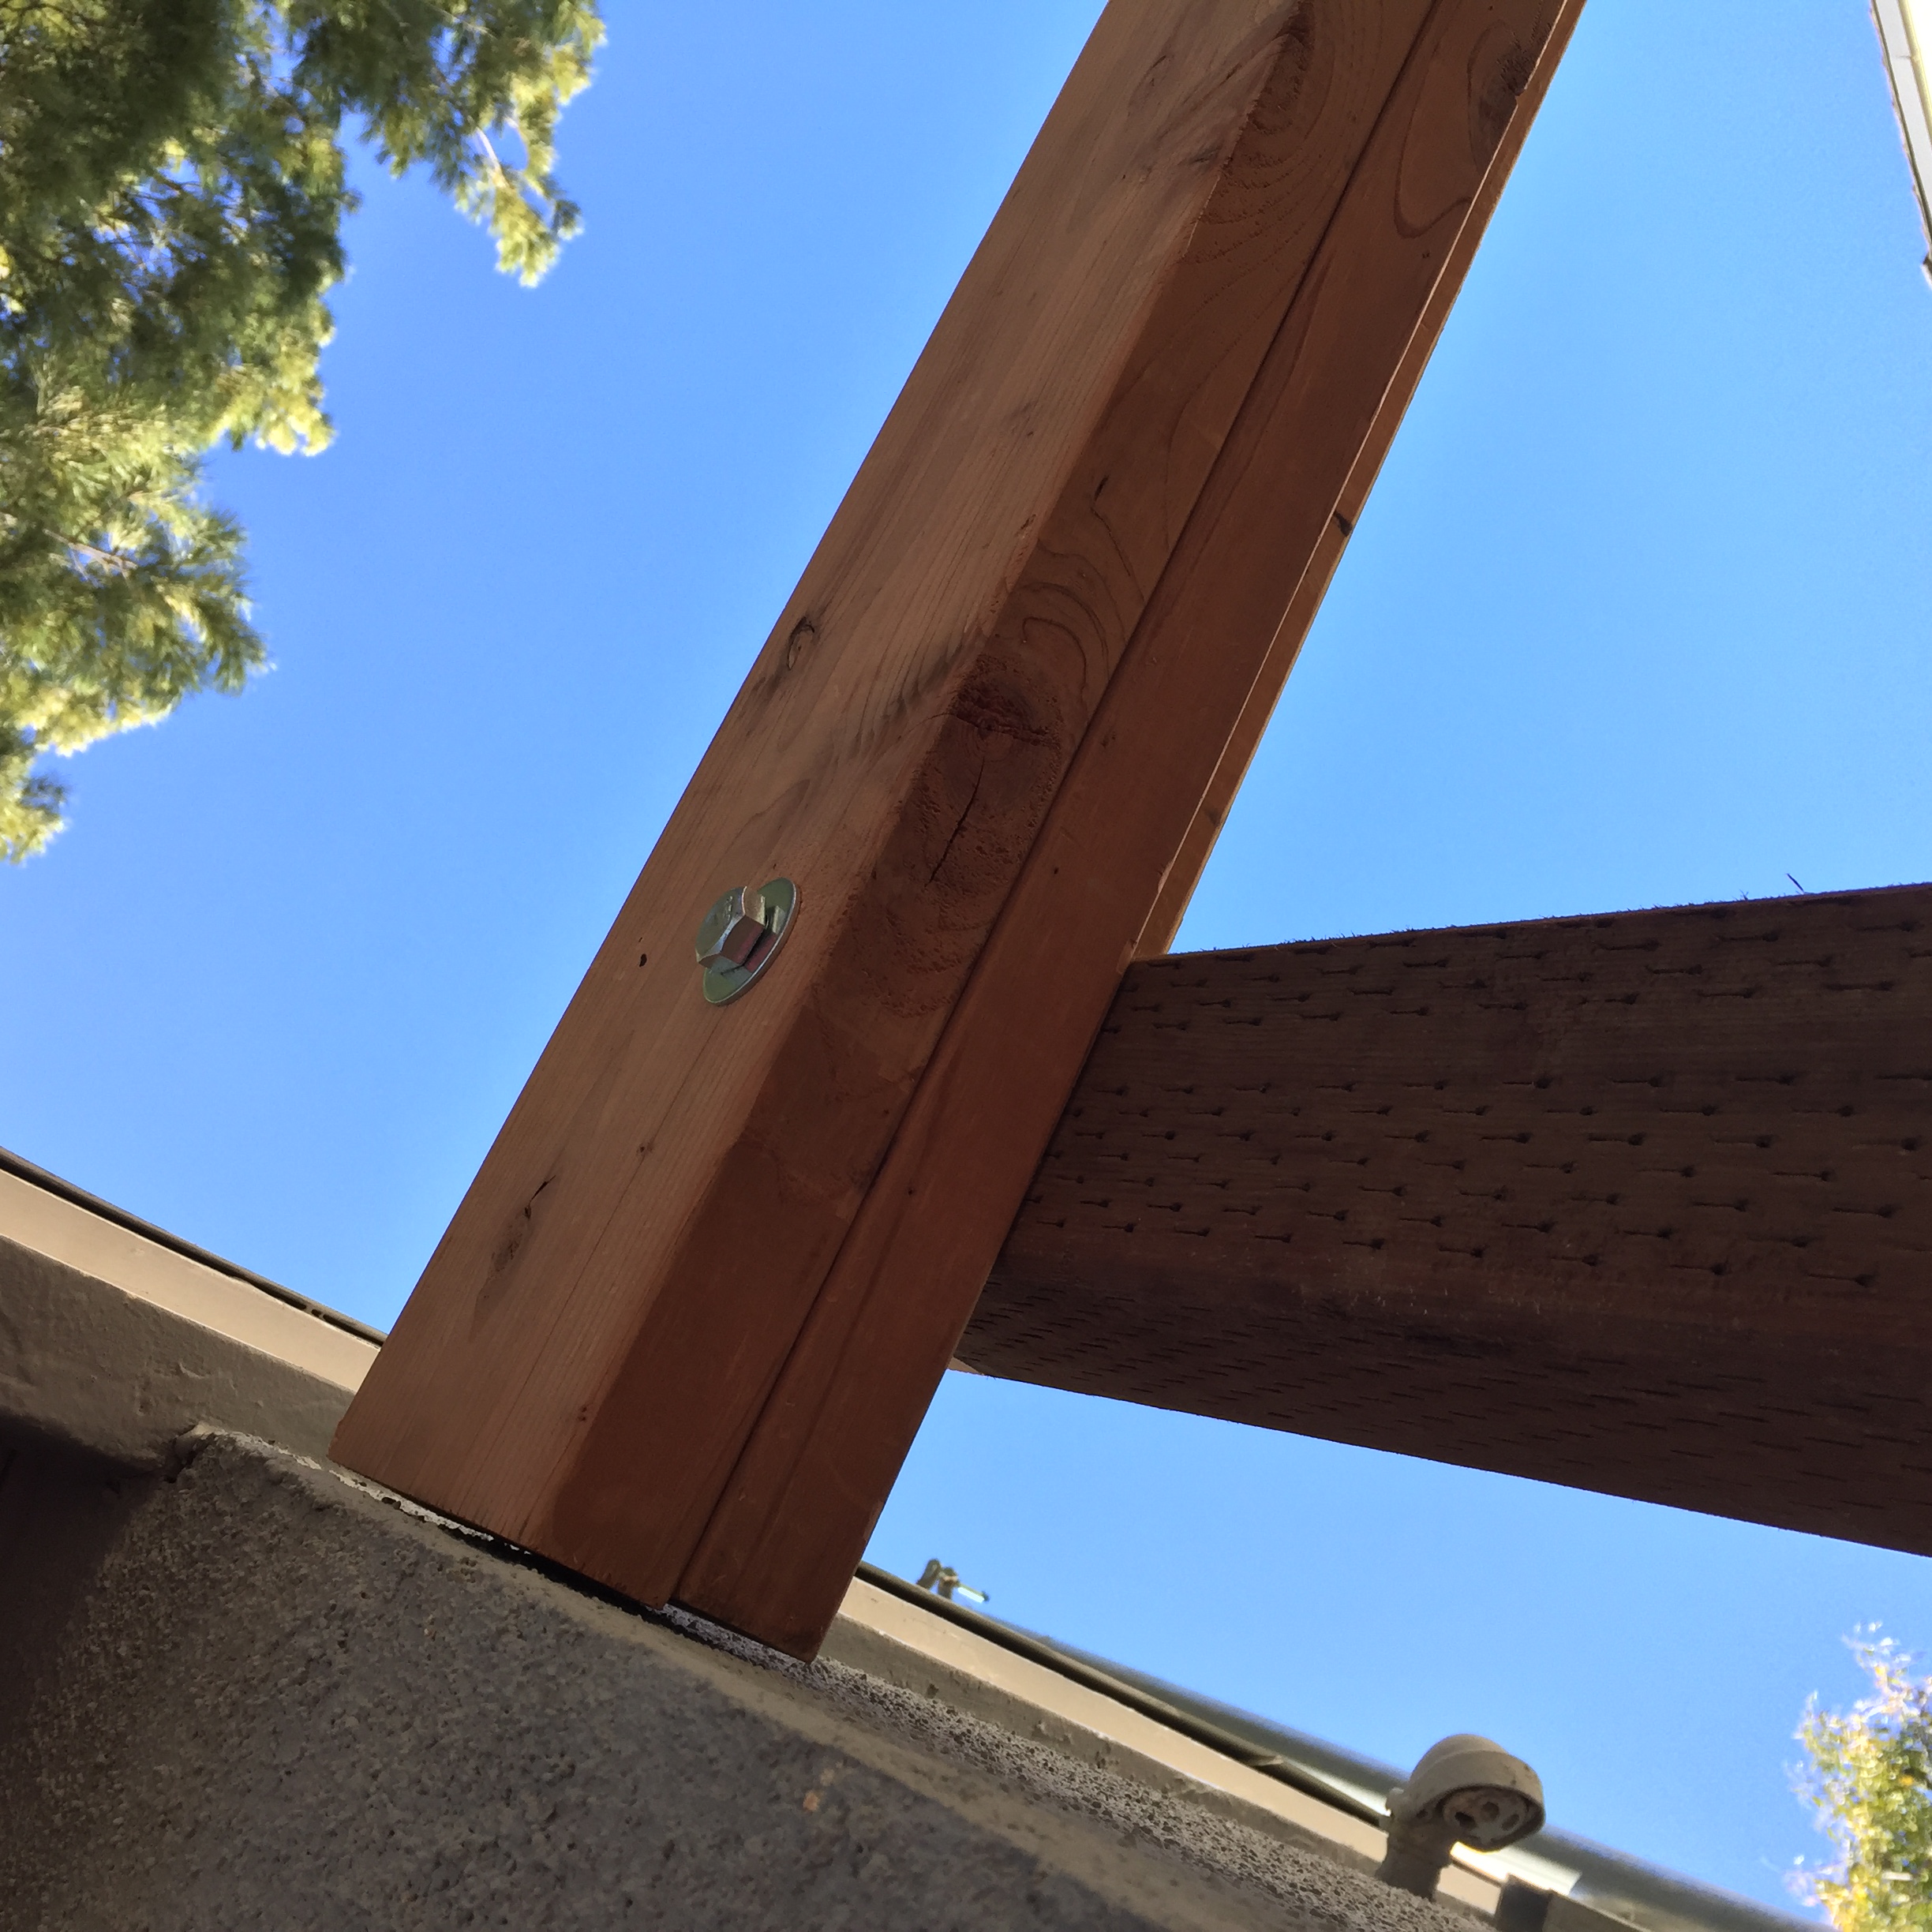
Once the gate was ready to hang, I focused on the overhead arbor. This provides significant structural stability. I used a level across the top beam to ensure it was visually aligned with the garage and house.
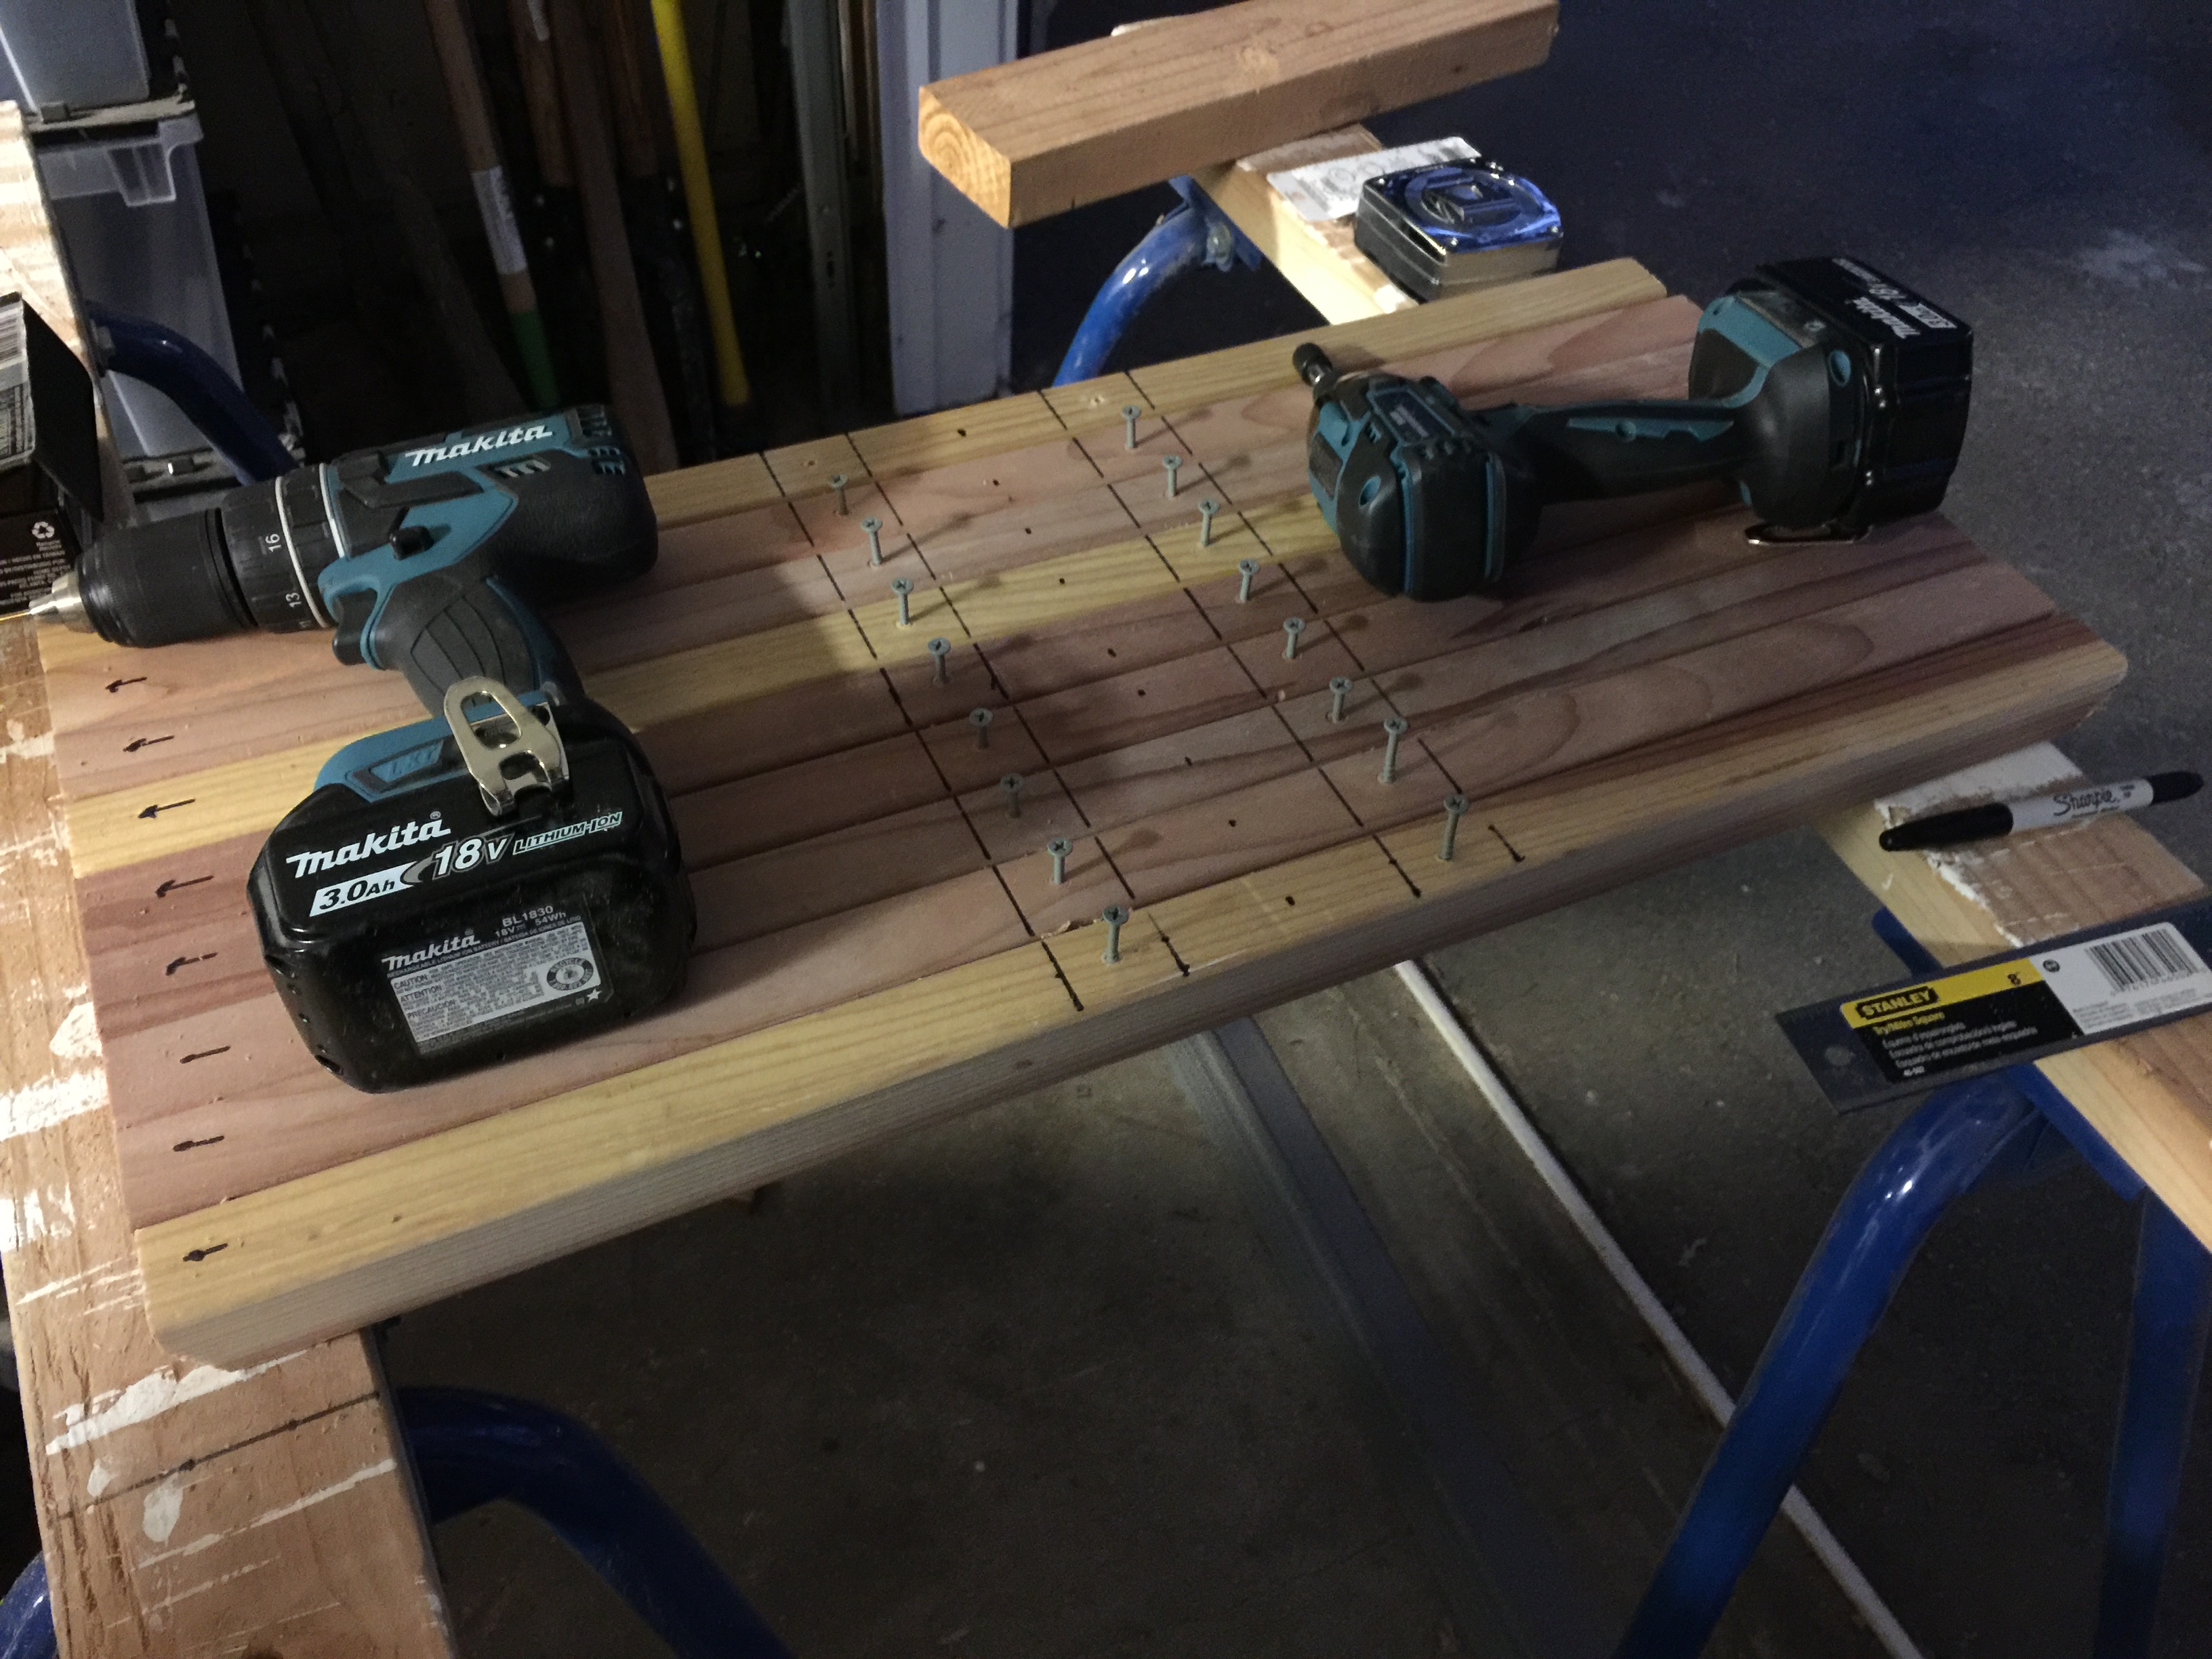
Step 5: Pre-loading for Efficiency
To make the installation on the ladder safer and more efficient, I measured out and pre-drilled all screw locations while the boards were still on the bench. I started the screws just enough so they’d stay put, allowing me to drive them home with one hand while holding the piece in place with the other.
Project Complete
The finished gate provides a secure, beautiful entrance that matches the aesthetic of the home. The use of western red cedar ensures it will weather beautifully over the coming years.
Materials
- One Full Size Sheet of Plywood
- Flat Trim
- Wheels
- Hinges
- Screws & Small Nails
- Curved Trim
- Paint, primer, and brushes
Tools
- Chop Saw
- Drill
- Circular Saw/Buzz Saw
- Measuring Tape
Build Notes
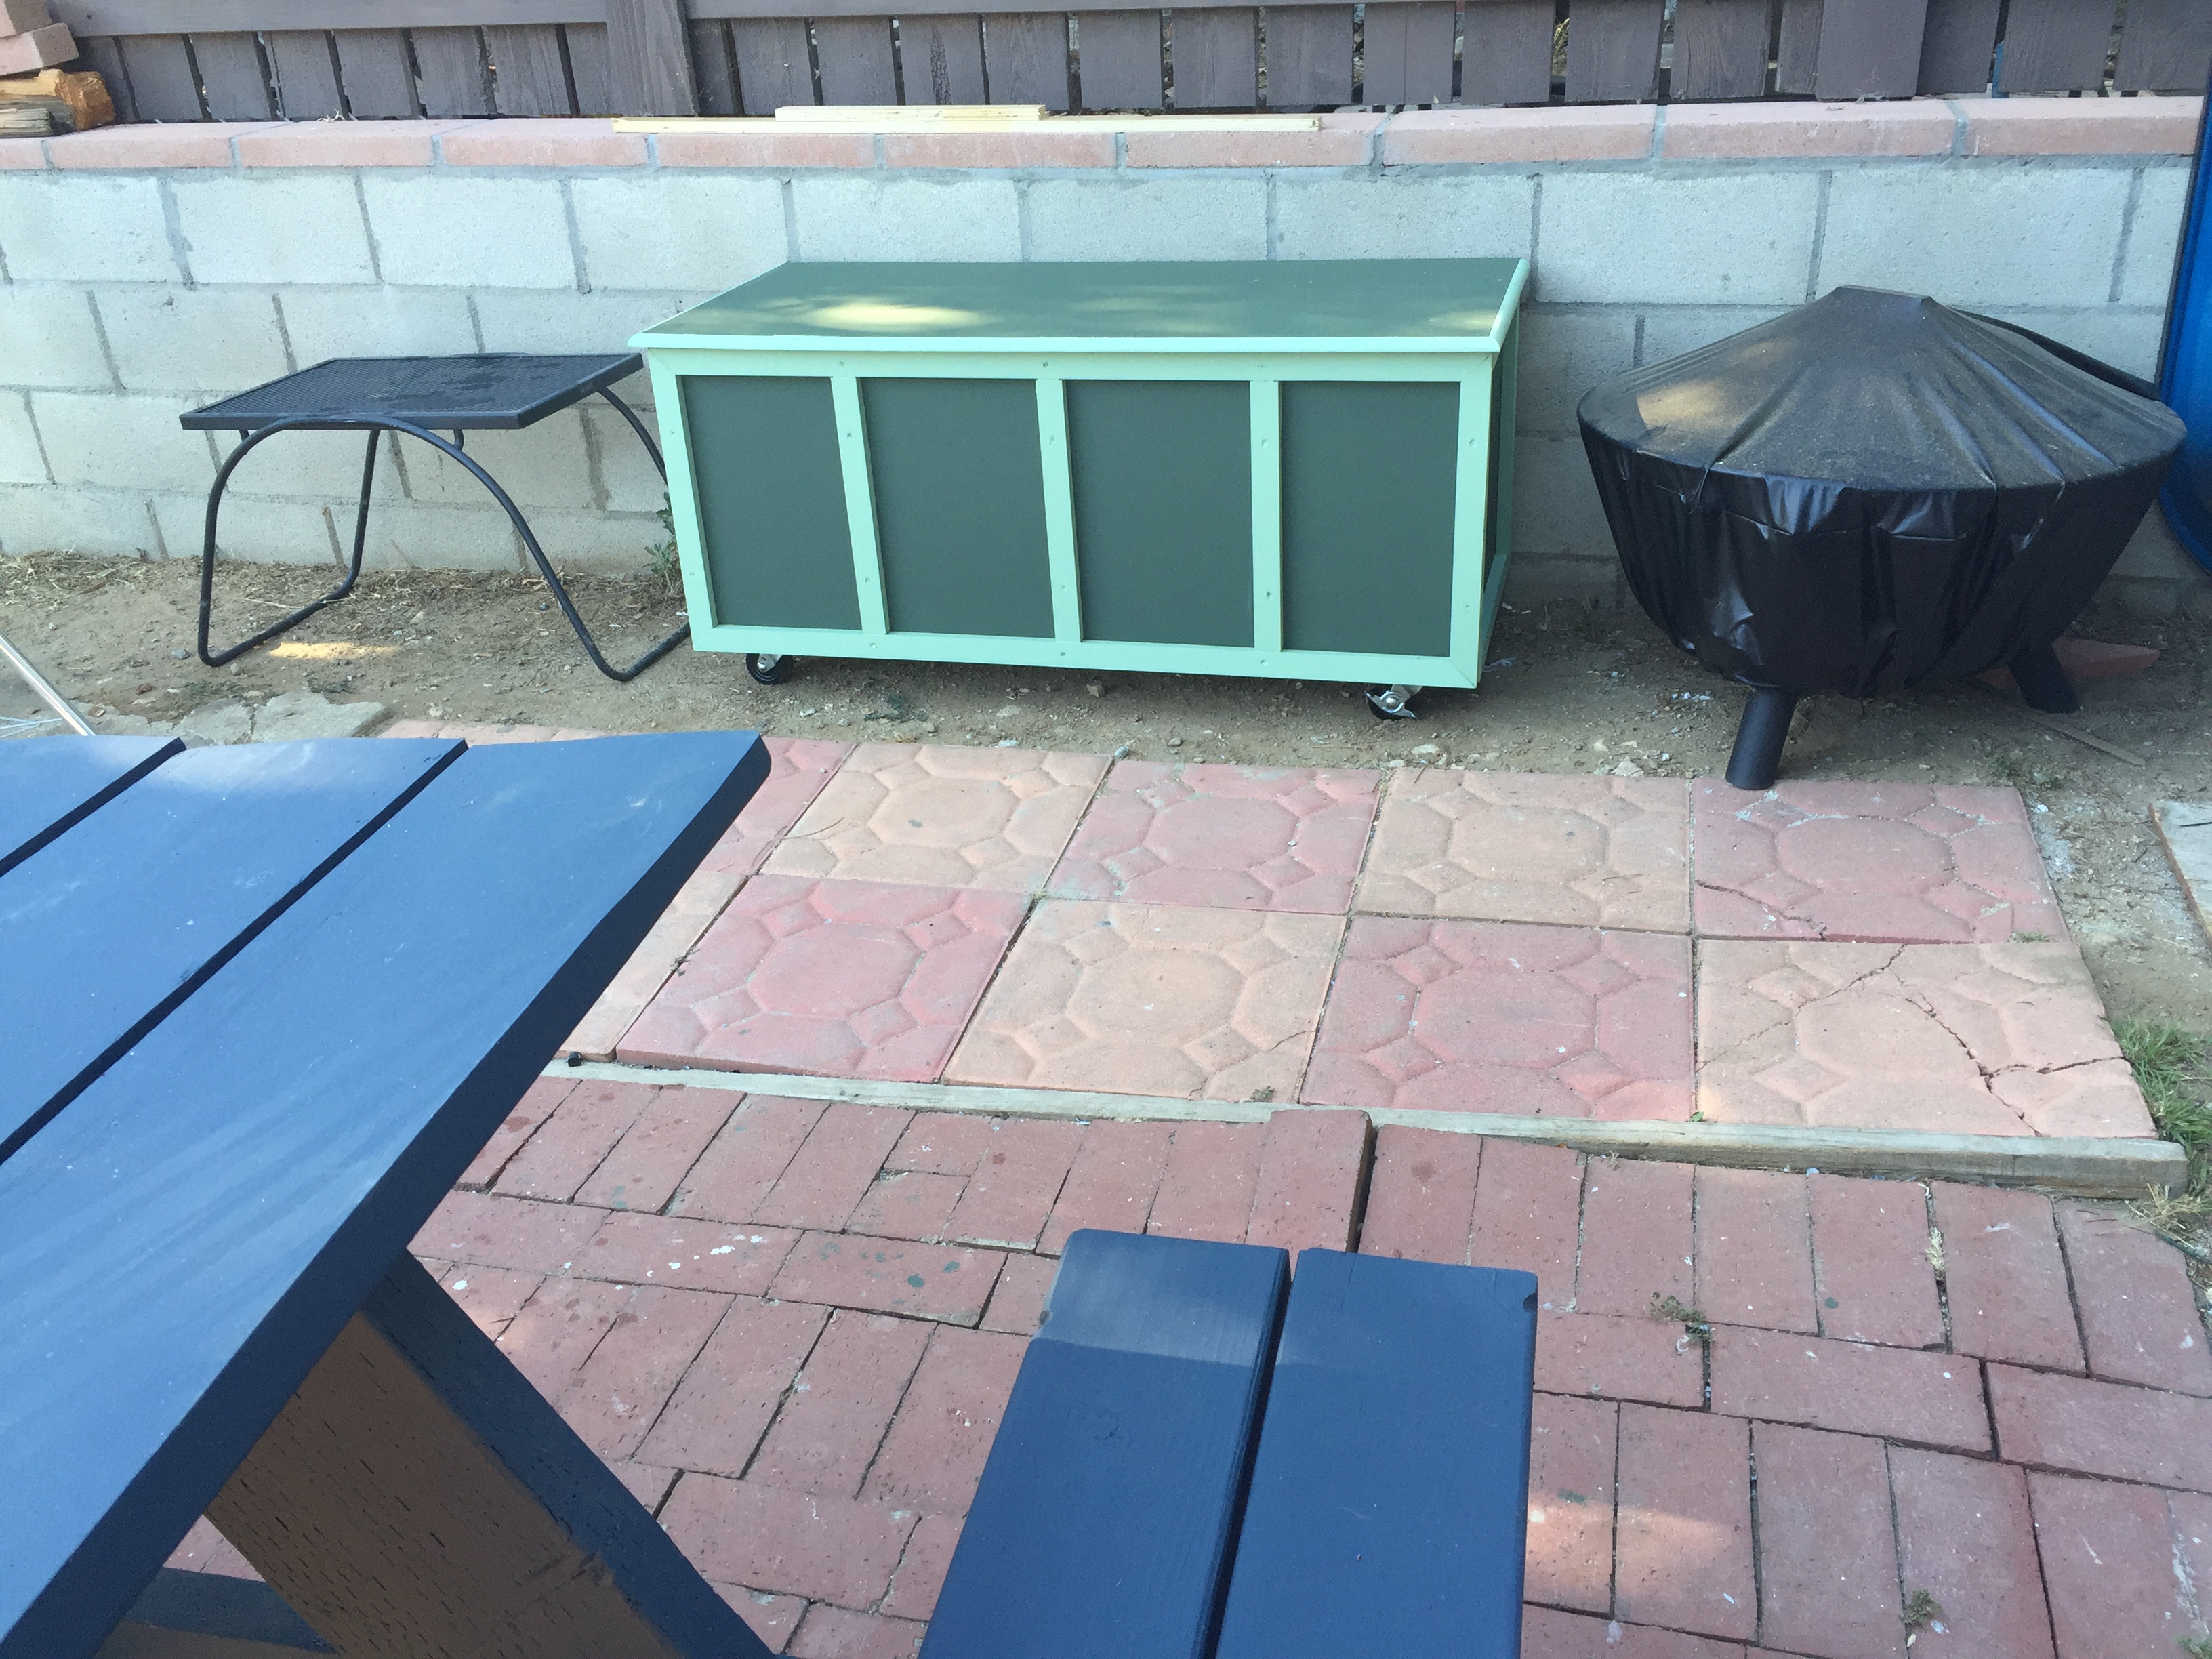
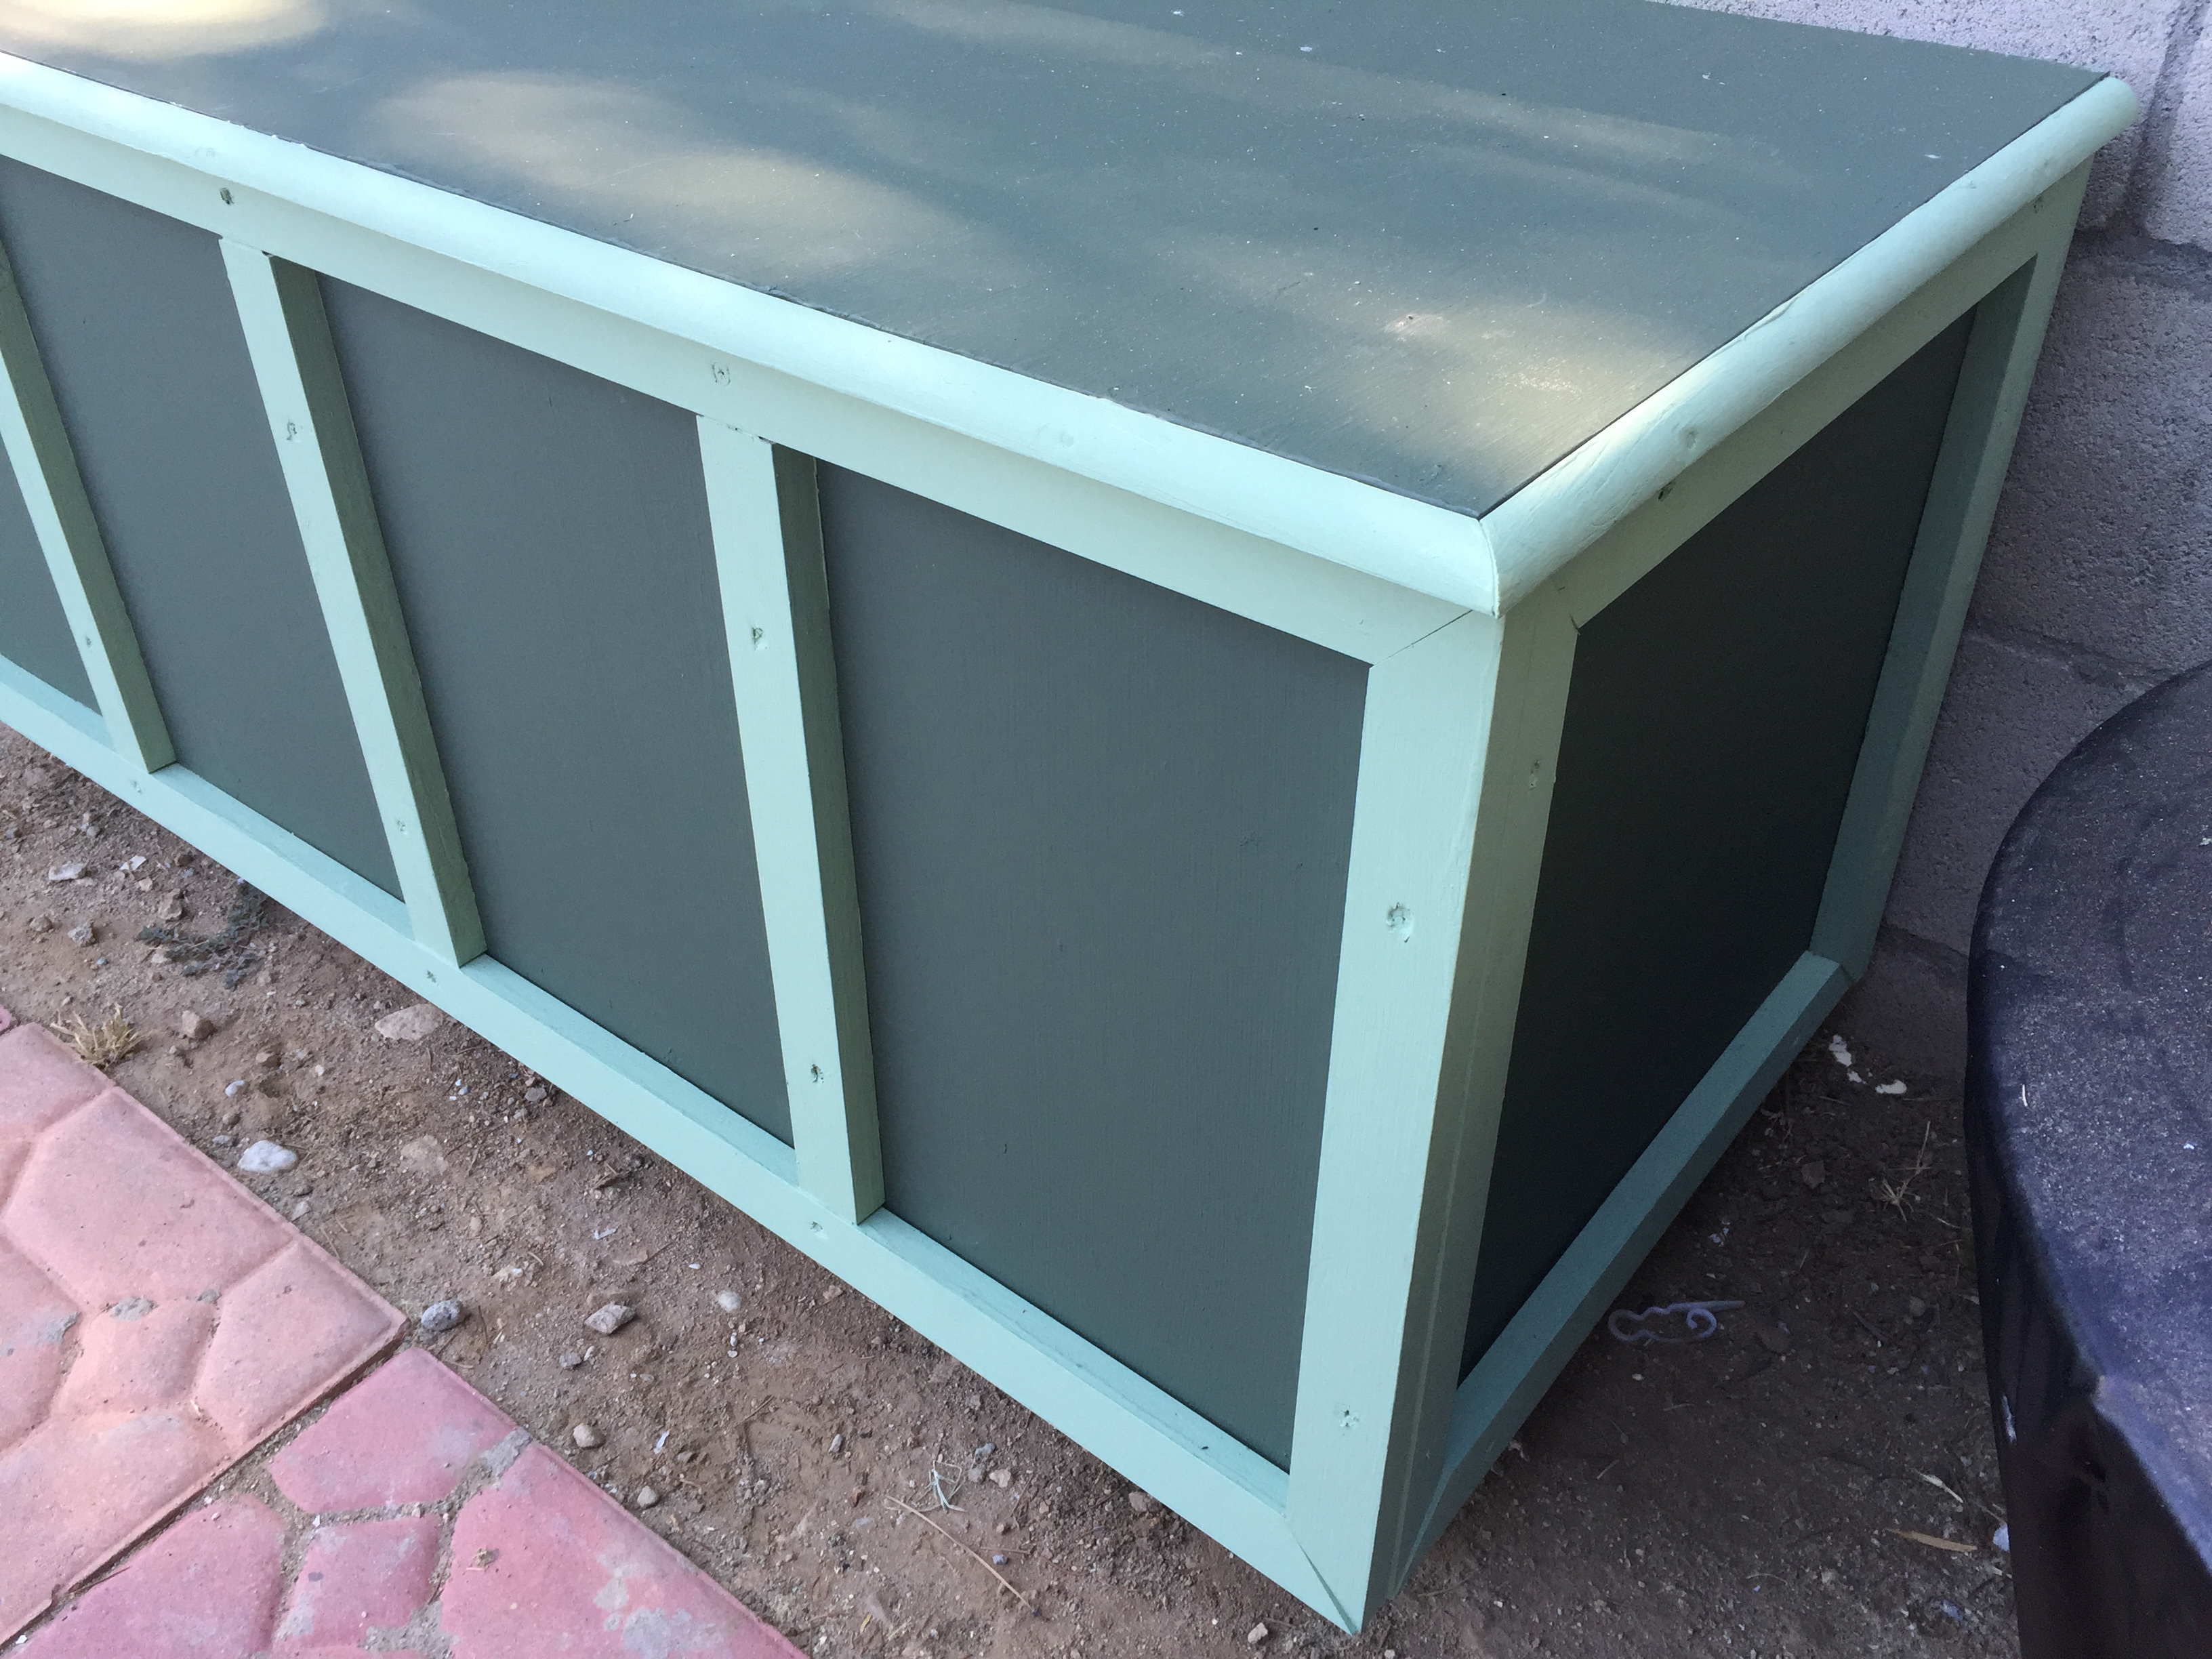
I used the chop saw to cut the trim pieces to size. I primed and then painted all the pieces before assembly.
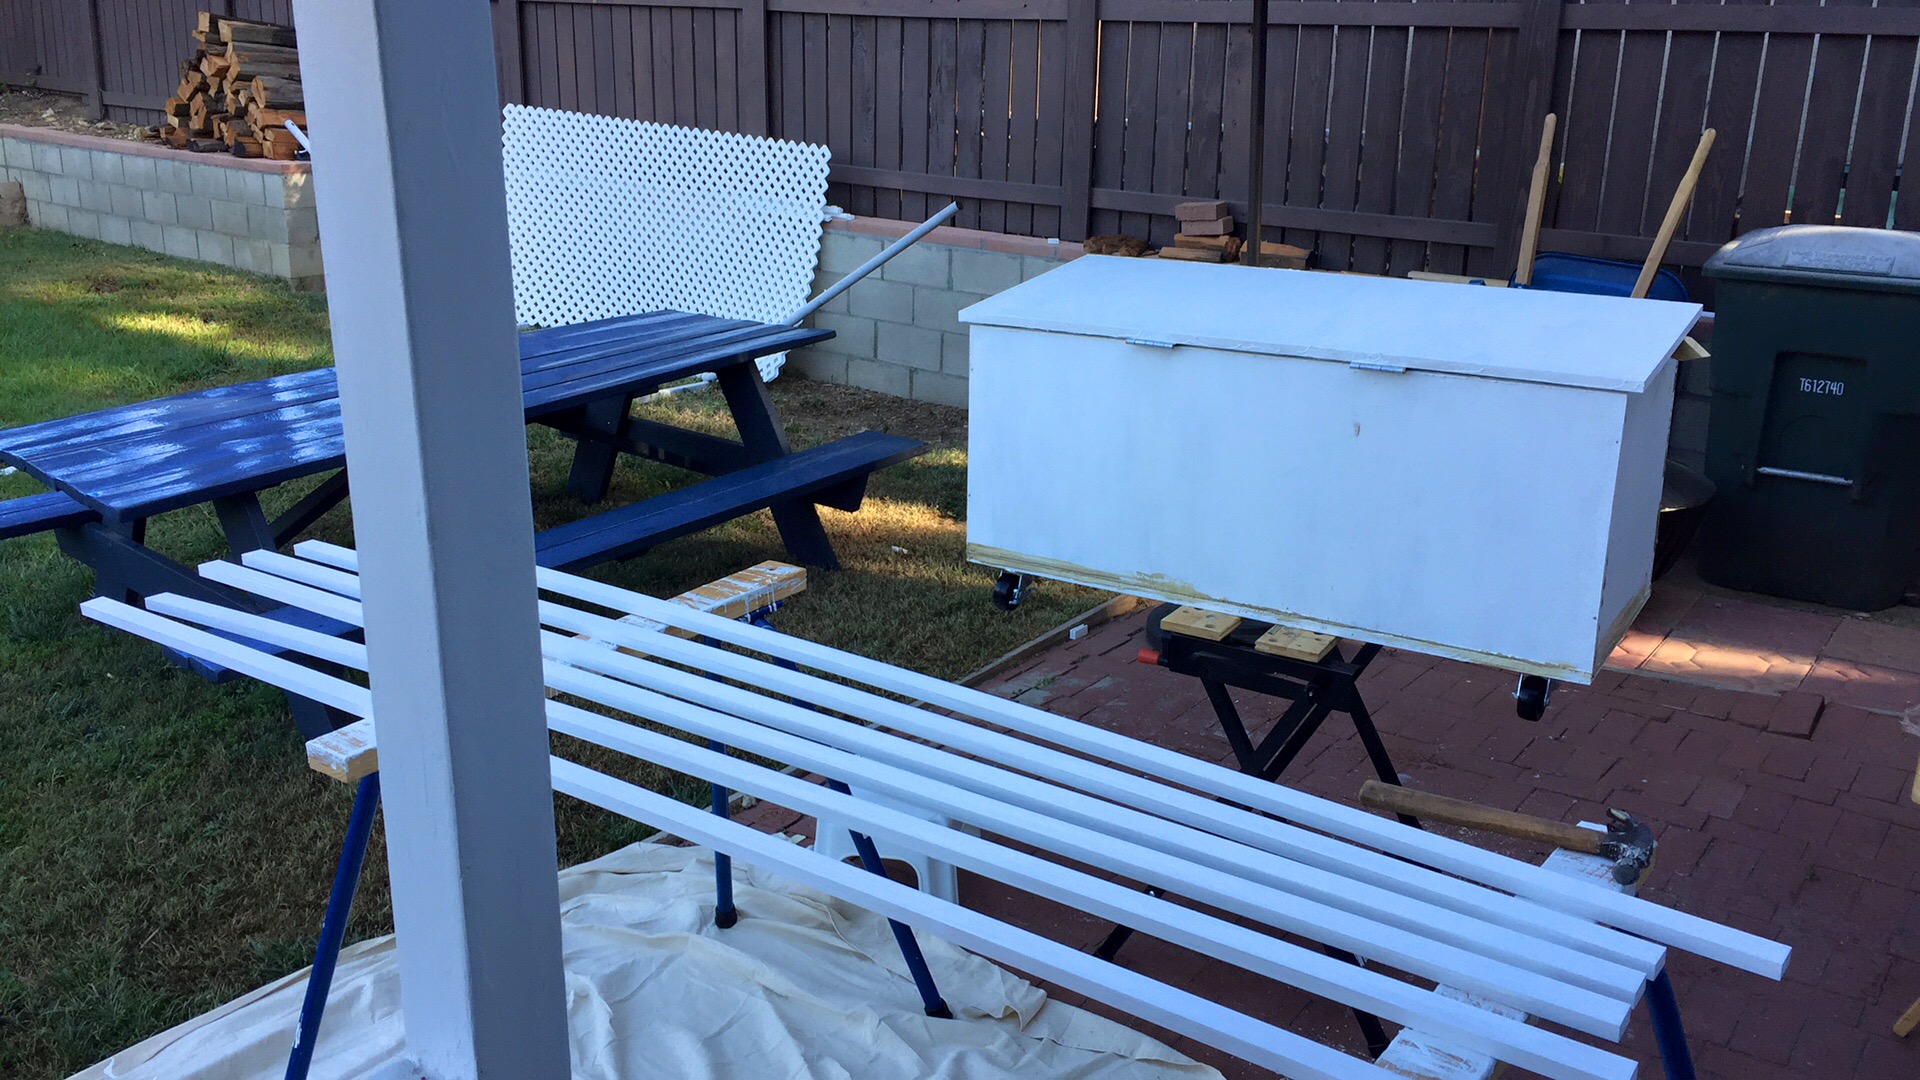
I attached the curved trim pieces with small nails and the flat ones with screws.
The wheels make it easy to move around, and the hinged lid allows for easy access to whatever is
stored inside.
Workshop Notes
Techniques, lessons learned, and reference material.